Order Monitors (Internal)
In this module, orders are generated. You can also view the fulfillment flow for each order, as well as a history of movements made for each order event.
Main View Display
- When you access the module, information related to the orders in the system is displayed.
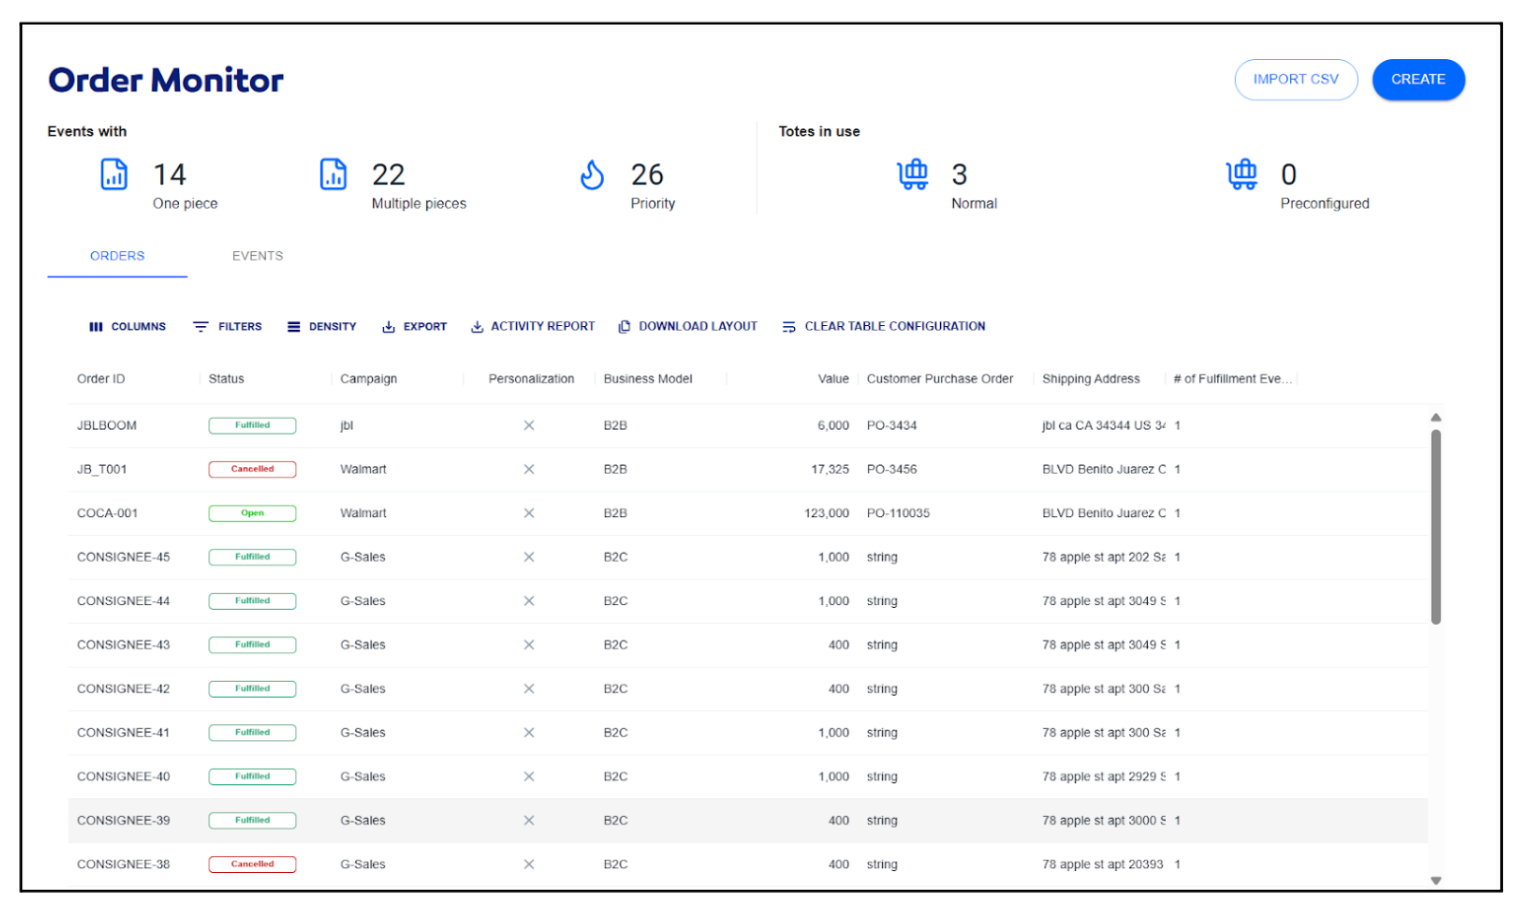
- At the top, there is a section of indicators that presents key metrics about the status of the orders. This section shows:
- The number of active orders composed of a single item and multiple items.
- Orders that have priority for processing, allowing resources to be focused on the most urgent ones.
- The number of totes currently in use, distinguishing between normal and preconfigured totes.

- At the bottom of the module, a table is displayed containing the information of the generated orders. The columns show key information for their identification and tracking.
- The Order ID column corresponds to a unique key that specifically identifies each order within the system.
- The Status column reflects the current state of the order, which can be Open, Cancelled, Processing, or Fulfilled if it has already been processed and is ready for shipping.
- The Campaign column indicates the company or client to whom the order belongs.
- The Business Model column specifies the business model under which the order is being managed.
- The Value column shows the economic value associated with the order.
- The Customer Purchase Order column represents the purchase order number provided by the client.
- Shipping Address contains the address to which the order should be sent.
- # of Fulfillment Events indicates the number of events the order contains.
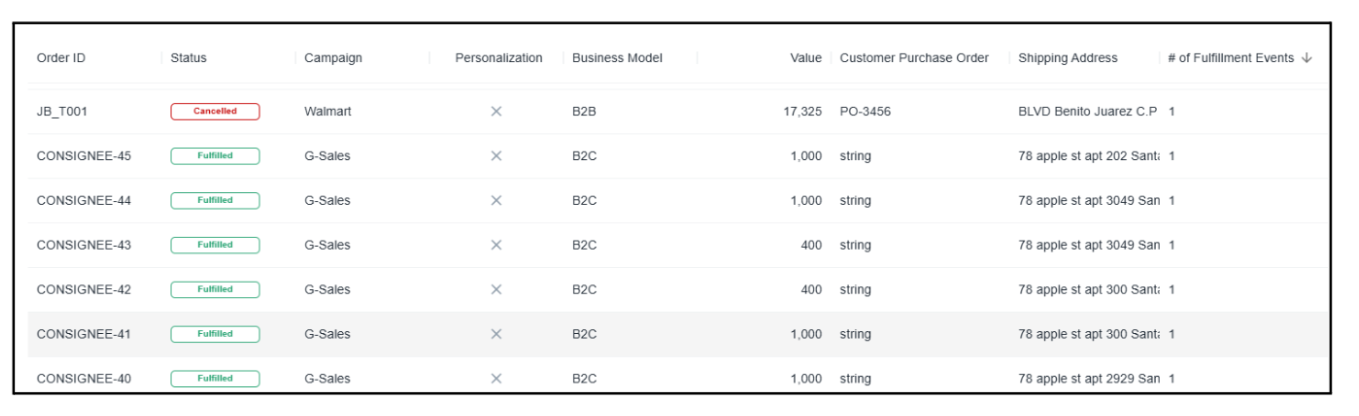
-
At the top of the table, there is a section of options to filter by ORDERS (displays the previously mentioned orders) or the EVENTS option (to view all fulfillment events for each order).
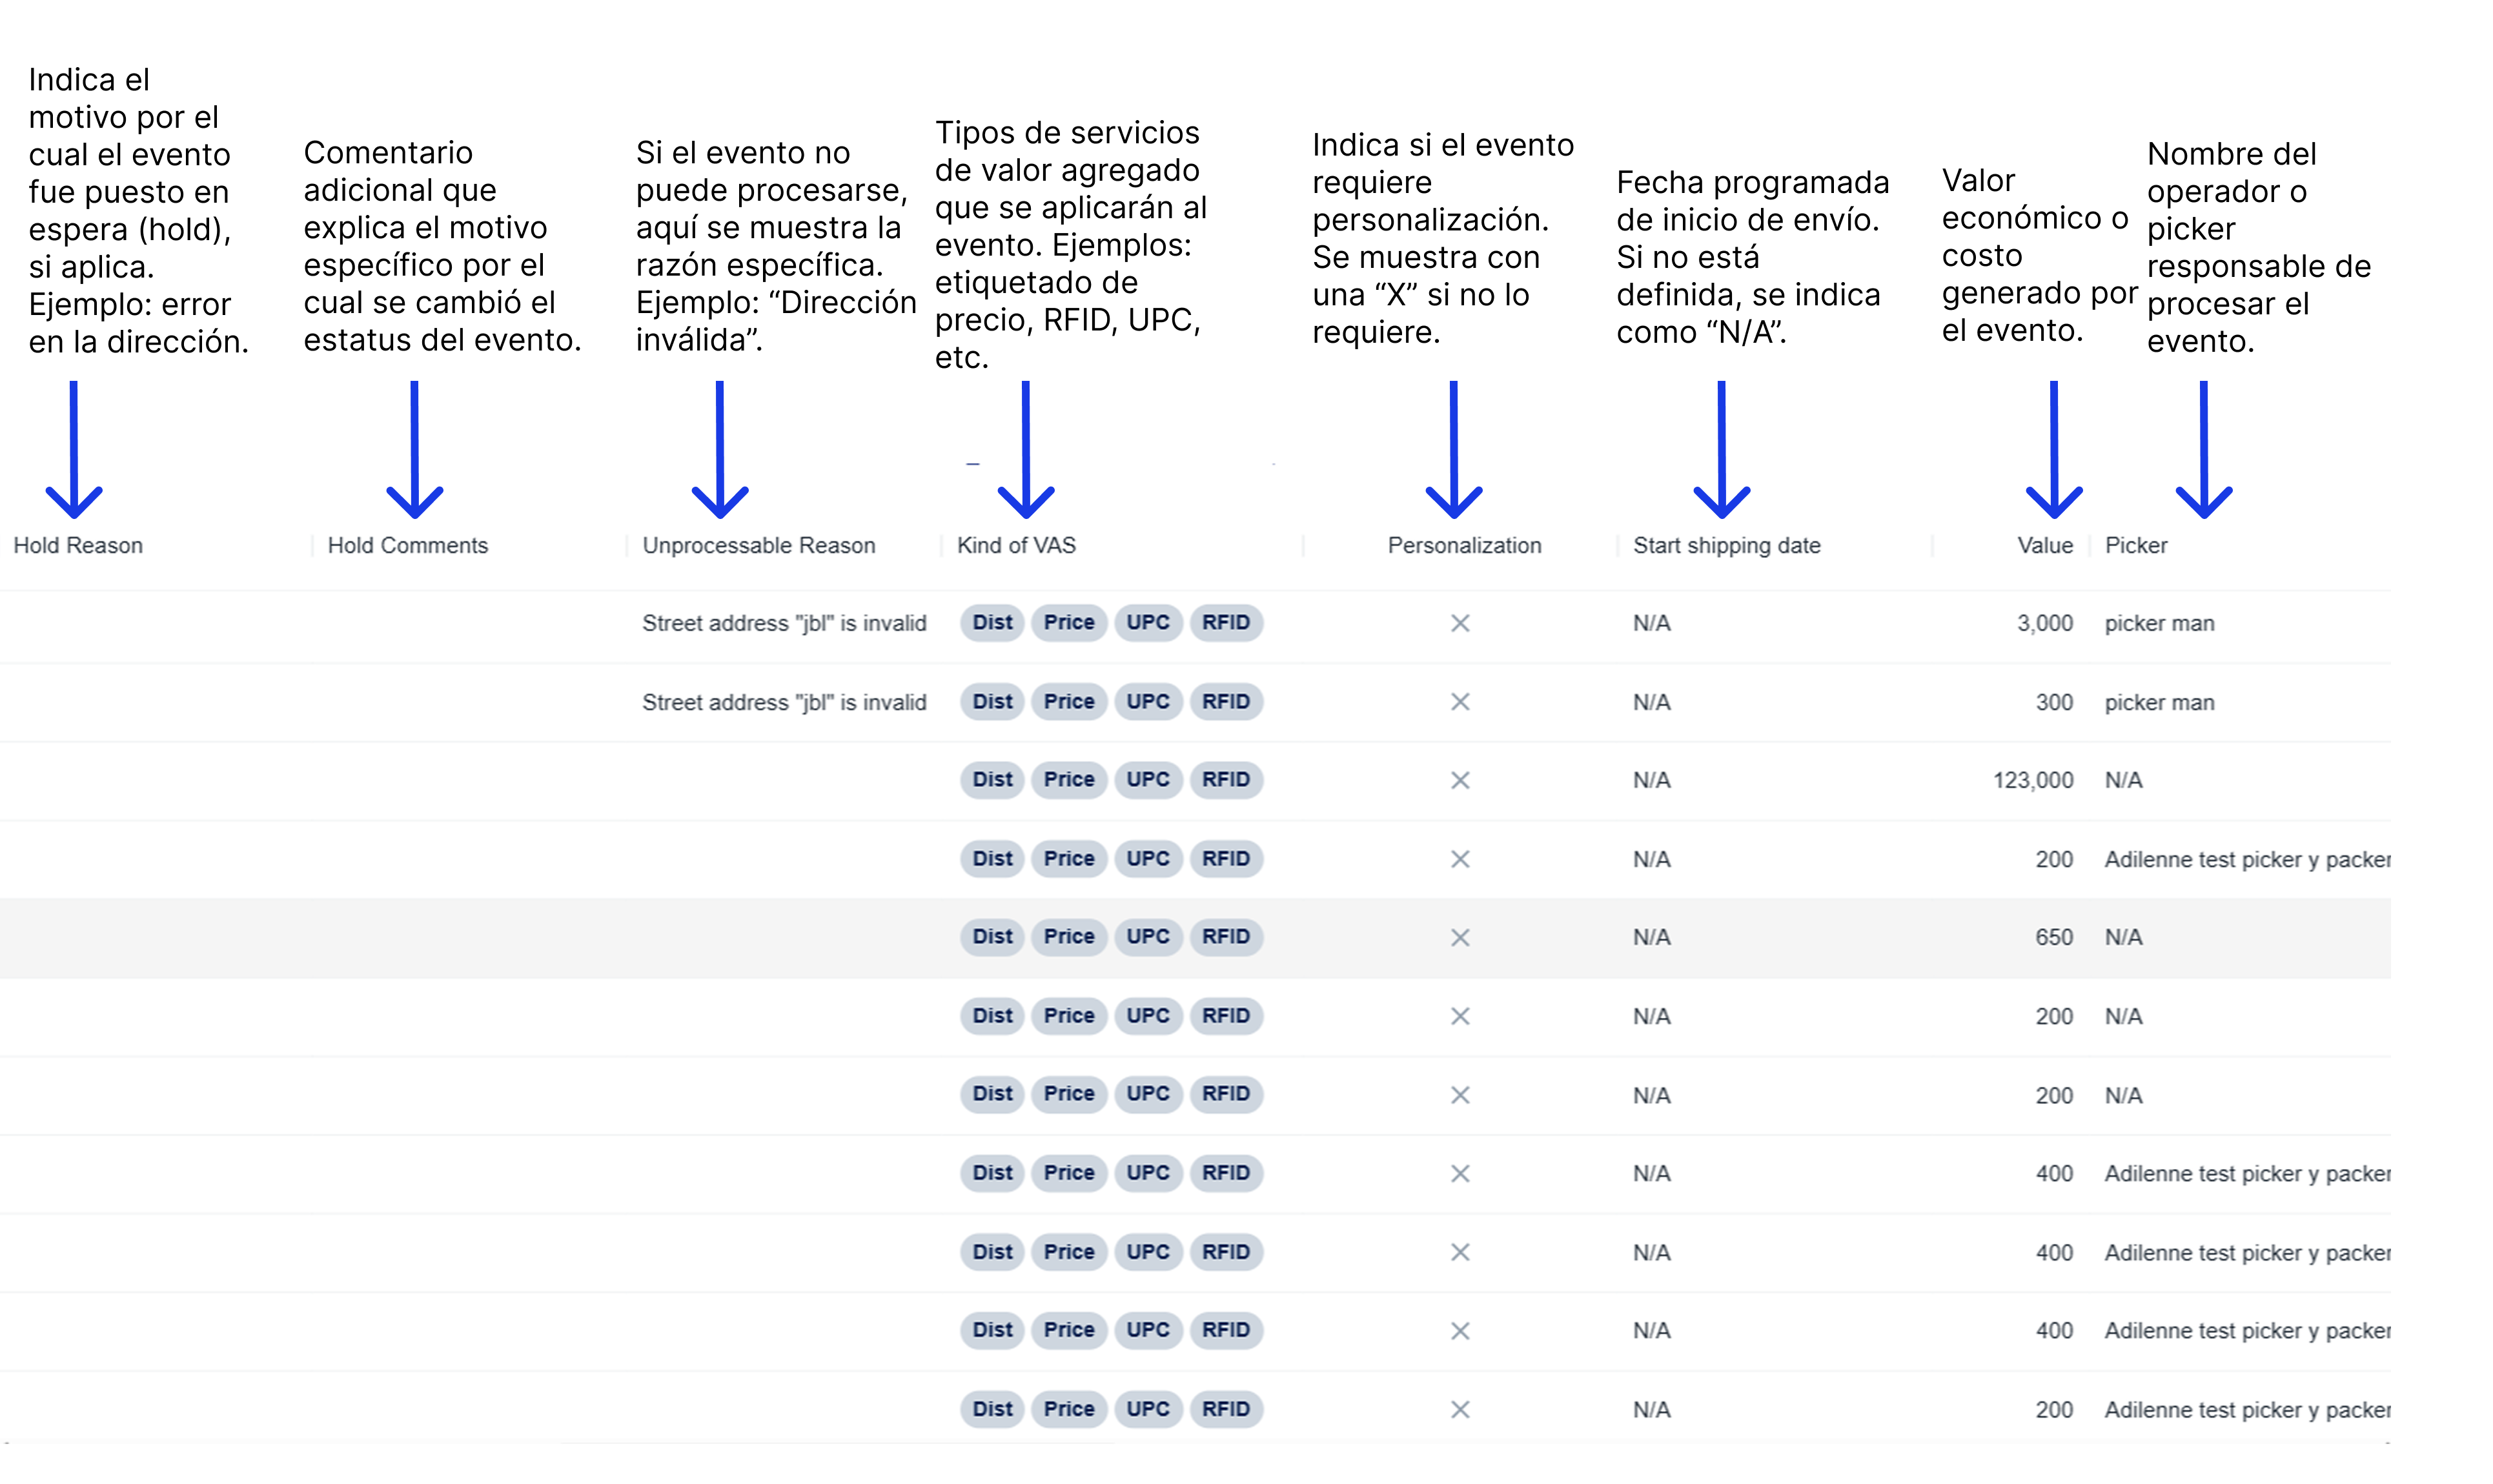
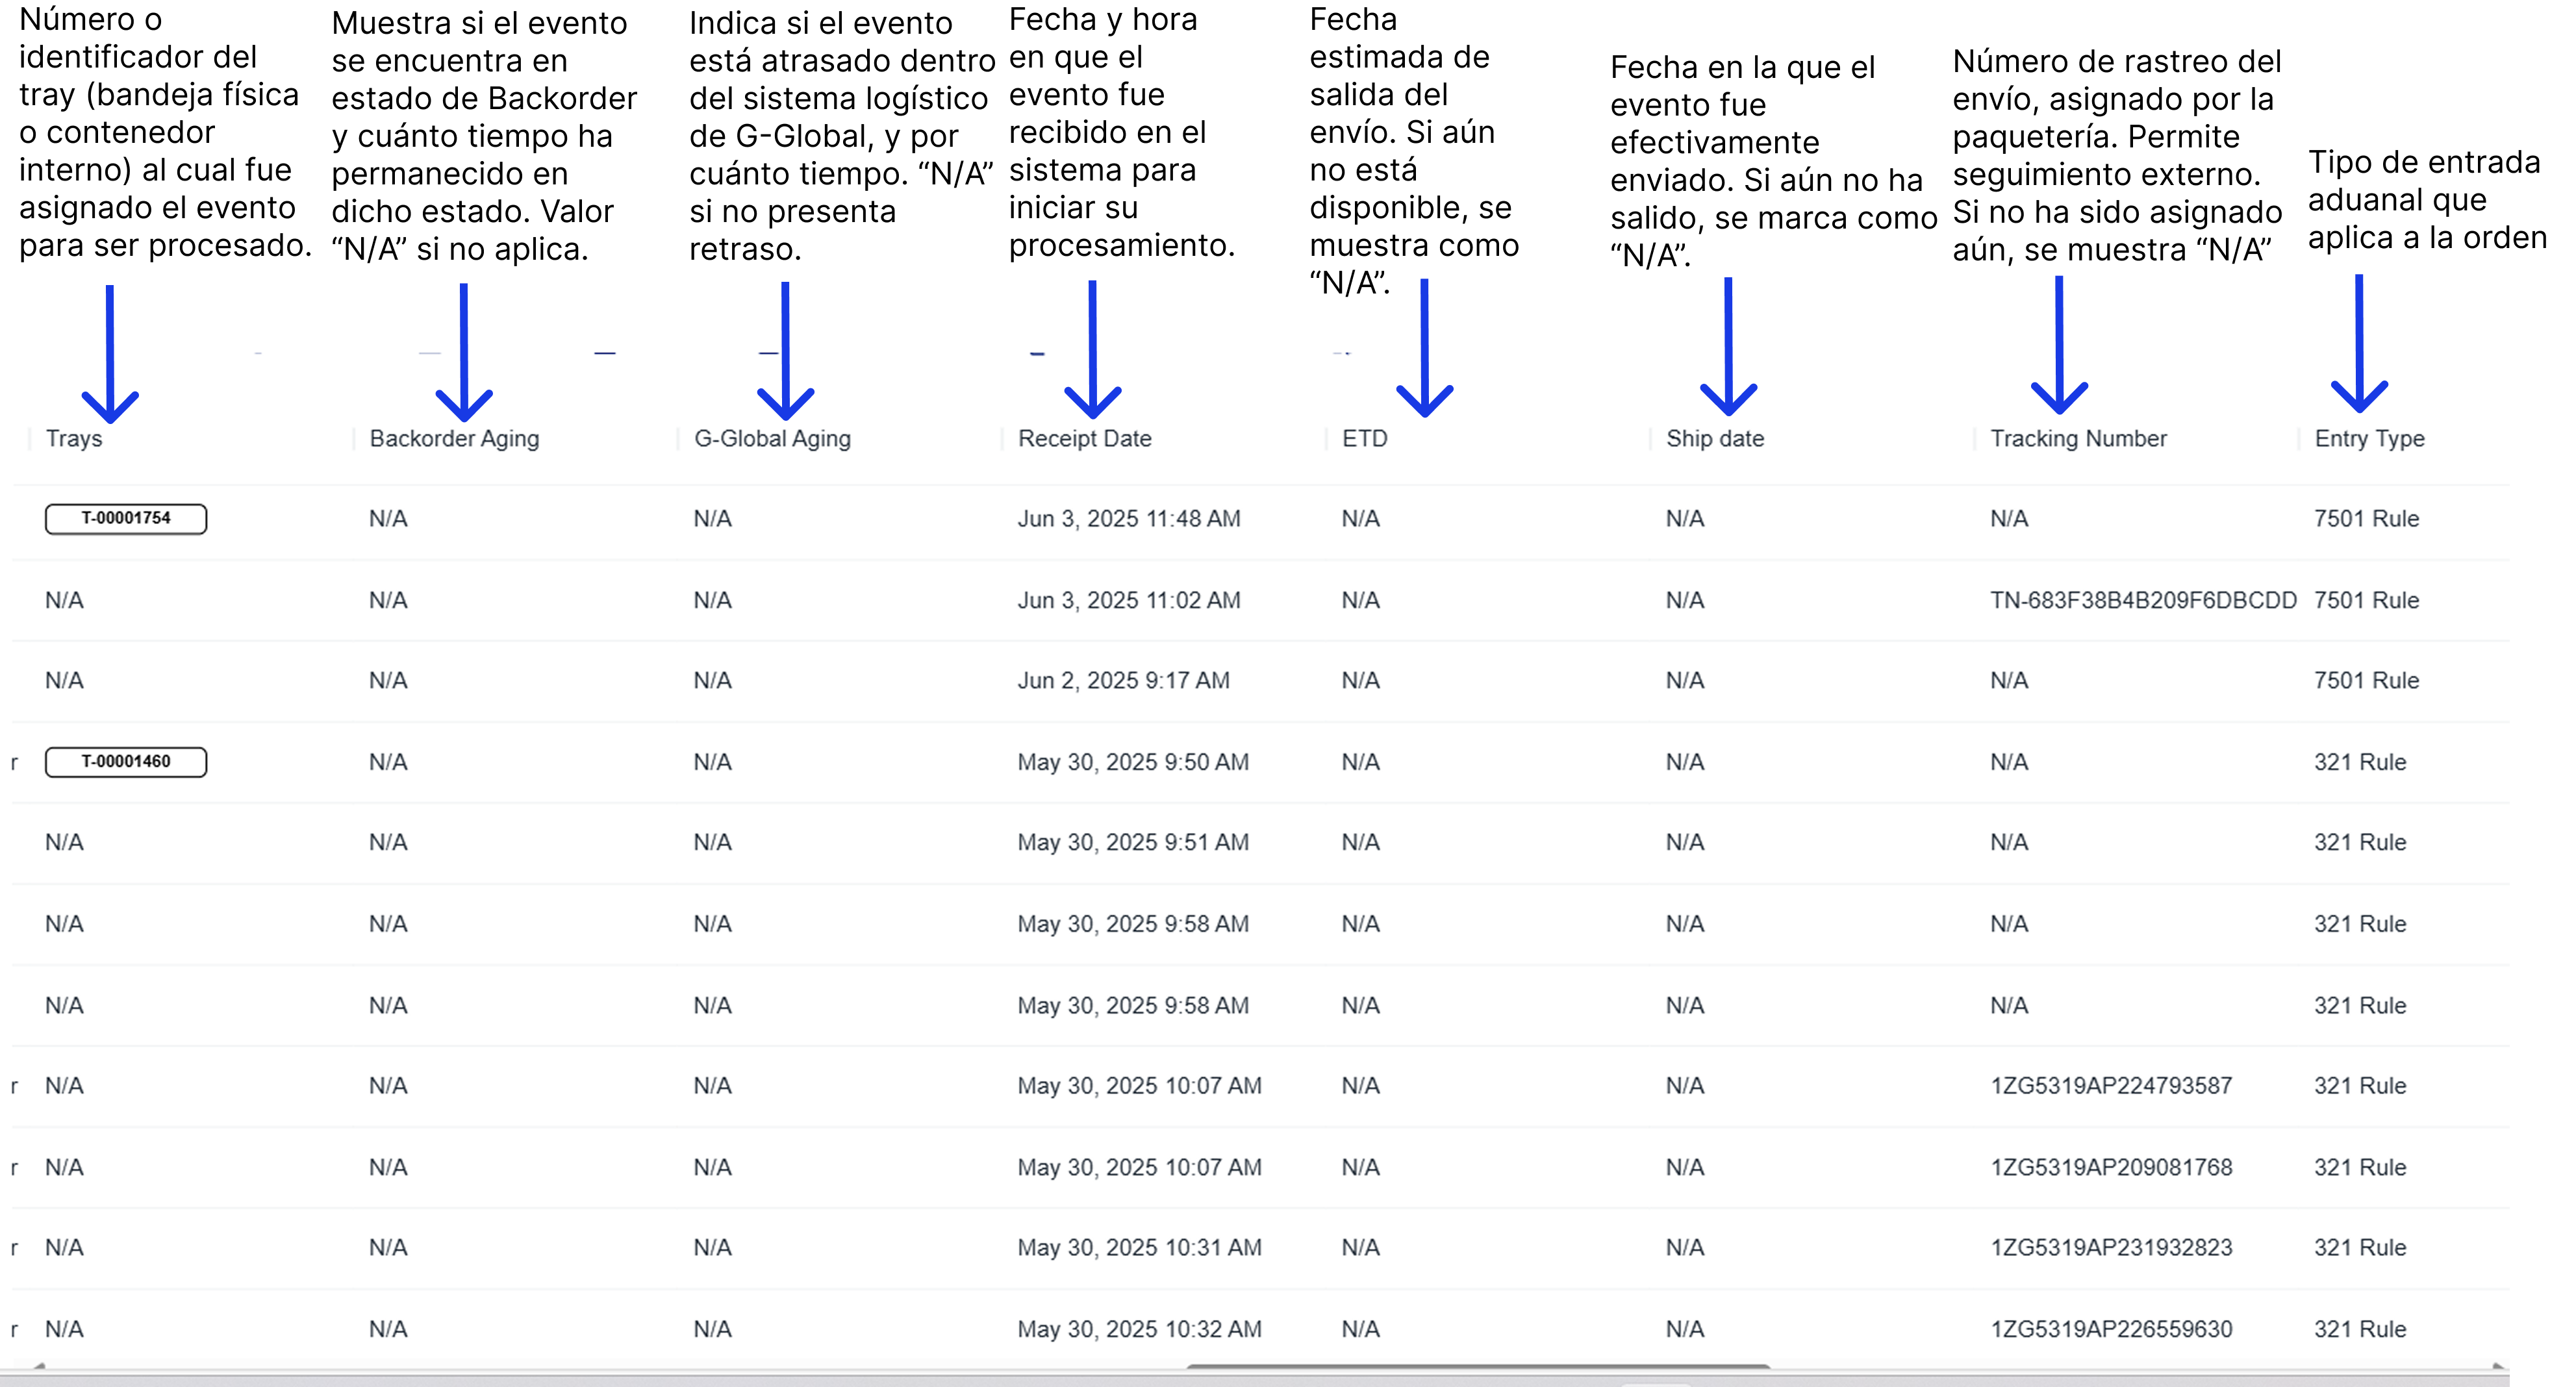
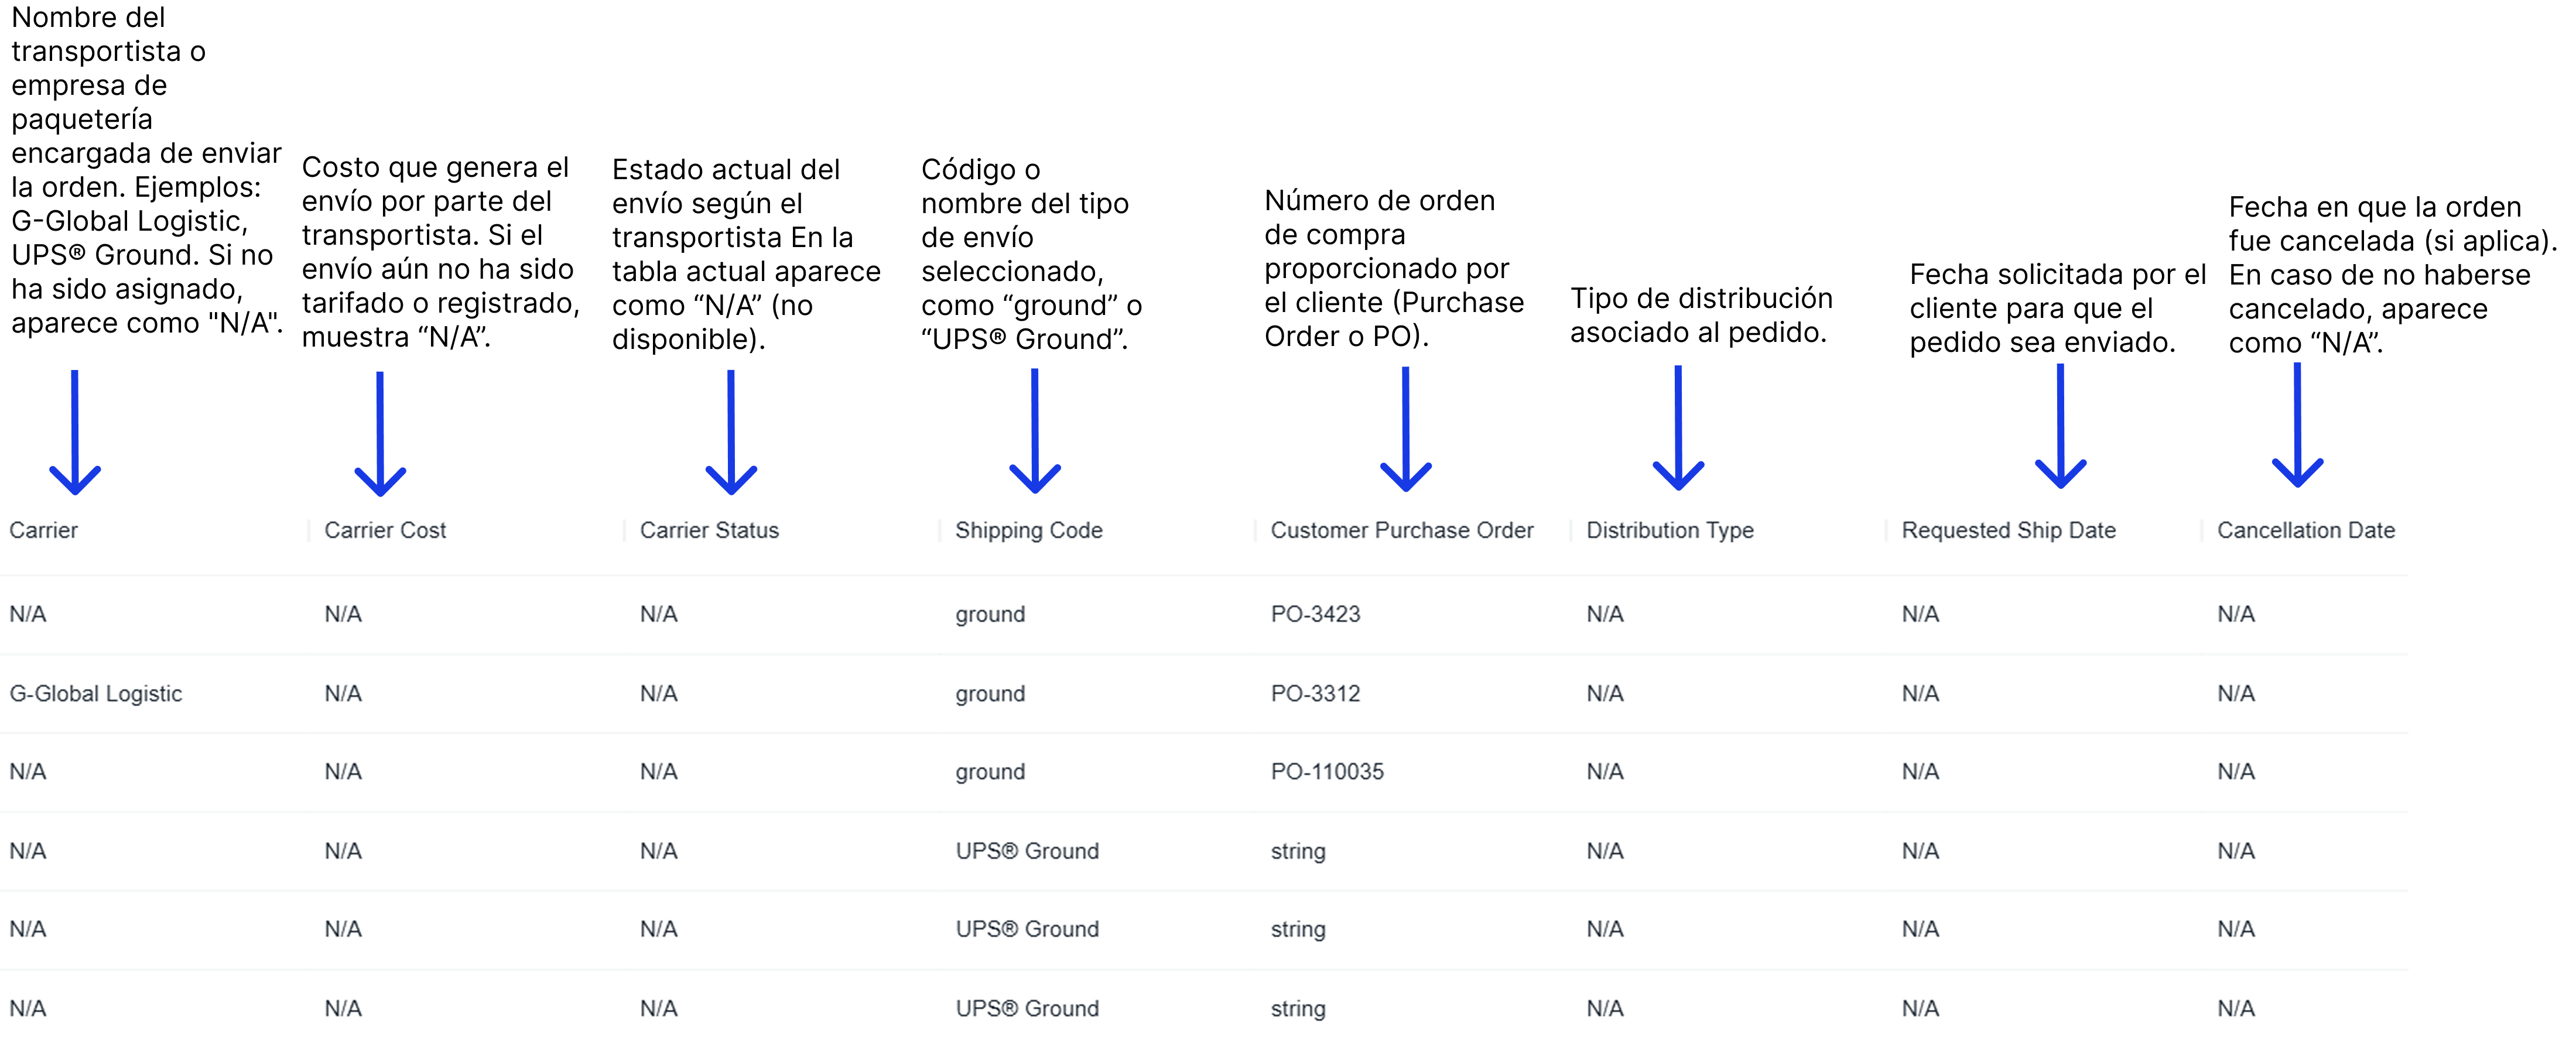
- When clicking on Events.
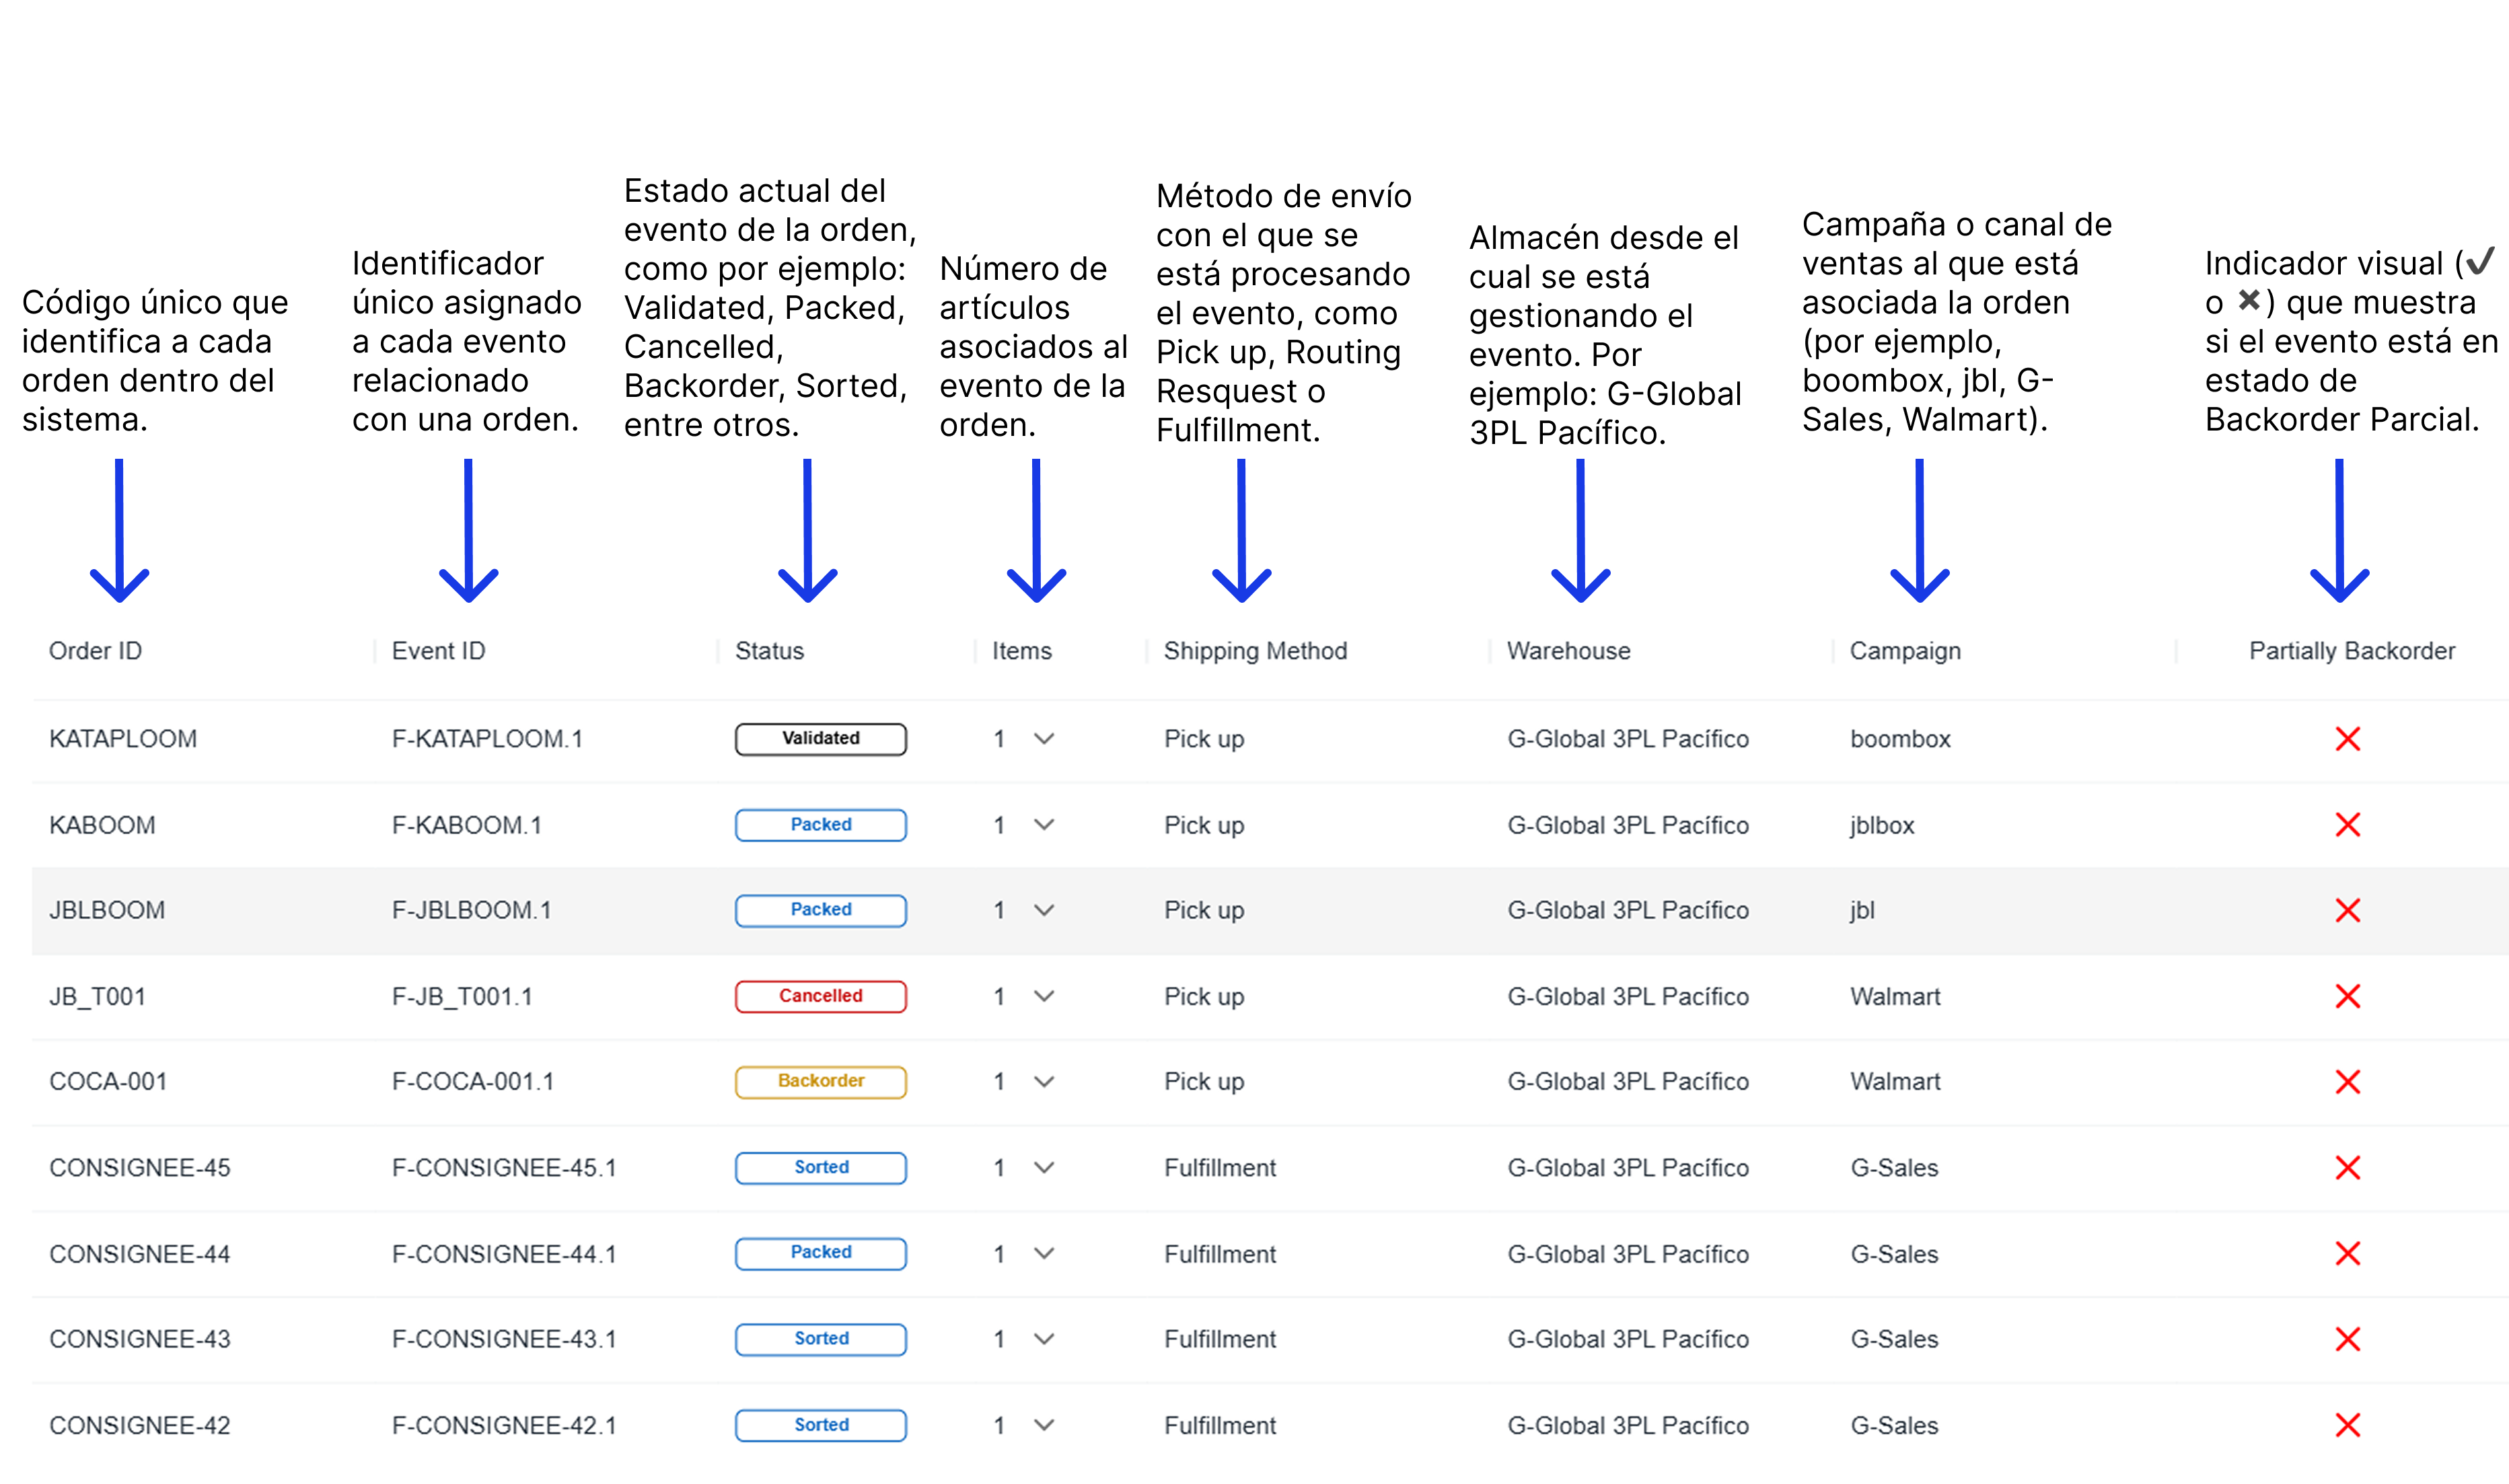
- The information displayed is as follows:
How to create an order in Order Monitors?
- Click on the CREATE option.
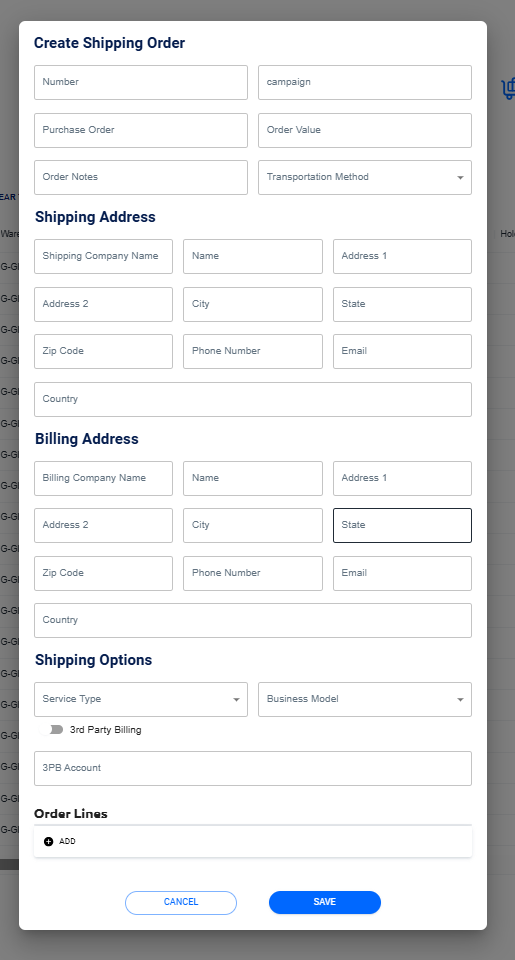
- A form with several sections will be displayed.
-
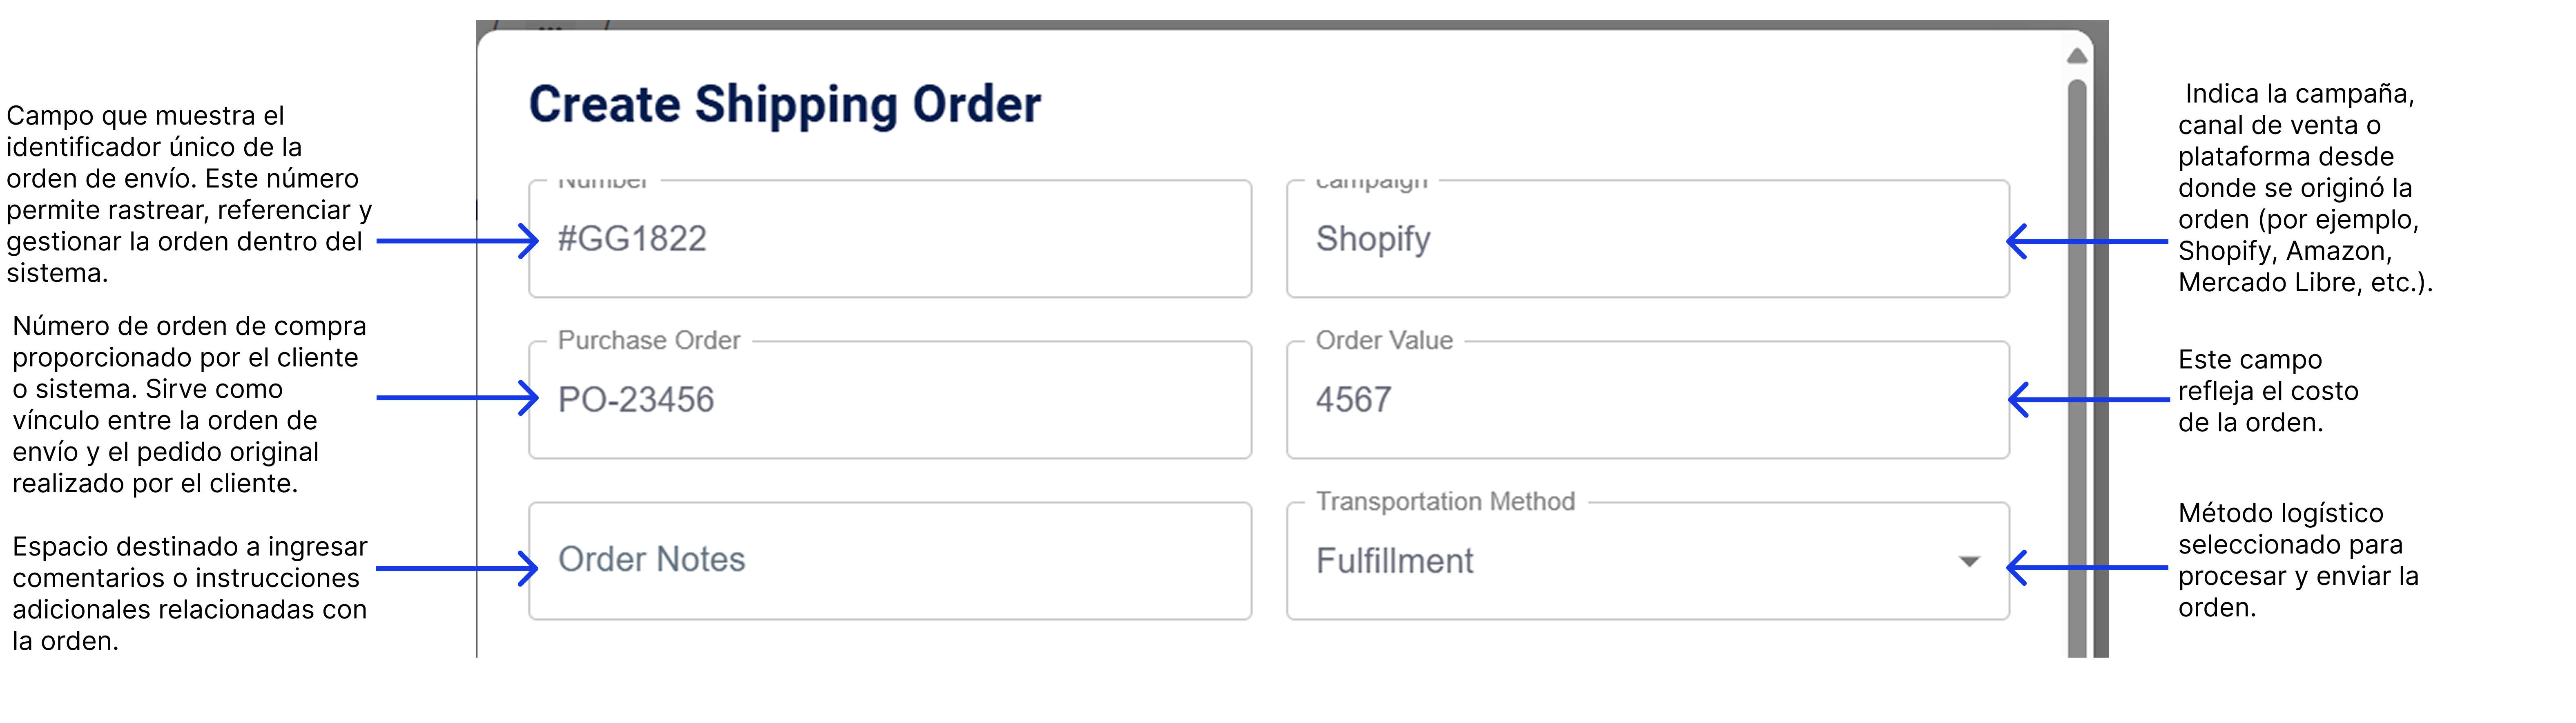
In the create shipping order section, the following data is filled in:
- In this section, you must complete the main data related to the creation of a shipping order. Here you define the order identifiers, the total value, the origin channel, and the transport method that will be used to process it.
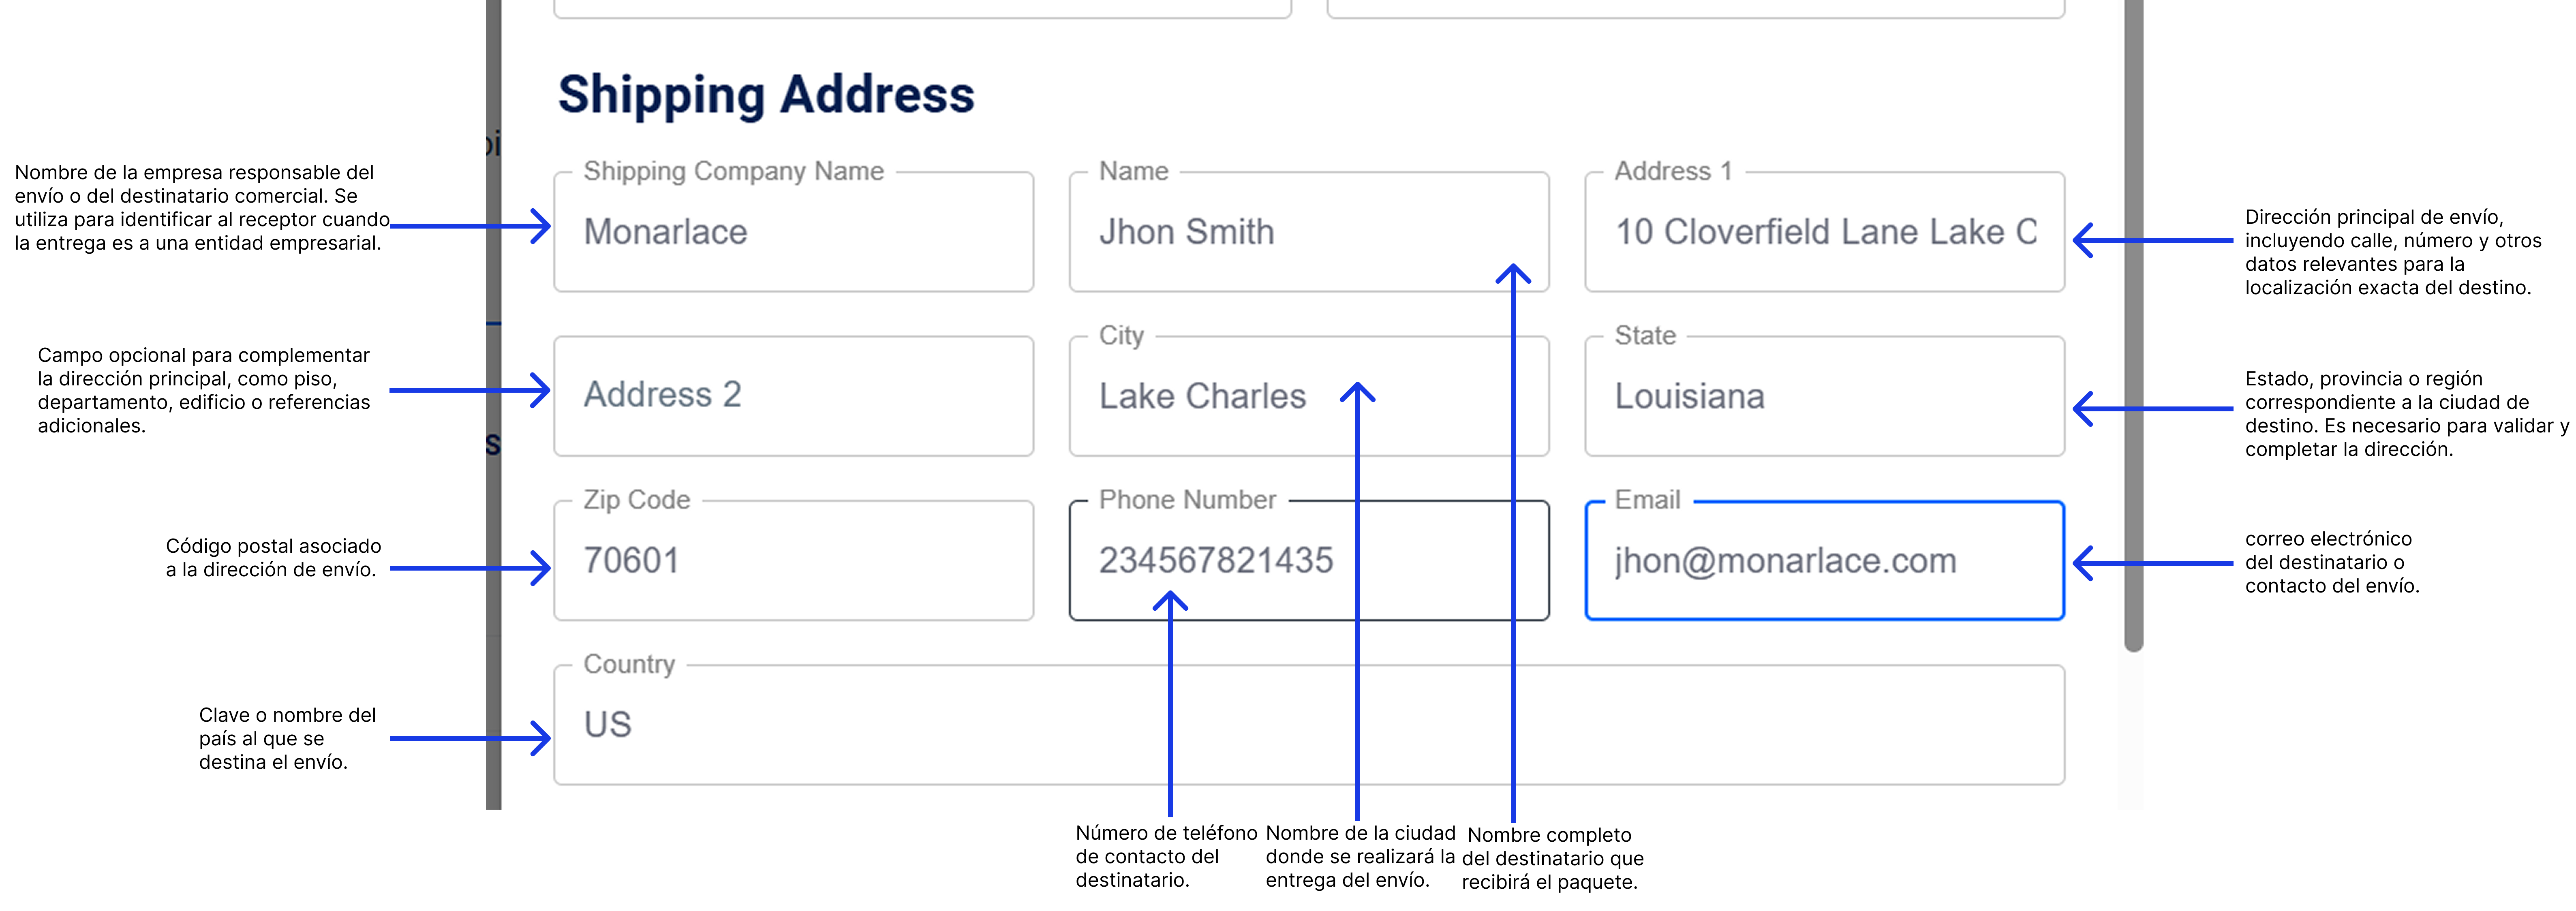
- This section of the form requests the complete shipping address information. It includes the recipient's data, the exact delivery location, contact information, and the destination country.
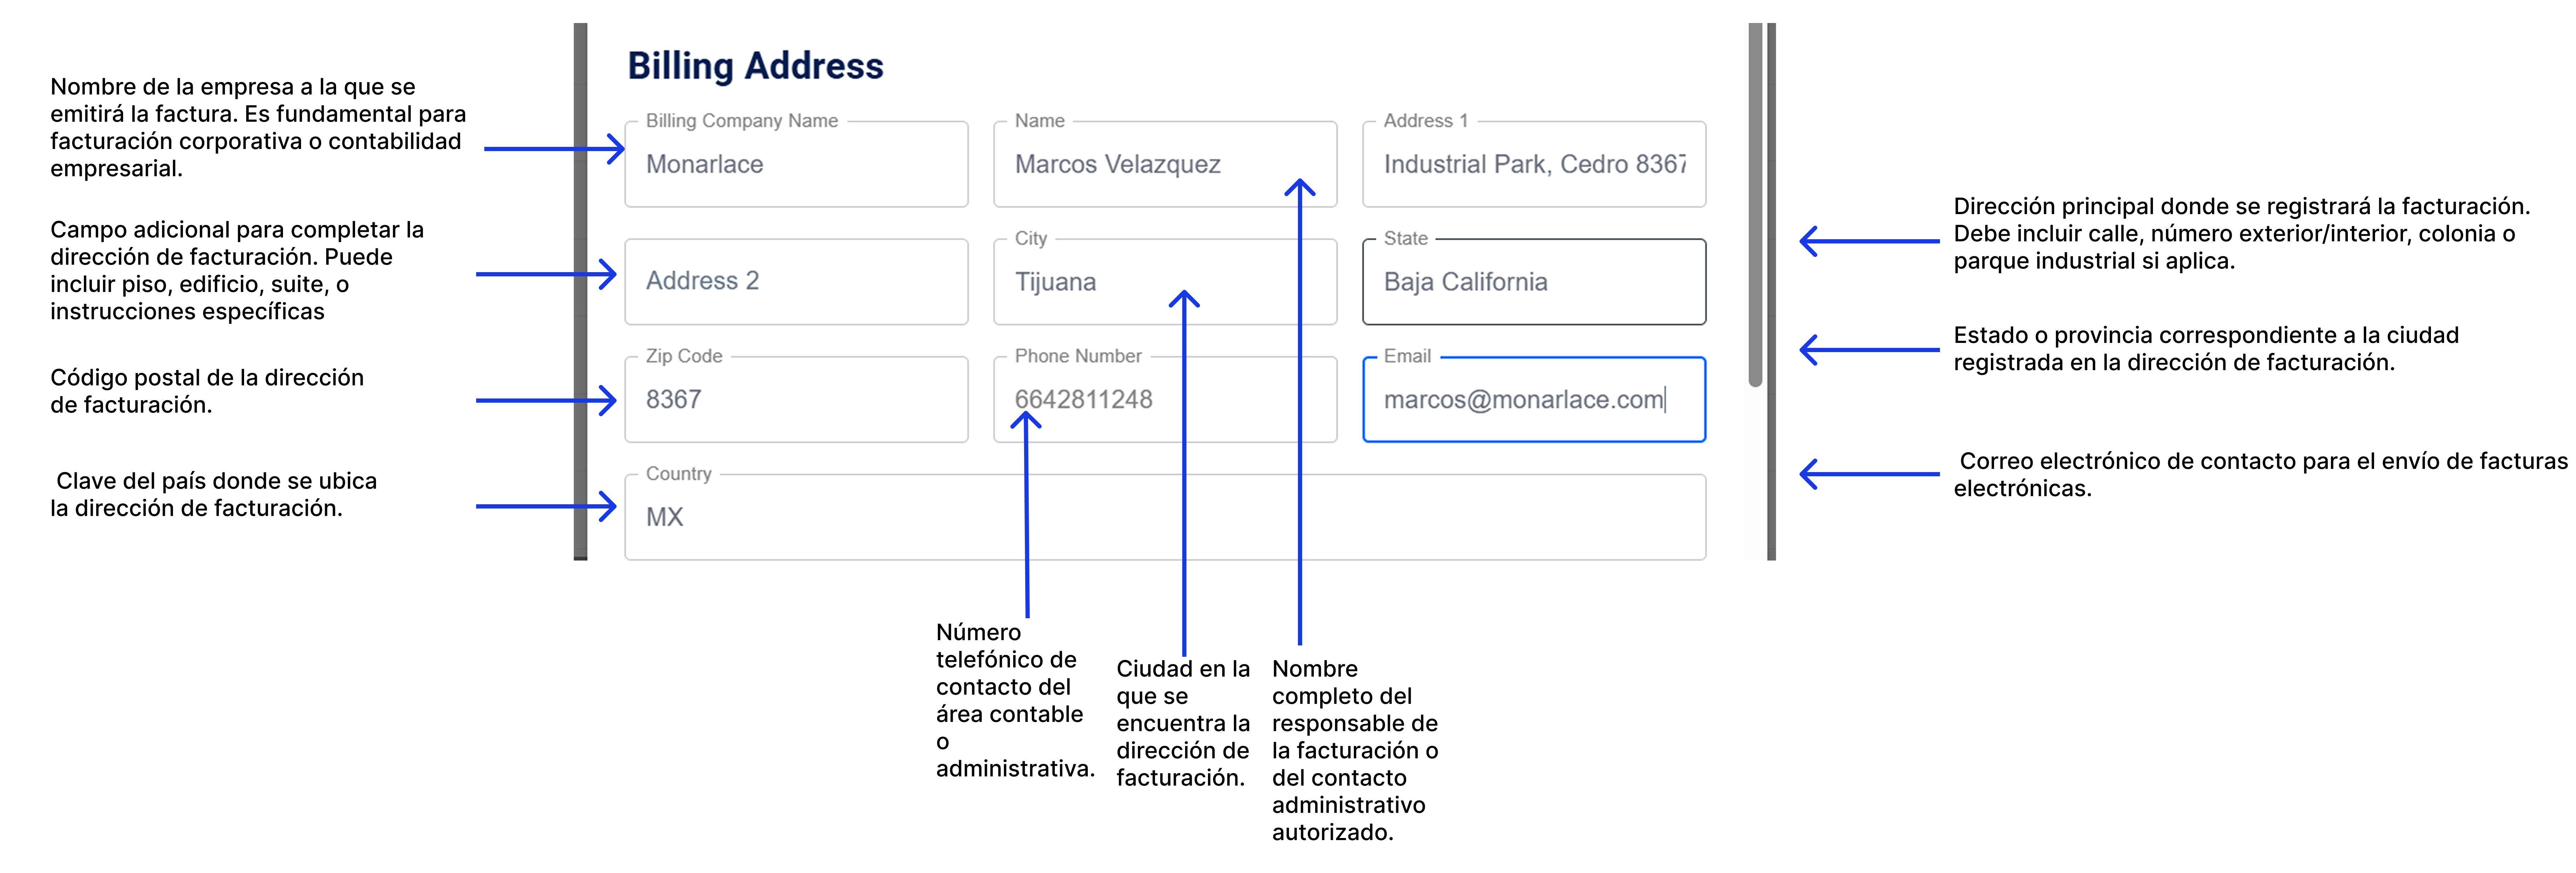
- In this section, you must enter the billing information. The information of the person or company that will receive the invoice is requested, along with the fiscal address, contact information, and country of fiscal residence.
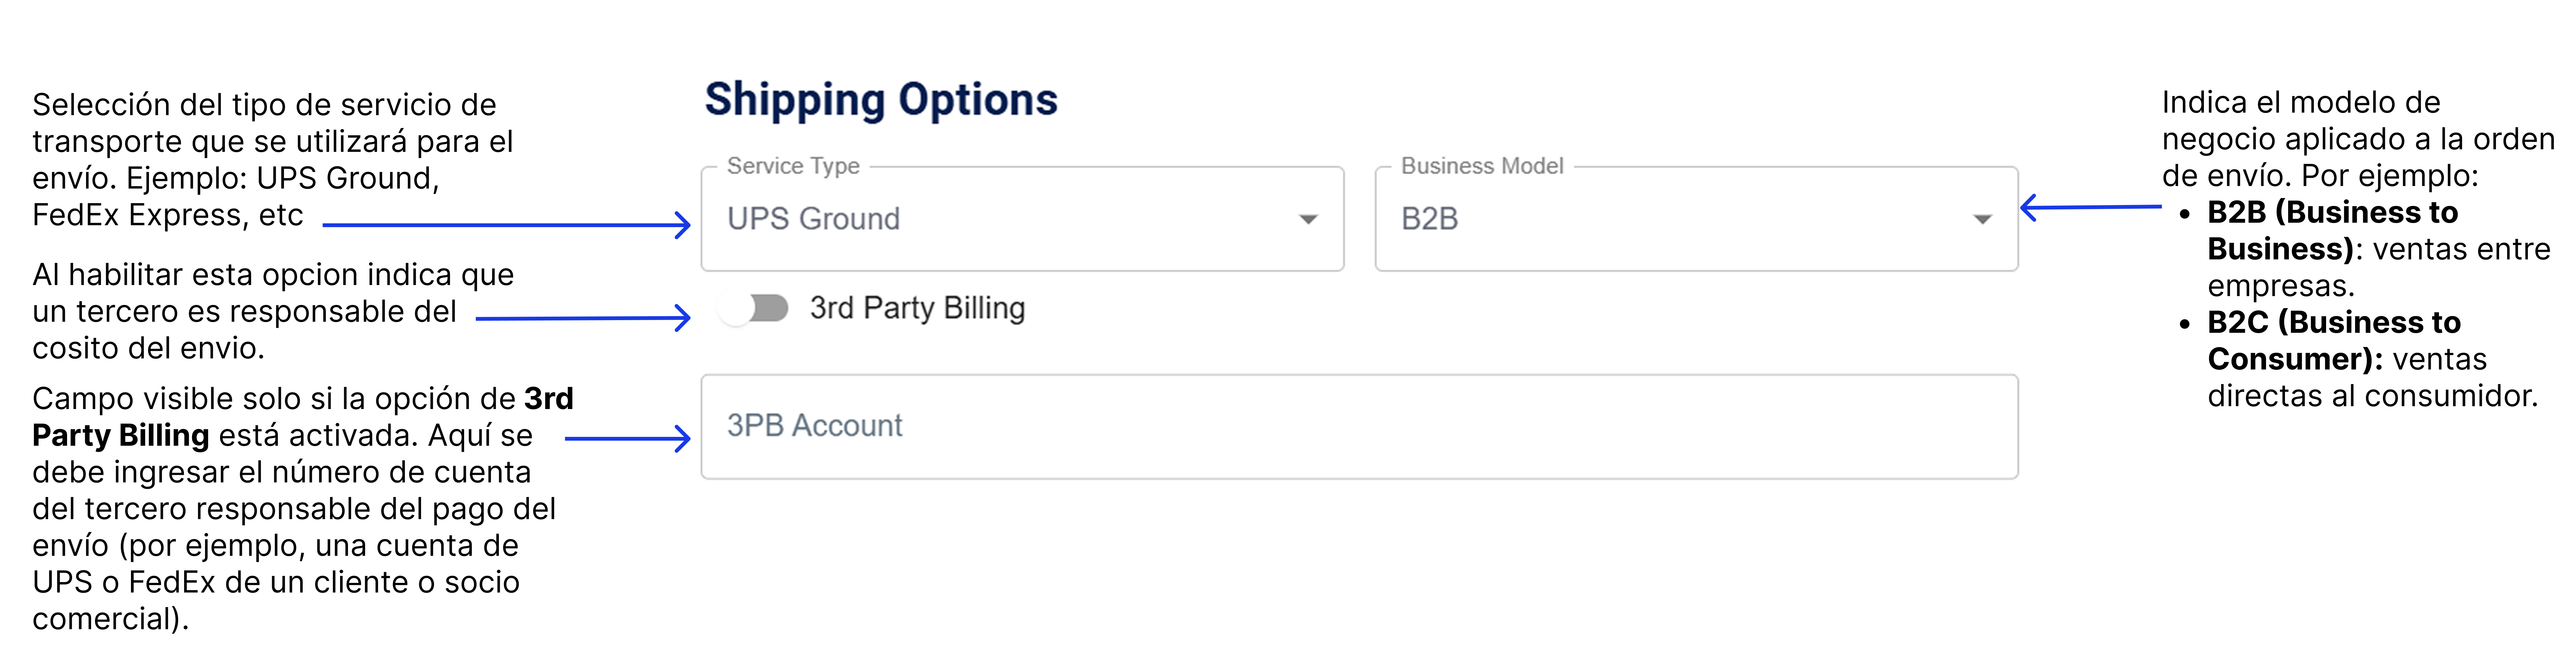
- In this section, you must enter the data related to the selected transport service, the business model under which the order is processed, and, if applicable, specify if the shipping cost will be assumed by a third party.
- To finish, click on the ADD option within the Order Lines section.
- By doing so, several fields are enabled that allow you to register the information of the item that will be included in the order. The requested data is as follows:
- SKU: Unique product code for its identification in the inventory.
- Package Quantity: Number of units or packages of the product being added to the order.
- Sales Price: Unit sales price corresponding to the product.
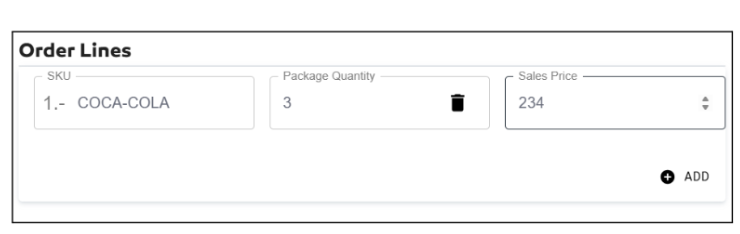
If you need to delete an added item, click the delete icon (🗑️) located next to the Package Quantity field. To add more items to the order, simply click the ADD button again.
-
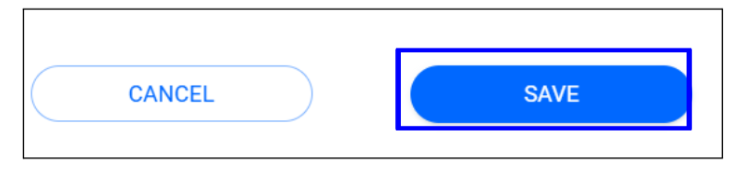
Once the form is completed, click the SAVE button to save the order data.
-
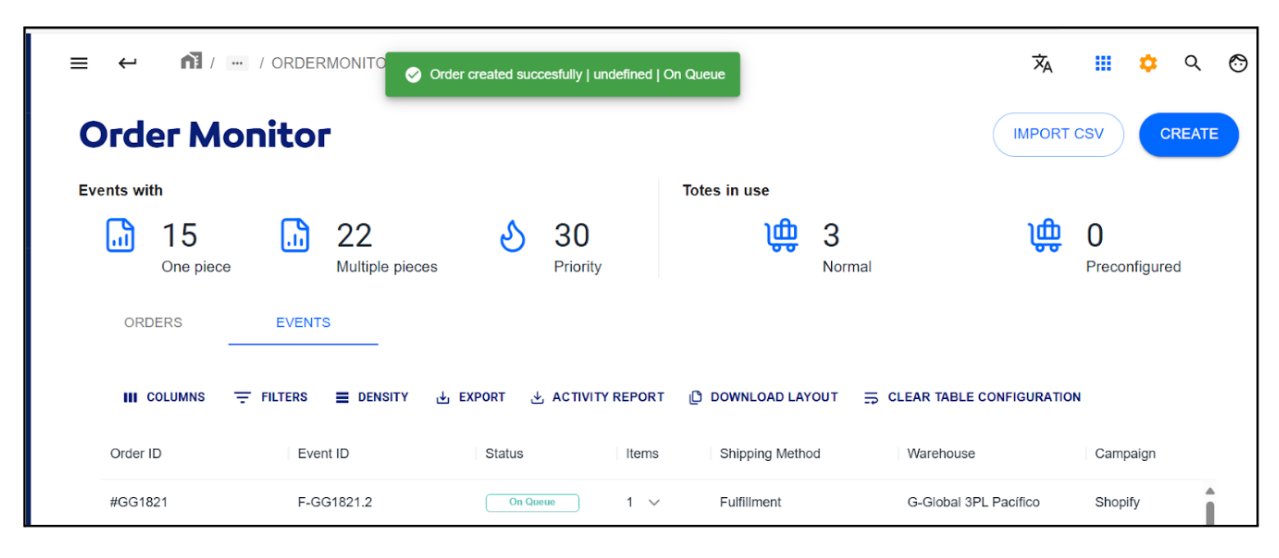
Upon successful saving, a green confirmation message will be displayed indicating that the process has been completed correctly. Additionally, the current status of the order will be displayed, allowing you to verify which stage of the processing flow it is in.
How to view the order detail in Order Monitors?
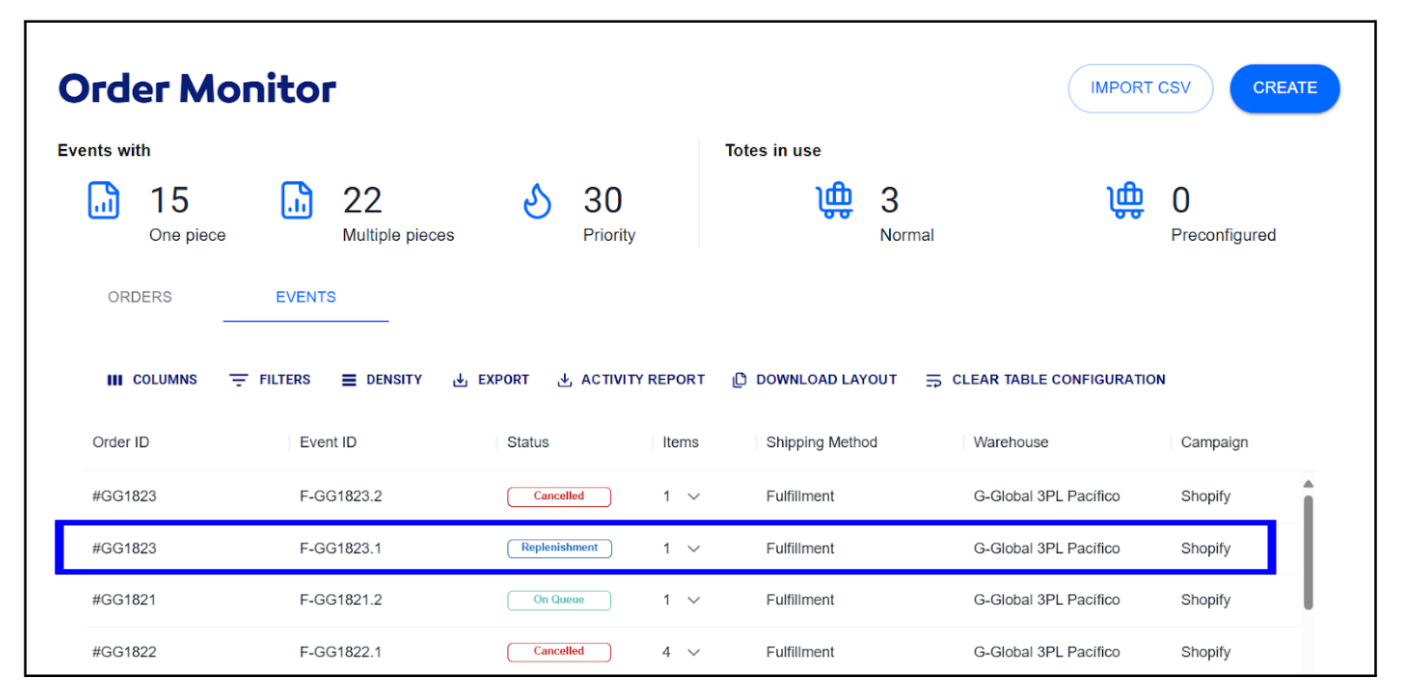
- To view the full detail of an order, double-click on the corresponding row in the table.
- This will open the detailed view of the selected order.
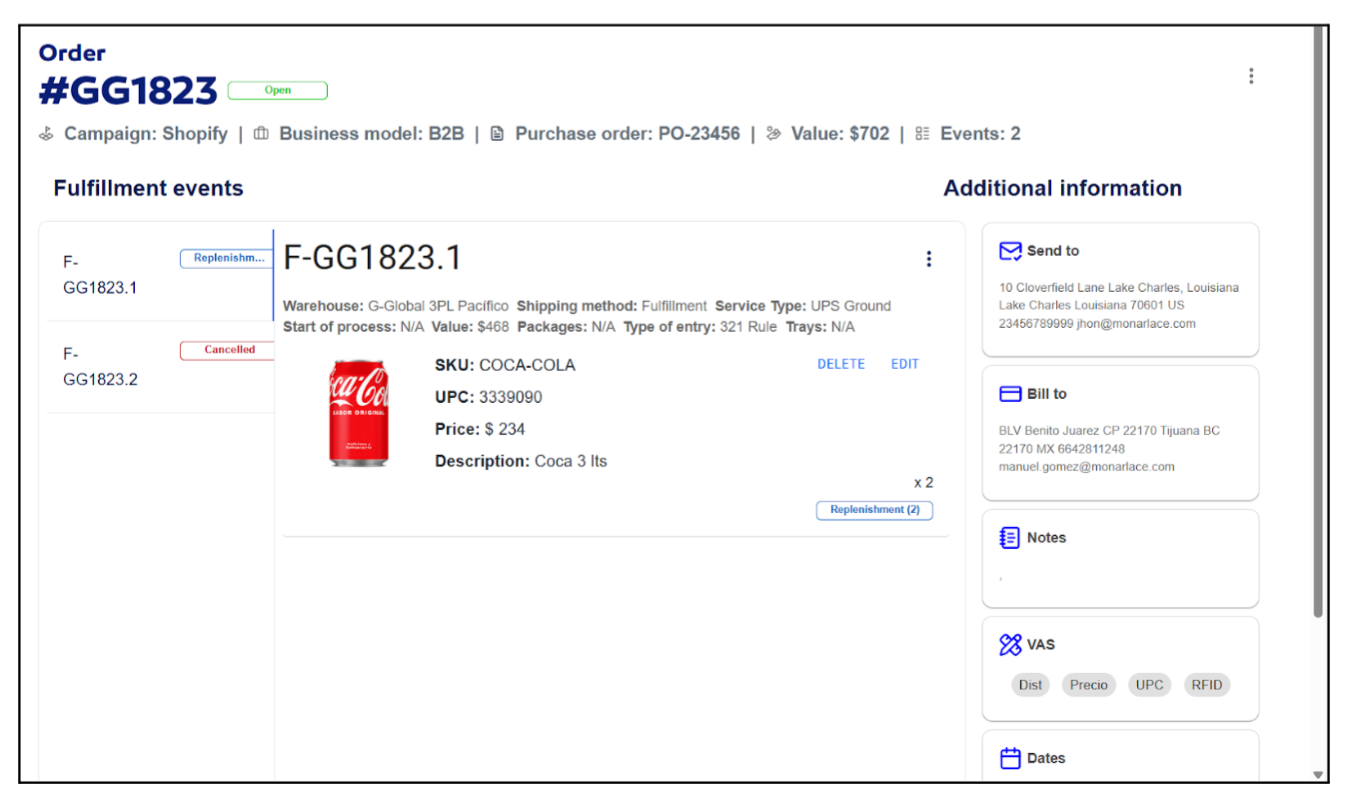
- The view is divided into several options and sections of information related to the order:
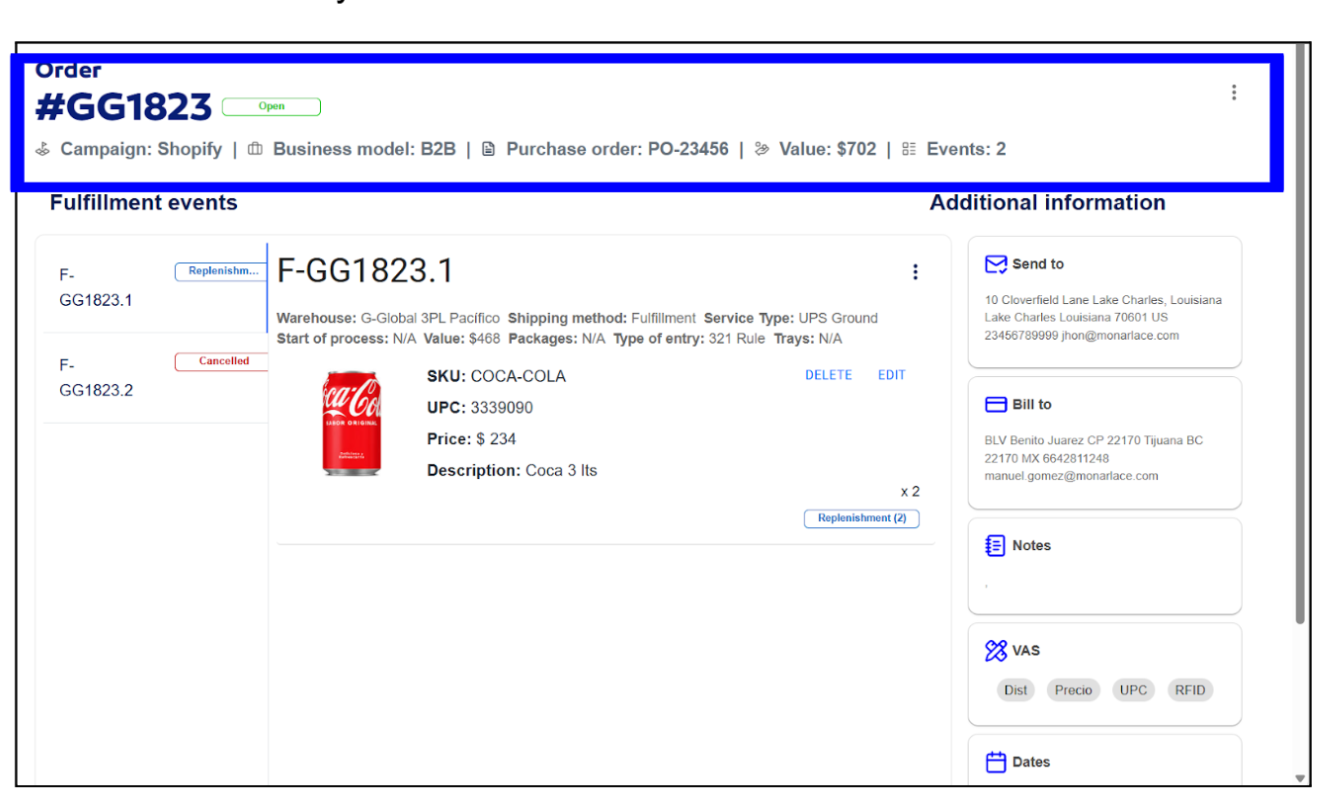
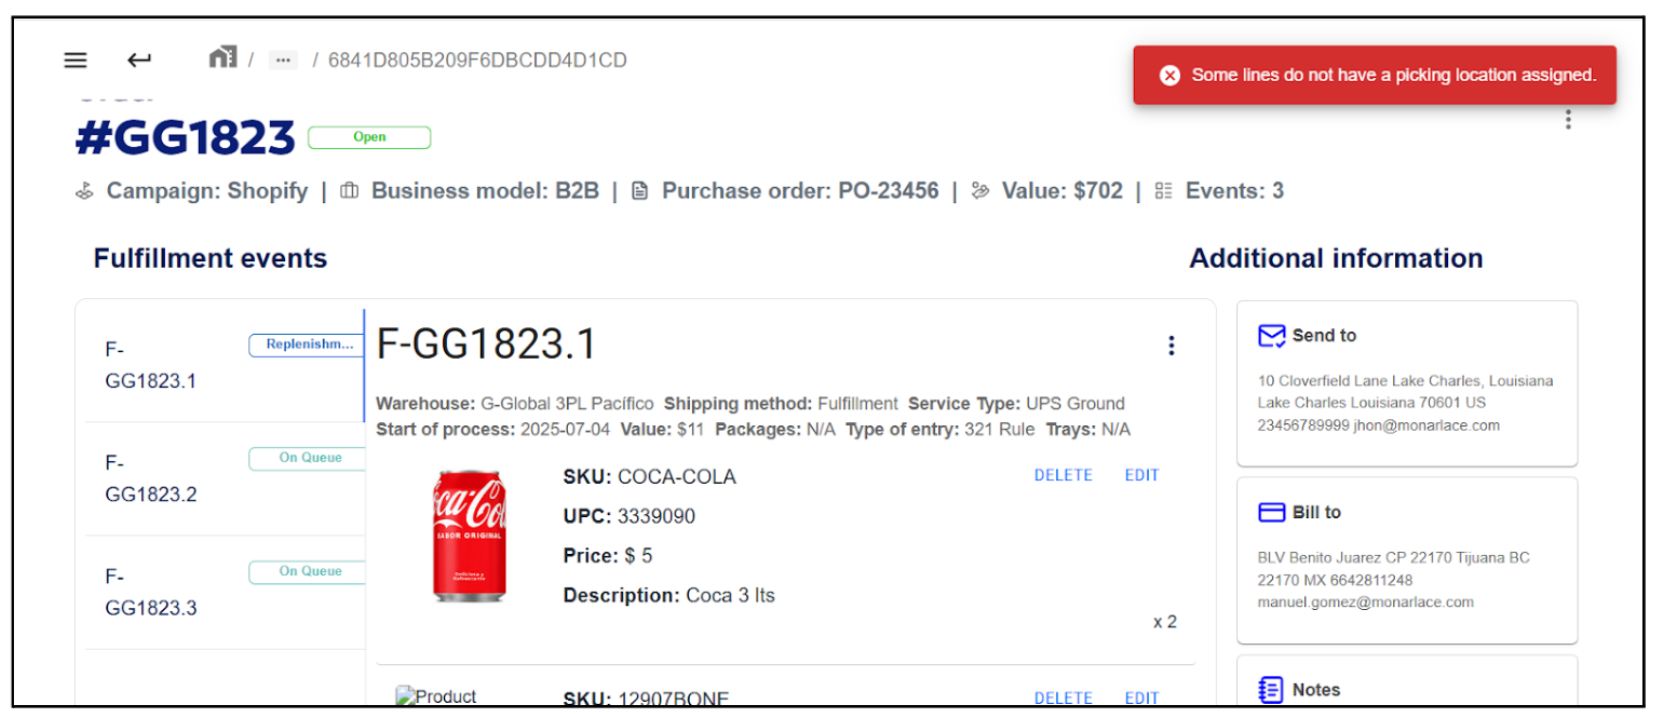
- At the top, the identification number, current status, campaign, business model, PO, order value, and number of events are displayed.
- On the lower left, the history of events linked to the order is shown, allowing you to consult the status and evolution of the logistics process.
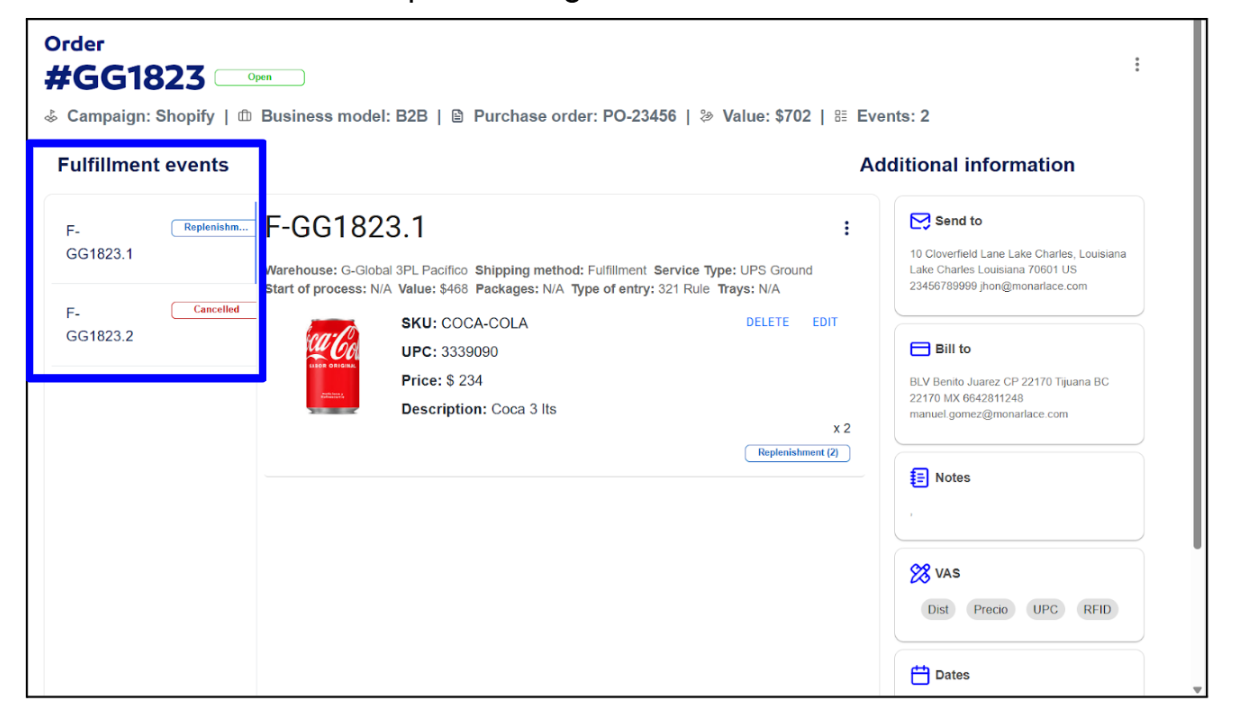
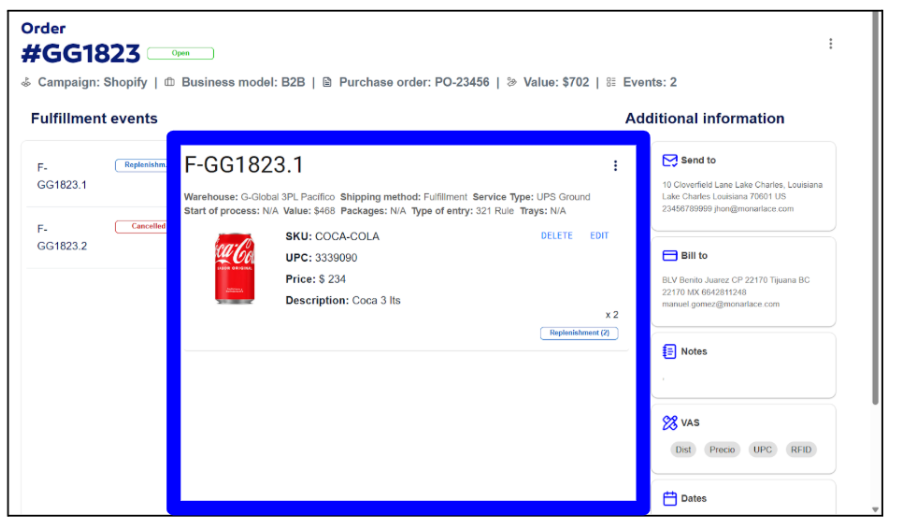
- In the lower central part of the screen, the detail of the event associated with the order is displayed. This section includes key information such as the event identification number, assigned warehouse, shipping method and service type, processing start date (if applicable), value related to the order, number of packages (visible when the event is in Packed status), applied import rule, and the assigned Tray number (available when the event is in Picked status). It also details item information like its SKU, UPC, price, and description.
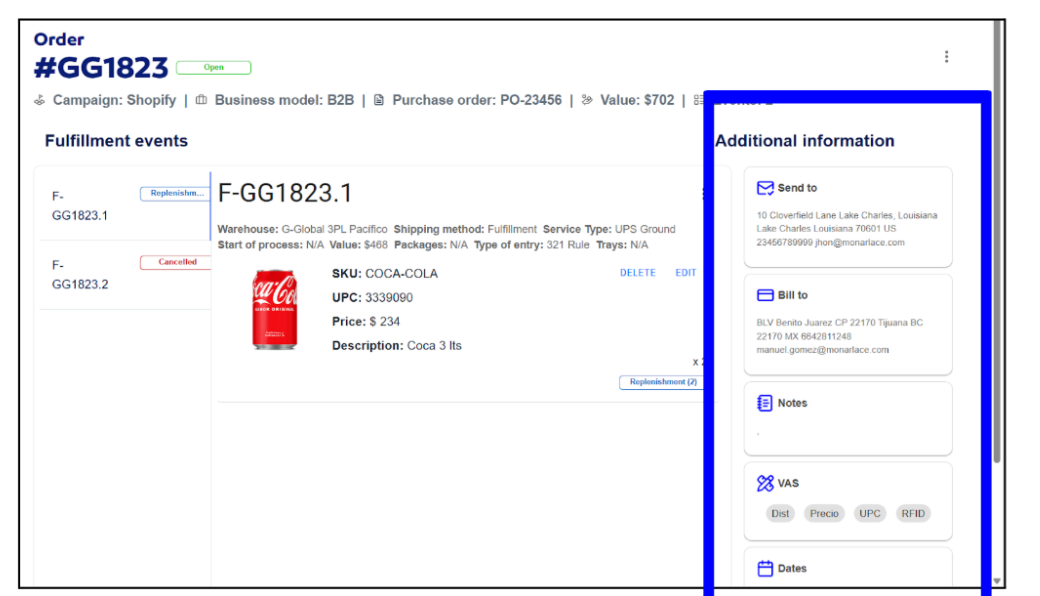
- On the lower right of the screen, complementary order information is presented, including shipping data, billing information, associated notes, included VAS (Value-Added Services), as well as the corresponding receipt dates.
- At the top, the identification number, current status, campaign, business model, PO, order value, and number of events are displayed.
Event Actions
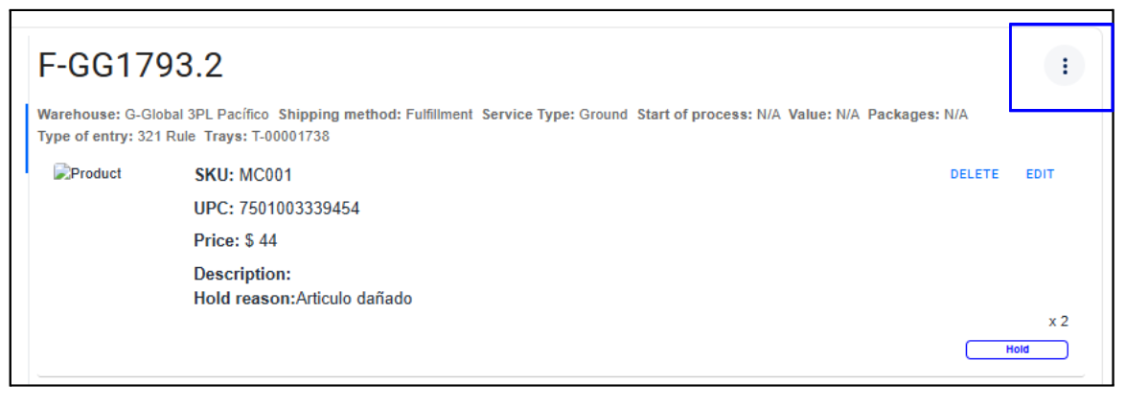
- Click on the three-dot option located on the lower right side of the event.
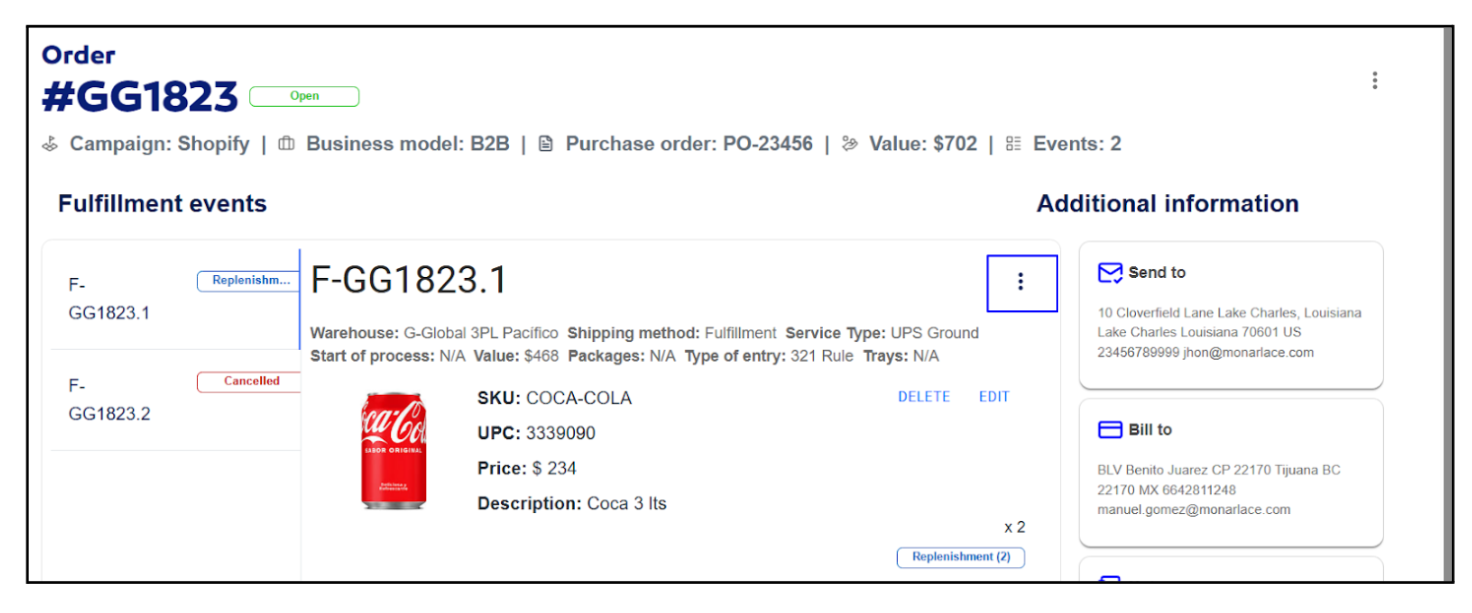
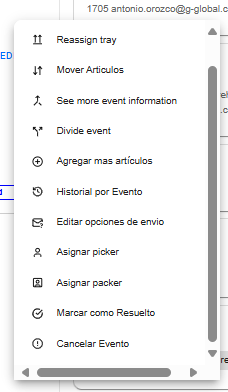
- An options bar will be displayed.
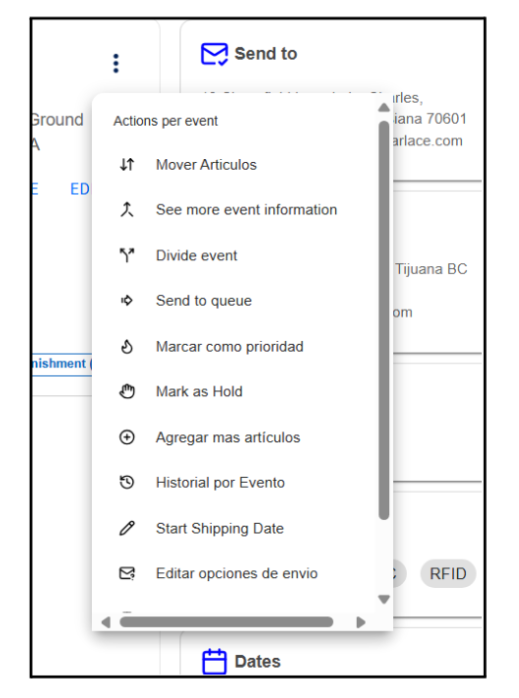
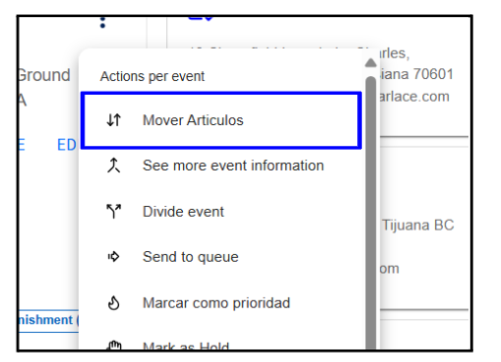
Move Items
Allows you to move an item from the current event to another existing or new one in the order.
- Click on the Move Items option.
- Next, a checkbox is shown. Click the checkbox to select the item to move.
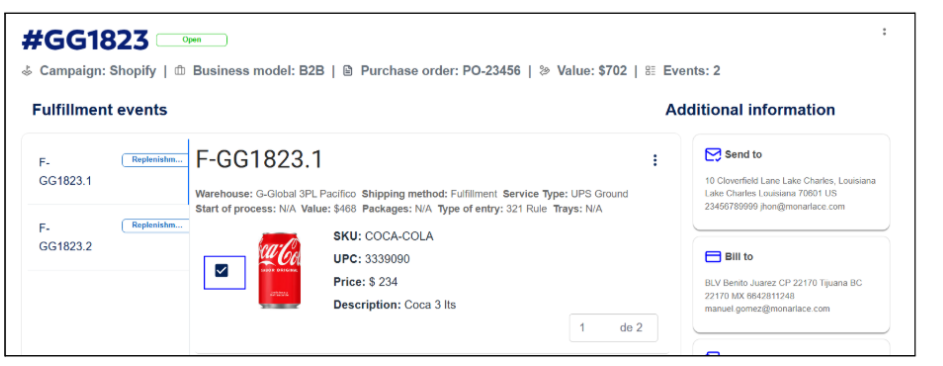
- Then, indicate how many items you want to move. For this example, the default value is left because only one item is to be moved.

- Then click on the Move option.
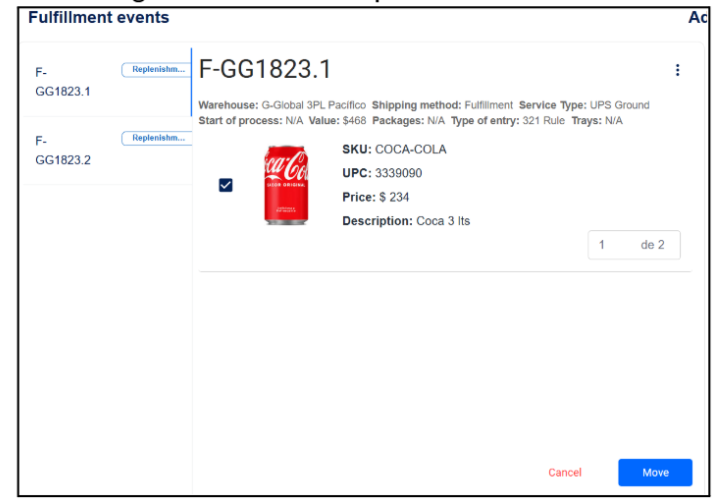
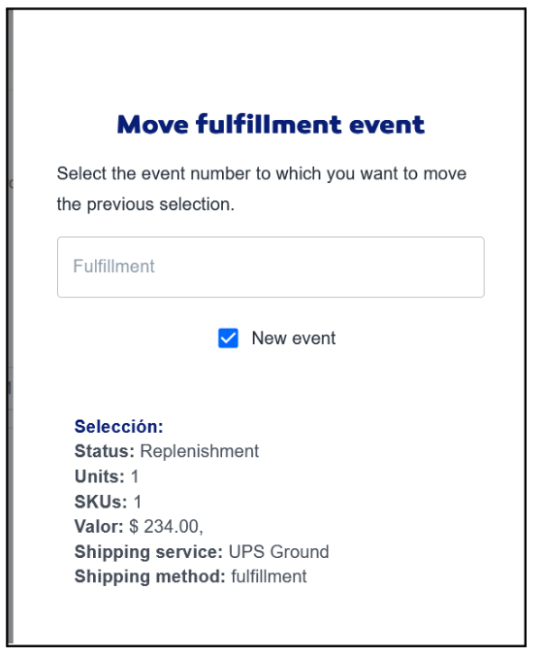
- Next, a form is displayed that allows you to choose whether you want to move the item to an existing event or a new one. To move it to an existing event, select the corresponding event from the dropdown field. If you prefer to move it to a new event, check the New Event box and leave the previous selection field empty.
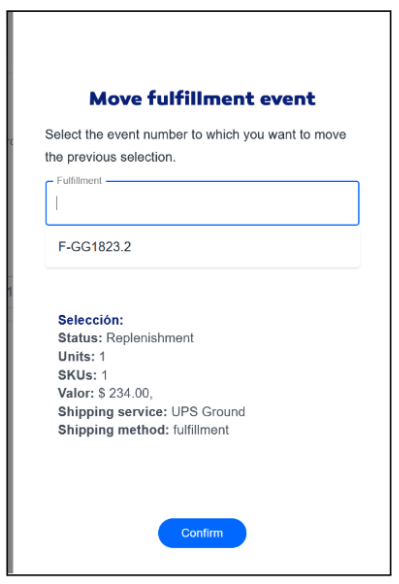
- For this example, the New Event box will be checked to perform a move to a new event.
- Next, click on the Confirm option.
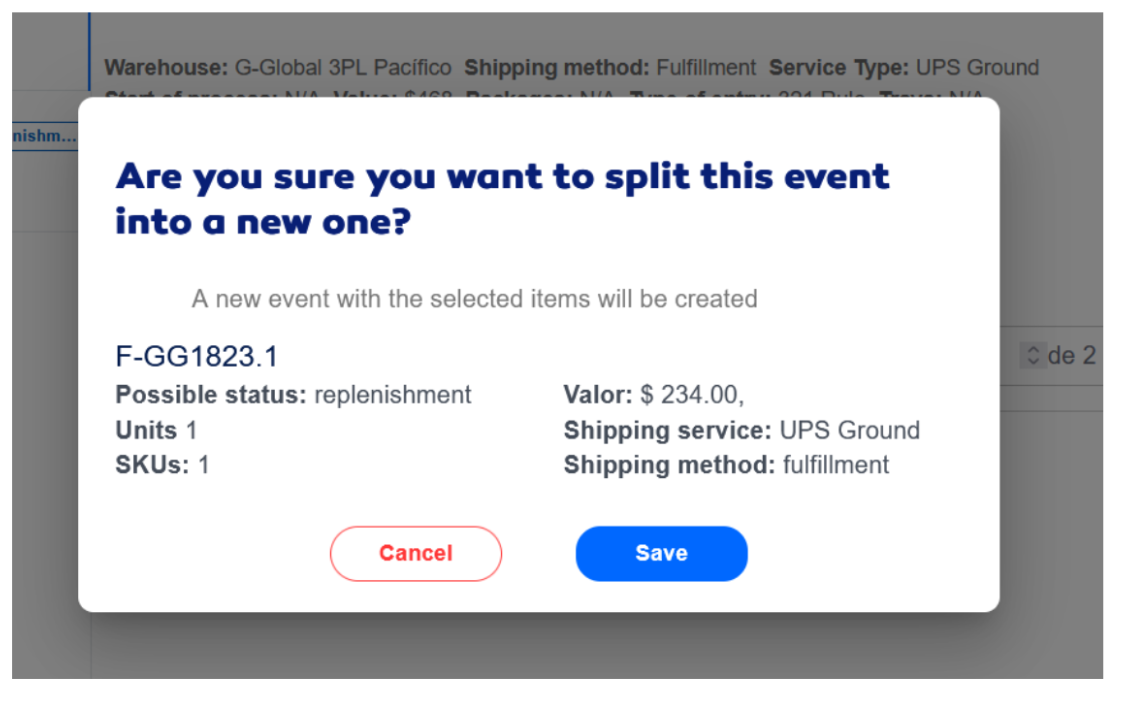
- A message will appear asking for confirmation to continue with the process. Click Save to proceed.
- Once the process is complete, a green message will be displayed indicating that the operation was successful, along with the identification number of the created event.
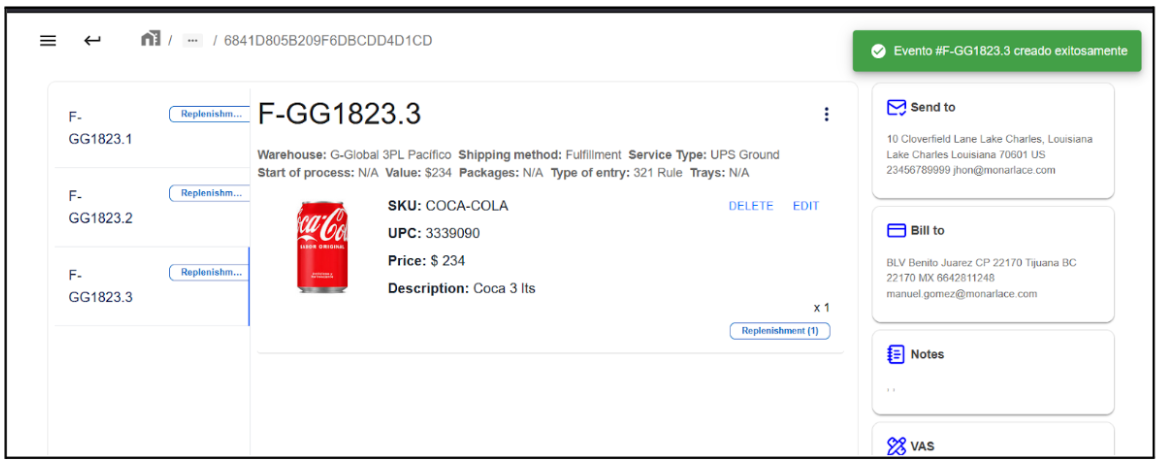
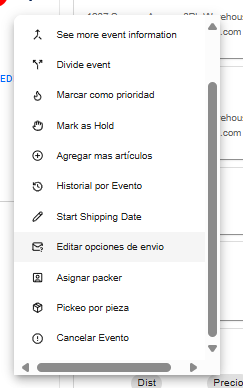
See more event information
This option allows you to view event information such as the creation date.
- Click on the corresponding option.
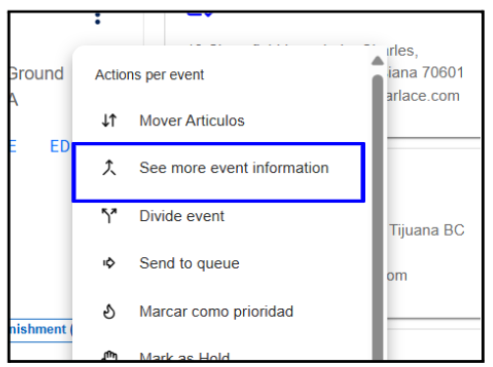
- A side modal will then be displayed with the event's creation date.
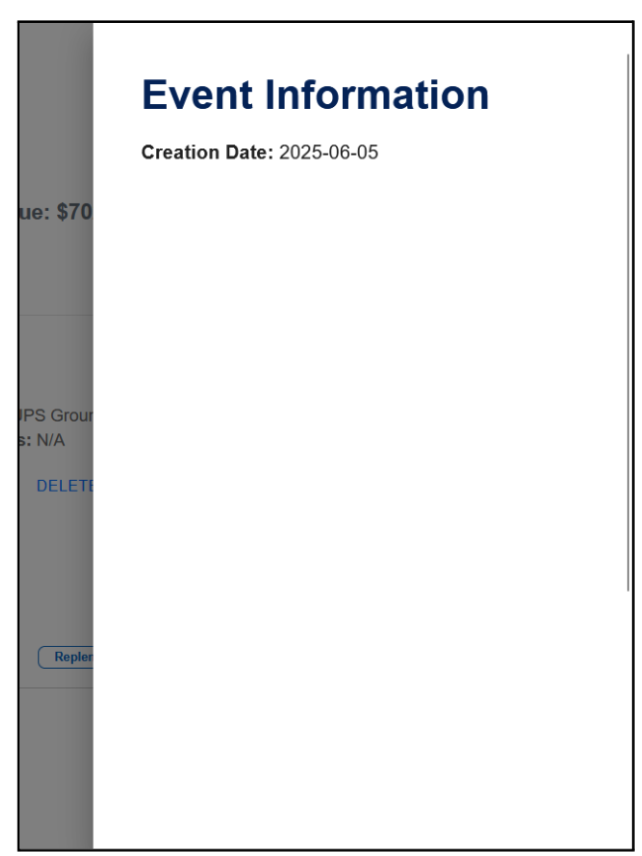
Divide event.
Allows you to divide an order event into several events, in order to manage items that generate the Replenishment or Queue statuses, as shown in the following image.
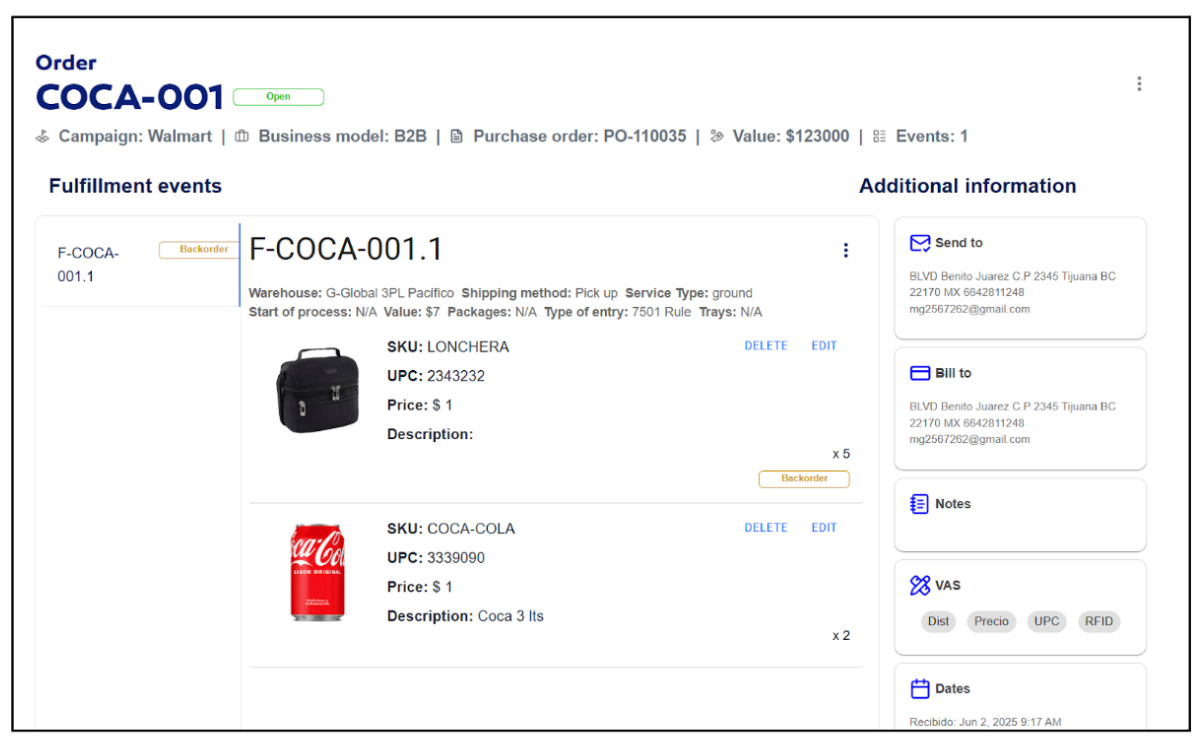
- Click on the corresponding option.
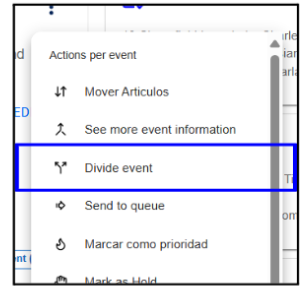
- Checkboxes are enabled to select the items that will be part of the new event.
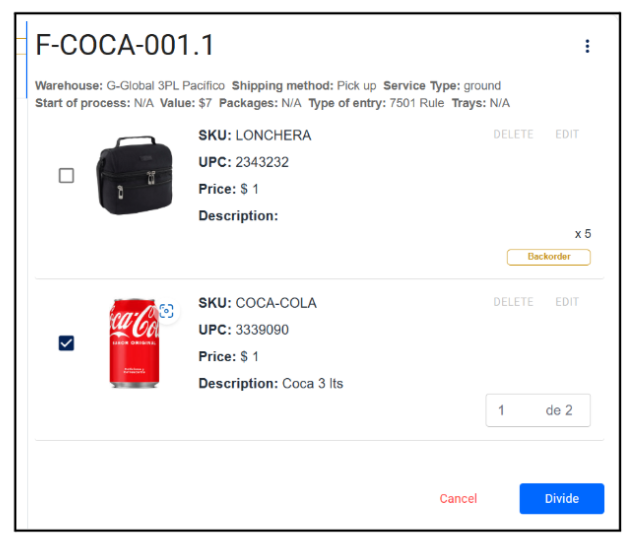
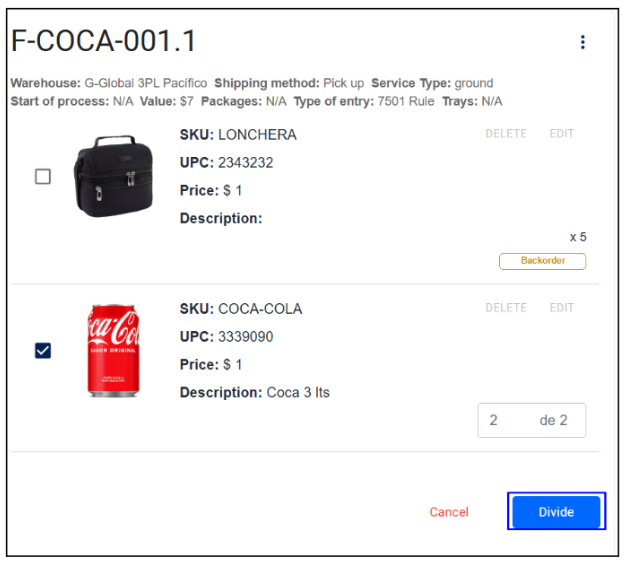
- Next, indicate the number of events that will be created for the selected items, in the field located at the bottom of the item list.

- Then, click the Divide button to finalize the process.
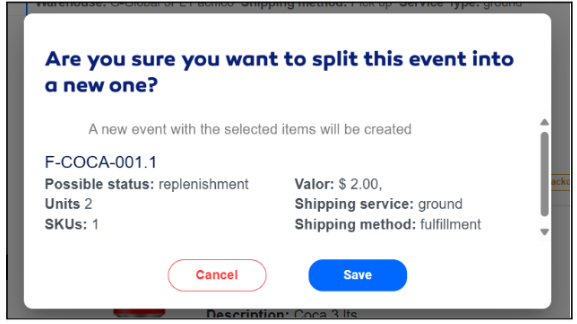
- Next, a confirmation message will be displayed; to continue with the process, click Save.
- Subsequently, a green message will be displayed indicating that the process was successful, followed by the code of the created event. The new event will be automatically assigned the corresponding status.
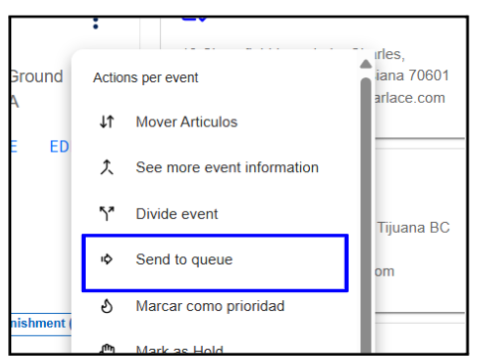
Send to queue.
Allows changing the event's status to Queue so it can be processed.
- Click on the corresponding option.
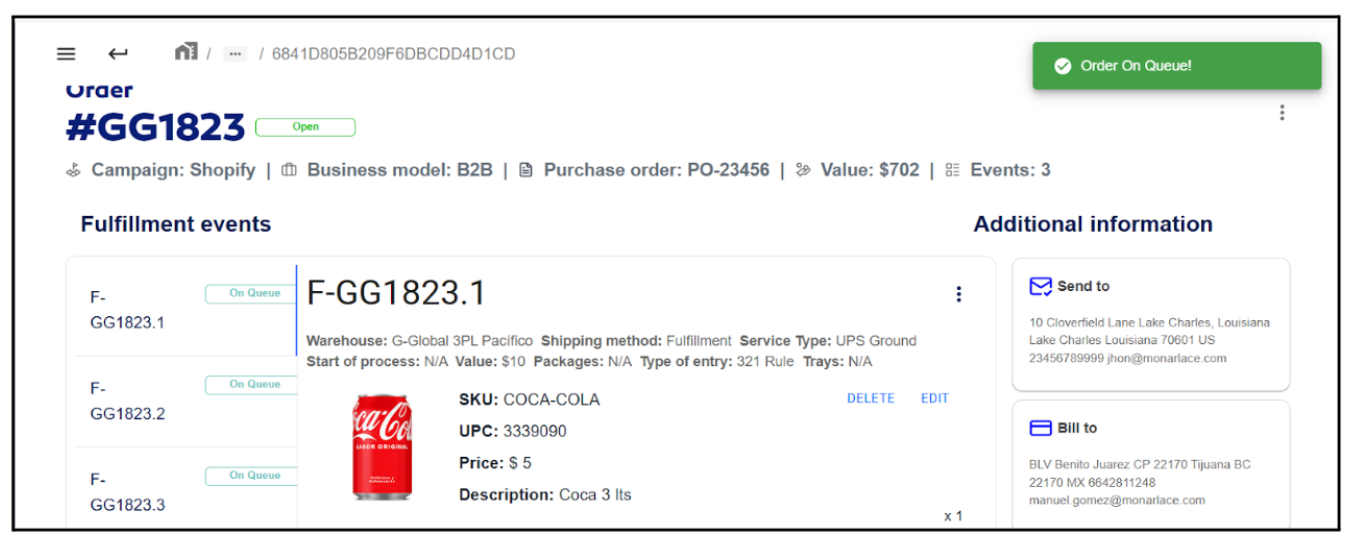
- If the item has available stock in the Pick Location, the event's status will be correctly updated to Queue. The system will display a green message indicating that the status update was successful.
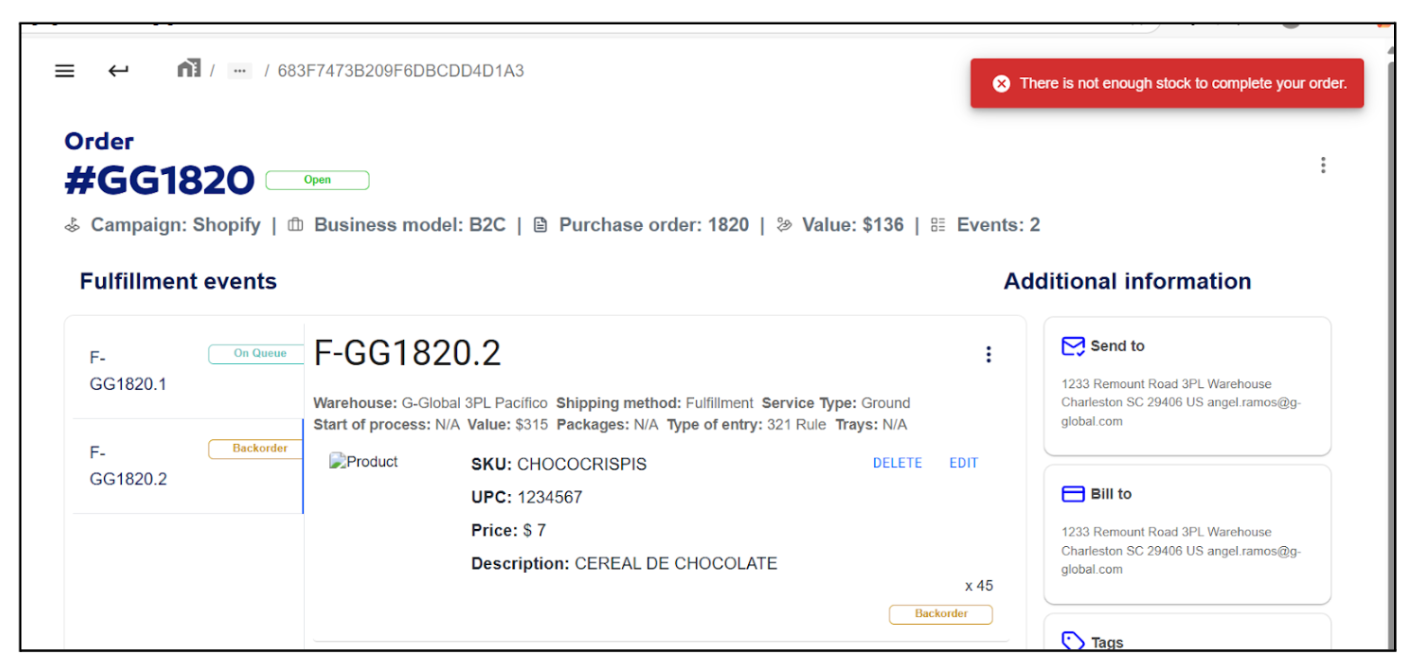
- If there is not enough stock of the item, the status will not be updated to Queue; it will remain in Backorder. Additionally, a red message will be displayed indicating that it is not possible to change to Queue due to insufficient stock.
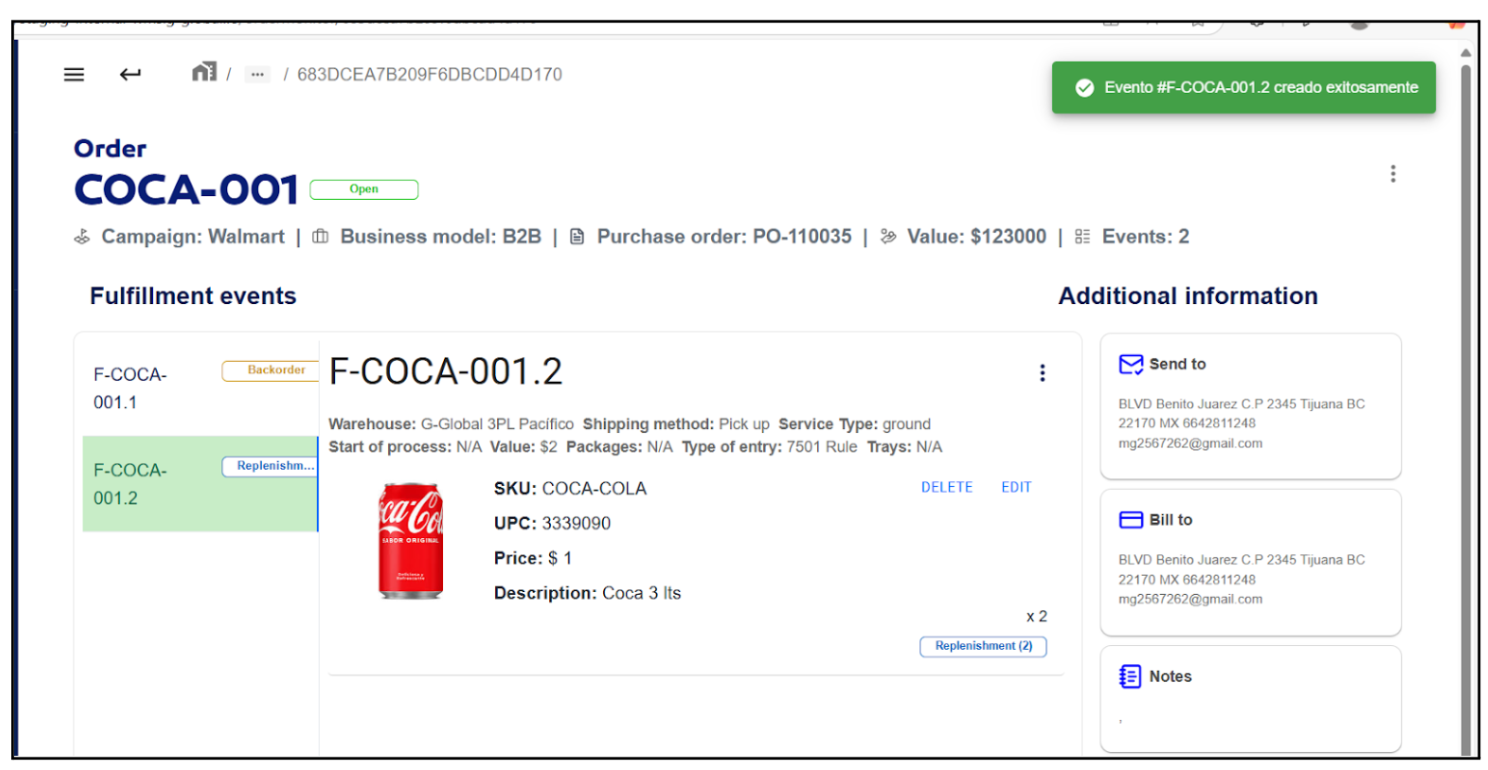
- If there is sufficient stock, but it is not located in the Pick Location, the status will also not be changed to Queue. In this case, the system will display a red message indicating that there are no available items in the Pick Location.
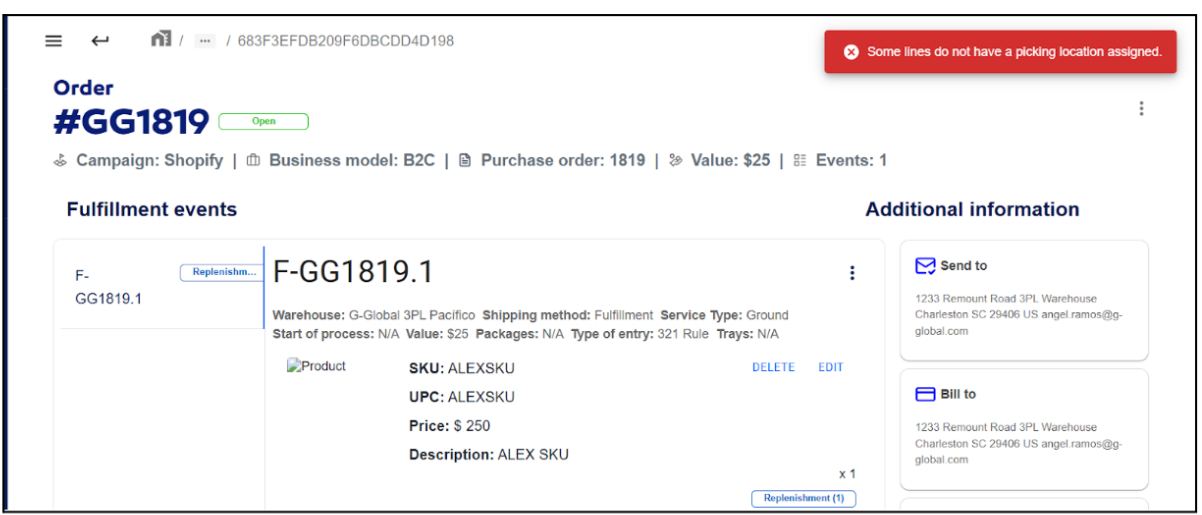
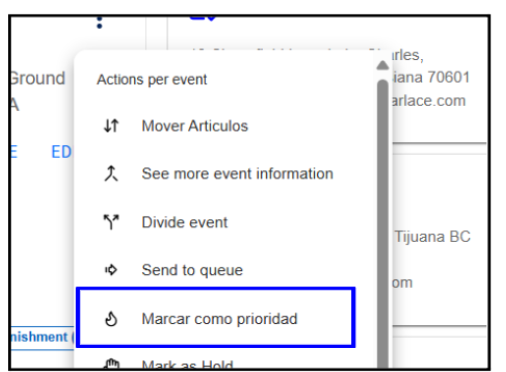
Mark as priority.
Allows setting the event as a priority for its processing in the system.
- Click on the corresponding option.
- The system will then display a green message indicating that the event has been marked as a priority for processing.
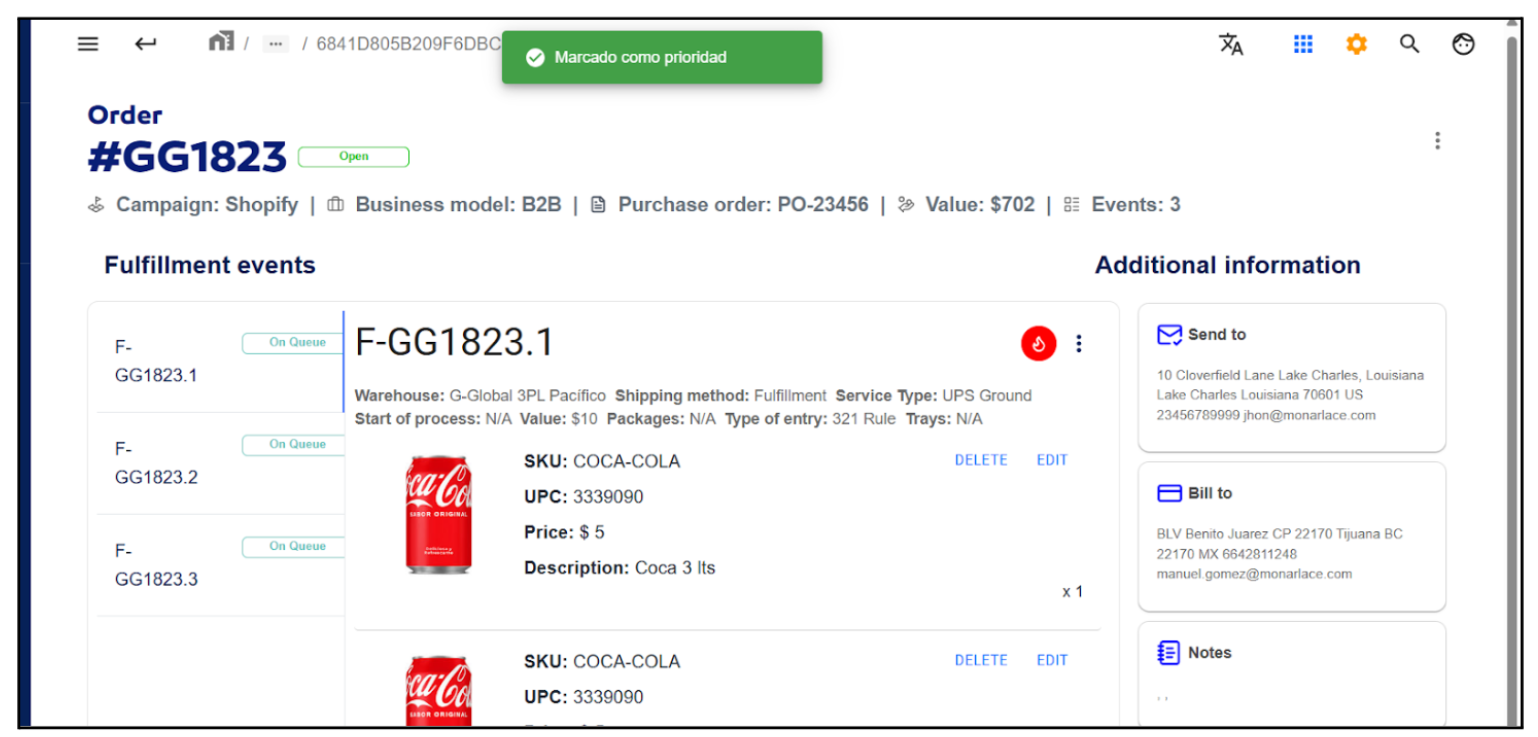
- It also displays a red icon indicating that the event is now a priority.

Mark as Hold.
Allows changing the status of an event to Hold.
- Click on the corresponding option.
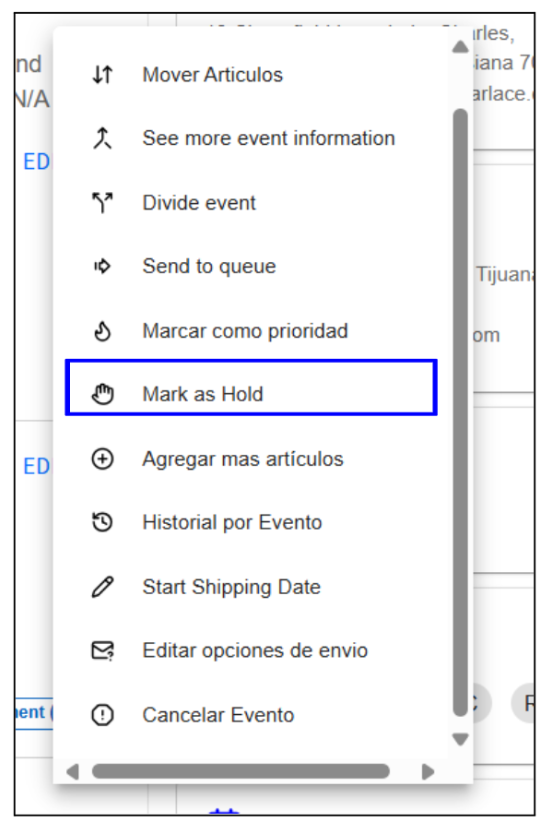
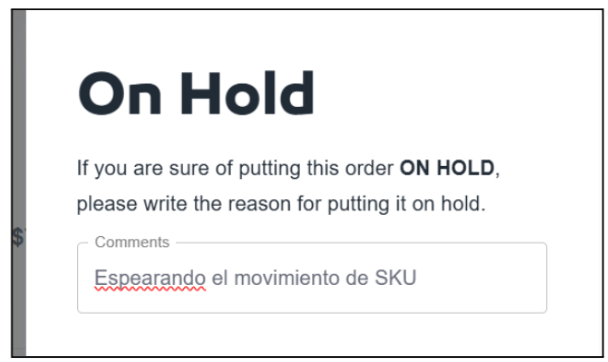
- Next, a form will be displayed where you must enter a brief description of the reason for changing the event to Hold.
- To continue with the process, click on the Confirm option.
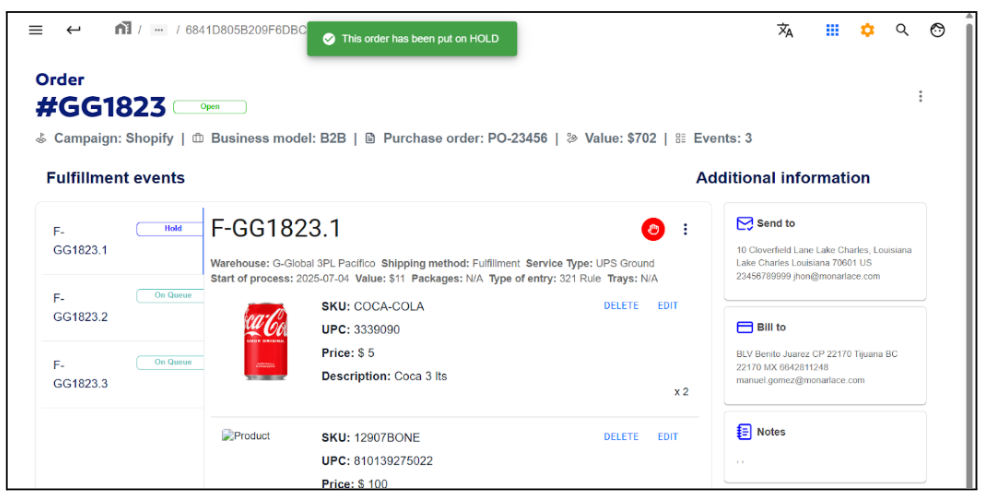
- The system will display a green message indicating that the process has been completed successfully, and the event will change its status to Hold.
Release fulfillment.
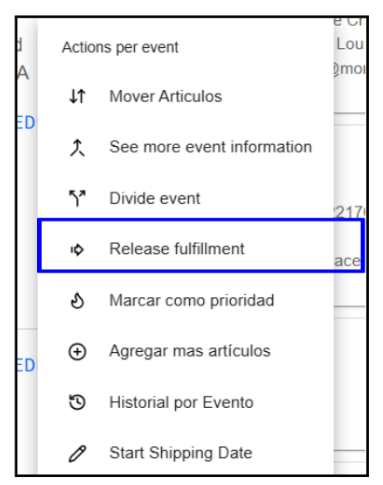
Allows resetting an event in Hold status to its previous state or sending it to Queue to be processed, depending on inventory availability.
- Click on the corresponding option.
- The system will attempt to update the event's status.
- If there is available stock in the picking location, the event will automatically move to Queue.
- If there is not enough stock in that location, the event will return to its previous state, and a red message will be displayed explaining why it was not possible to send it to Queue.
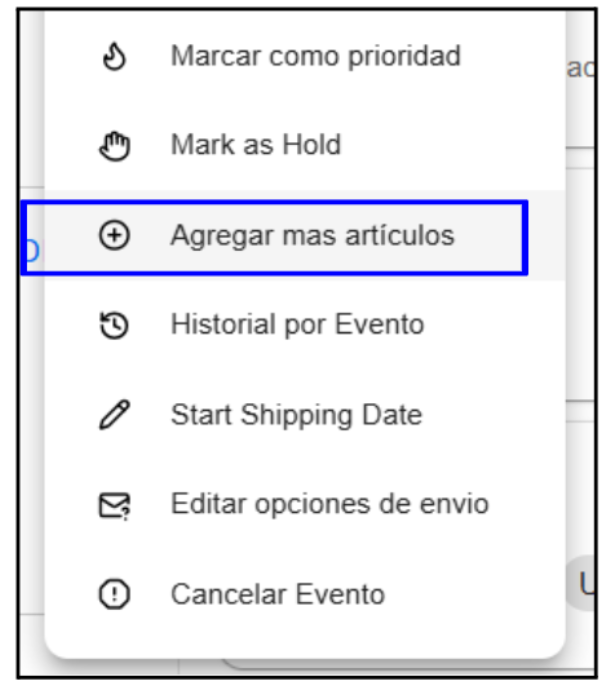
Add more items.
Allows you to add items to the event.
- Click on the corresponding option.
- Next, a form is displayed where you must enter the SKU (as you type, SKUs that match the entered text will be displayed), as well as the quantity. Then, click the Add items button to save the information.
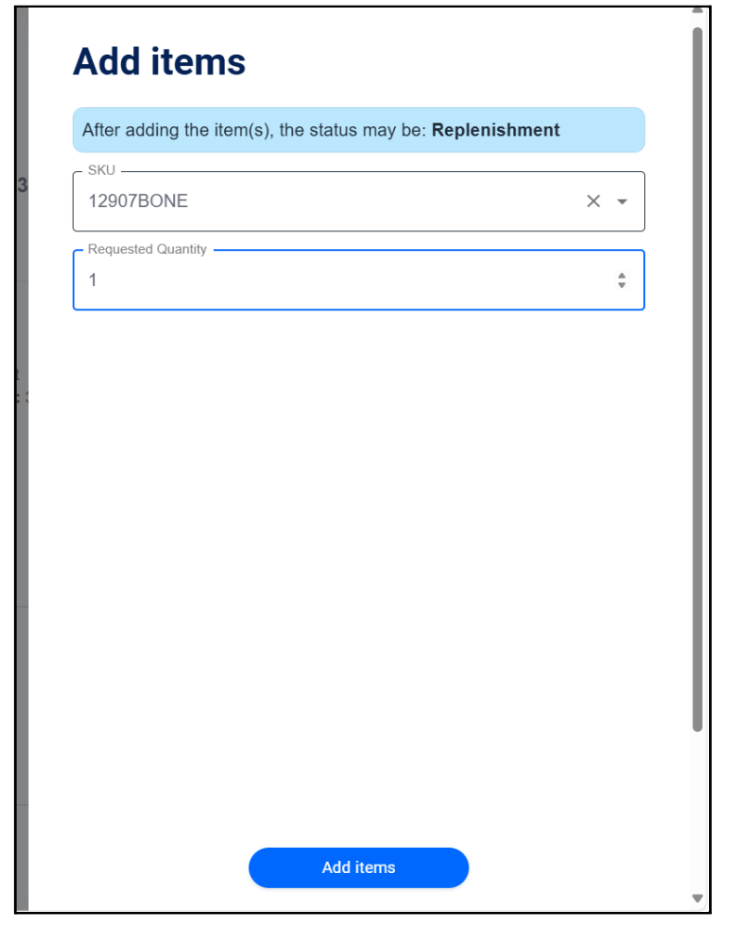
Depending on the stock status of the item being added, the event may change to Backorder, Replenishment, or Queue.
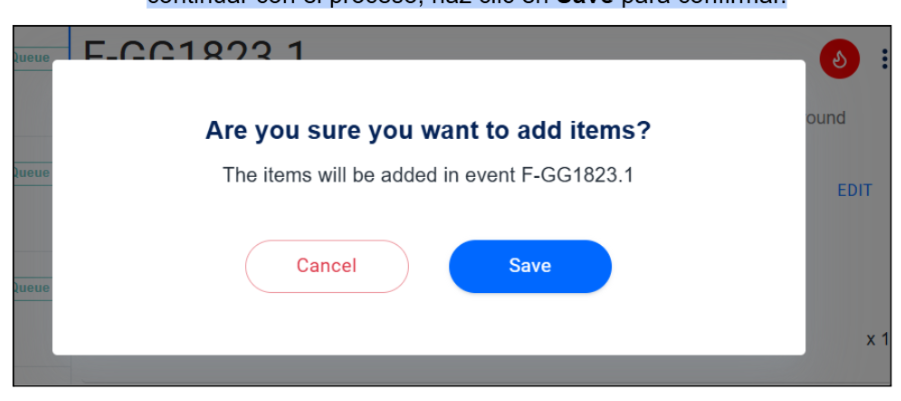
- Finally, a confirmation message is displayed. If you wish to continue with the process, click Save to confirm.
- The system will display a green message indicating that the process was successful. The new added item will then be shown within the event, and its status will be updated automatically.
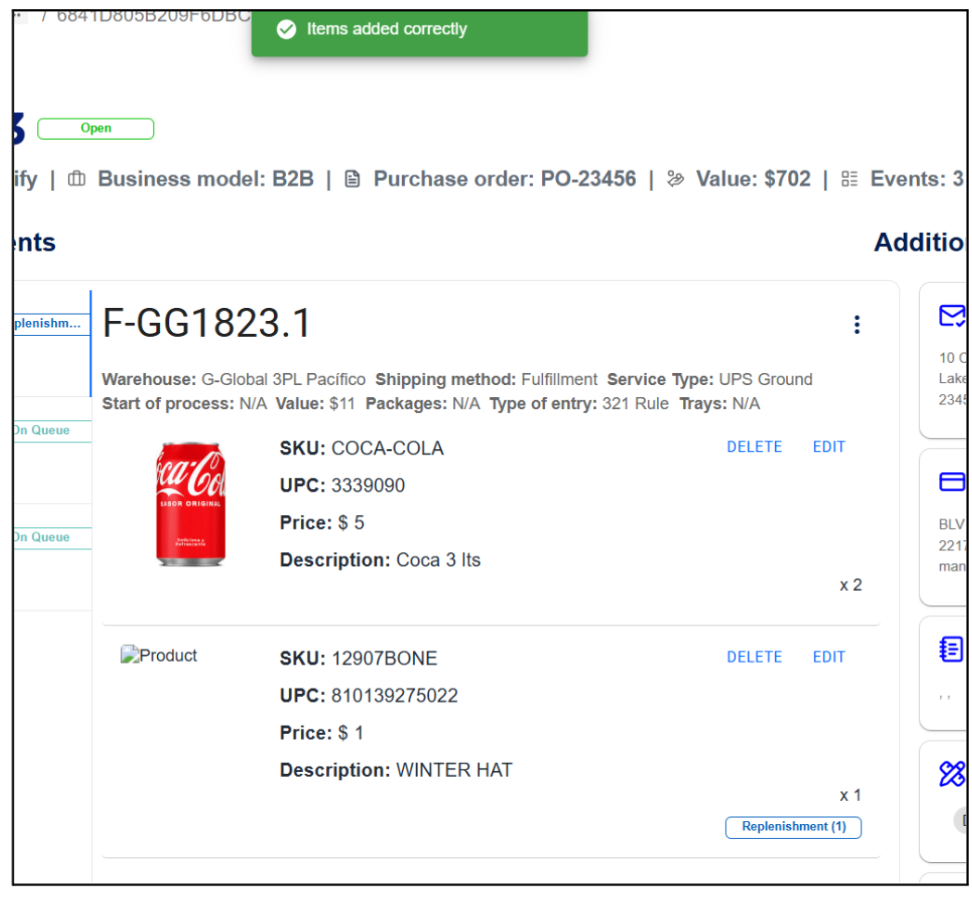
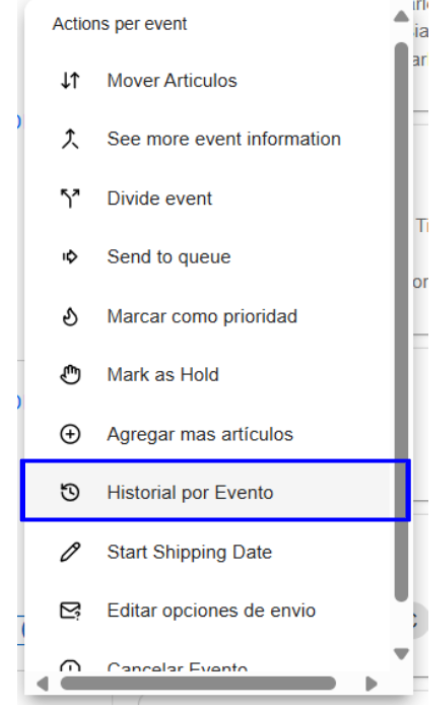
Event History.
Allows you to view the list of movements made in the event.
- Click on the corresponding option.
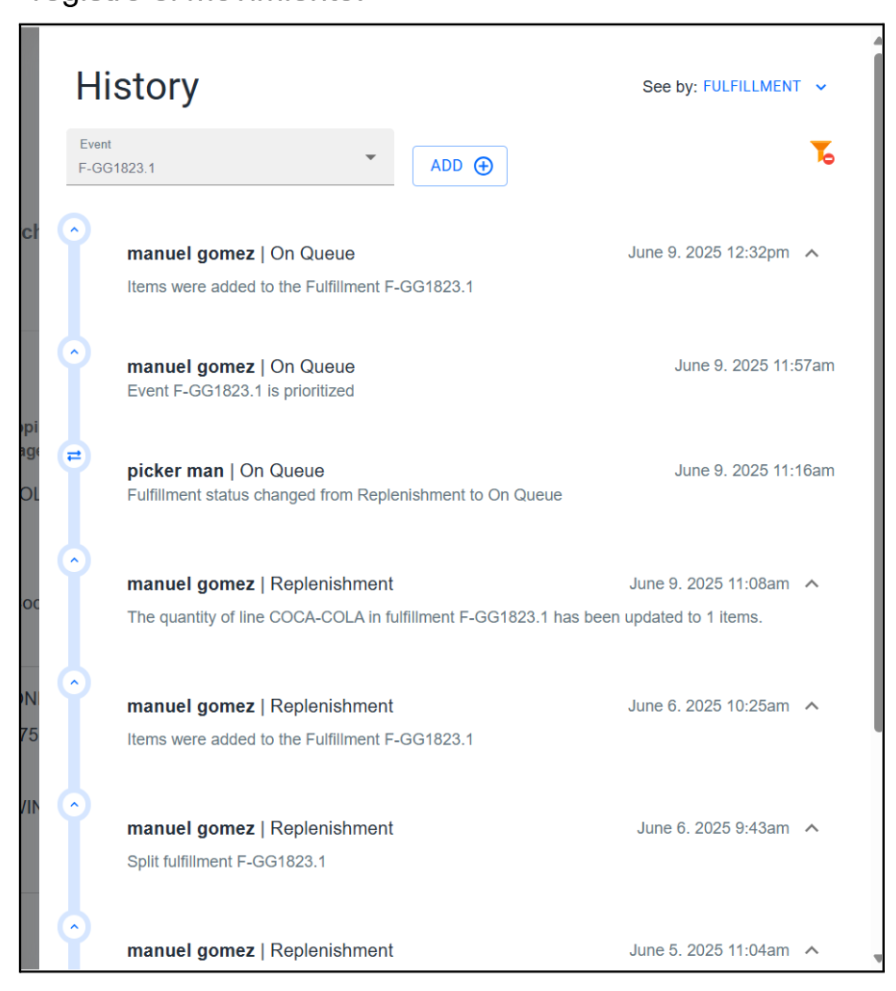
- Next, a history is displayed containing the movements made, including: the username, the type of movement, an associated description, and the date the movement was recorded.
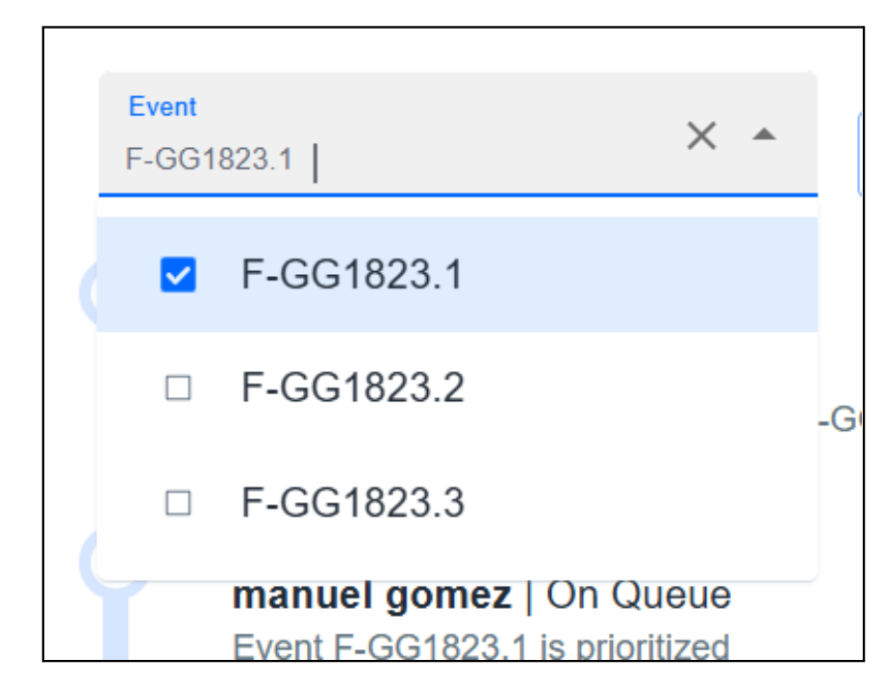
- Additionally, it is possible to filter the movements by events within the order.
- The ADD option allows you to add additional filters. Click on the corresponding option.
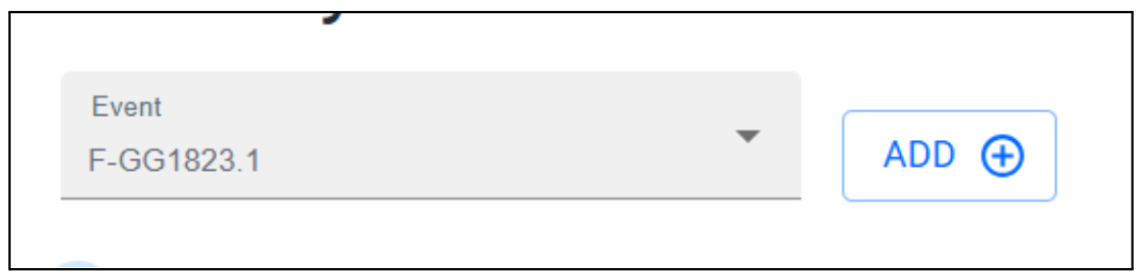
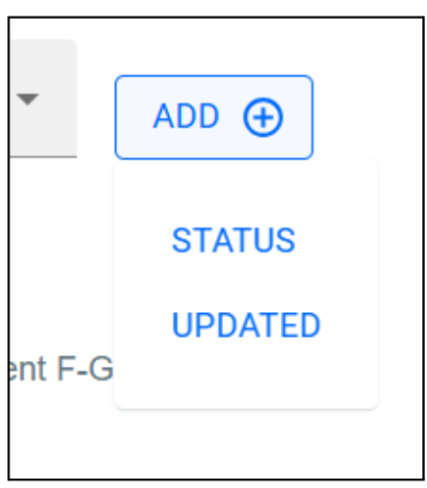
- Then, options will be displayed where you can select the type of filter you want to apply: by STATUS or by UPDATED.
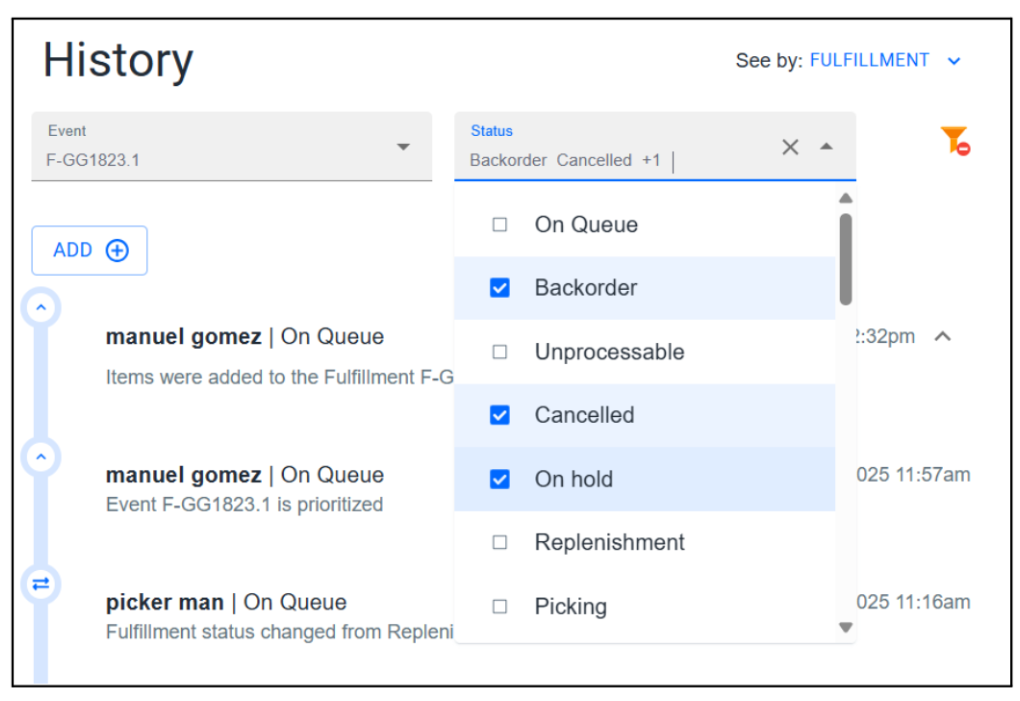
- If you select the filter by STATUS, you must indicate which event status you want to filter by. It is possible to select more than one status.
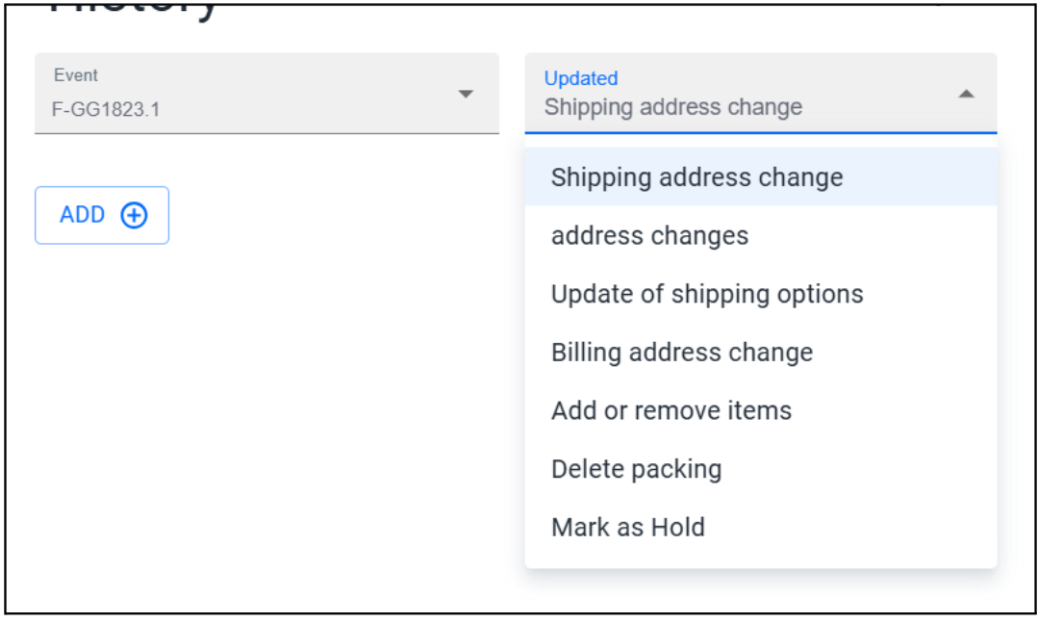
- If you select the filter by UPDATED, in a dropdown field you must indicate what type of update you want to view in the movements.
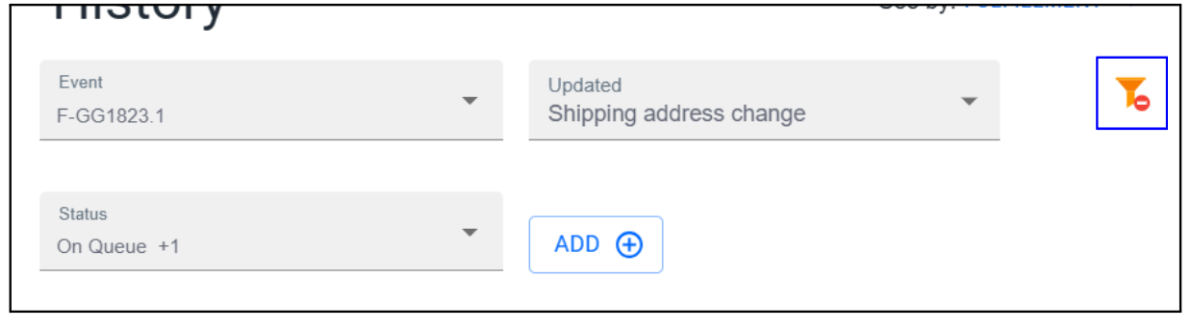
- To clear the established filters, click on the corresponding option, as shown in the following image.
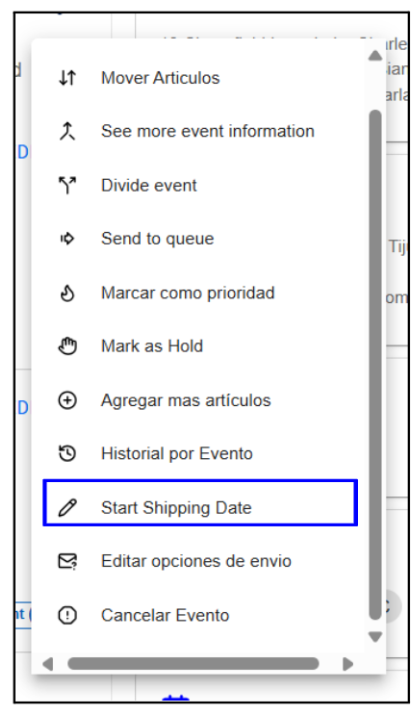
Start Shipping Date.
Allows setting or modifying the shipping date of the order.
- Click on the corresponding option.
- A form will be displayed where you must enter the shipping date.
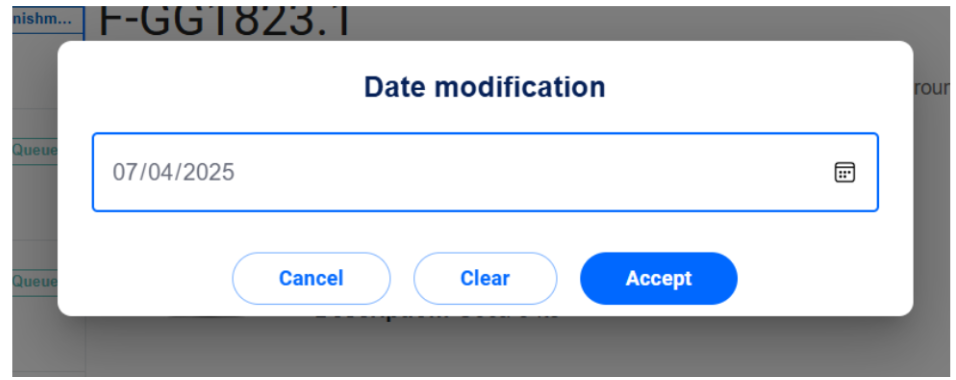
- Then, click the Accept option to confirm.

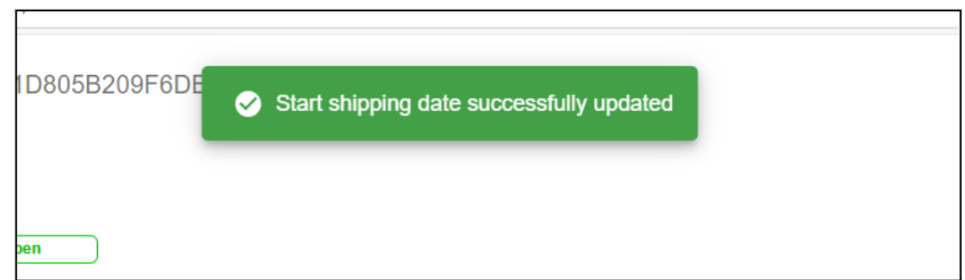
- The system will then display a green message indicating that the process was completed successfully.
If the order already has an assigned shipping date, you can follow this same process to modify it.
Edit shipping options
Allows you to modify the shipping options of an order.
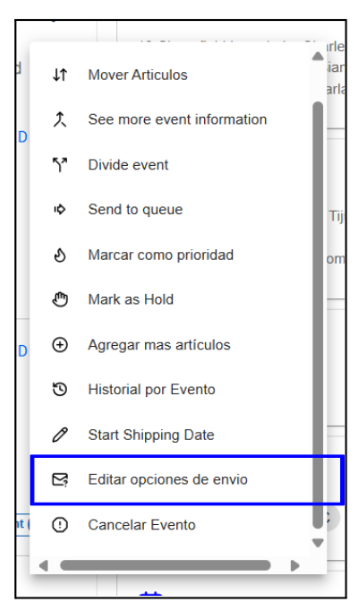
- Click on the corresponding option.
- A form will be displayed where you must complete the following fields: Transportation method, Services Available, Third Party Billing, and Warehouse.
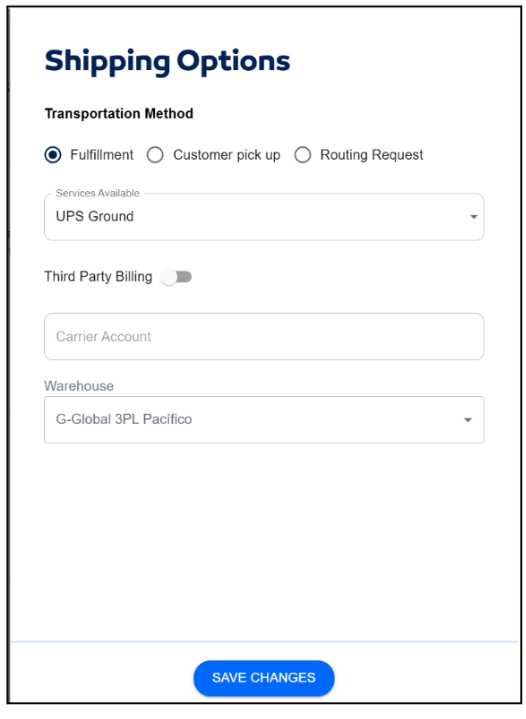
- Then, click the Save Changes option to continue with the process.

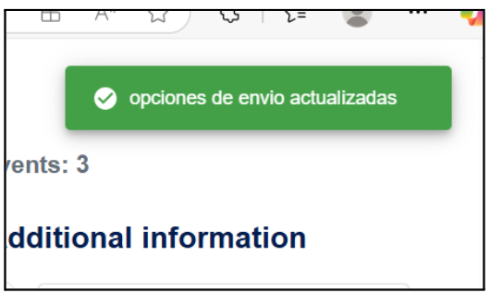
- Upon completion, the system will display a green message indicating that the process was completed successfully.
Cancel event
Allows you to cancel the event.
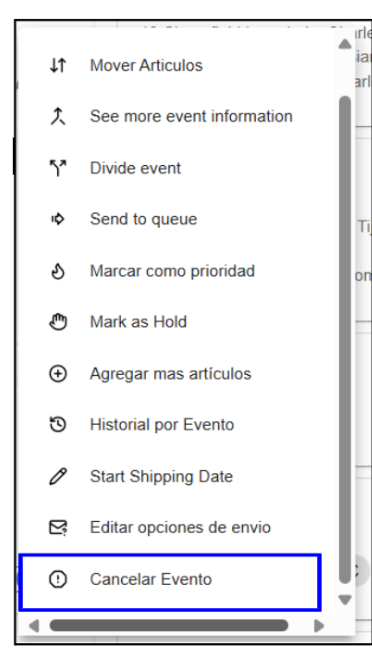
- Click on the corresponding option.
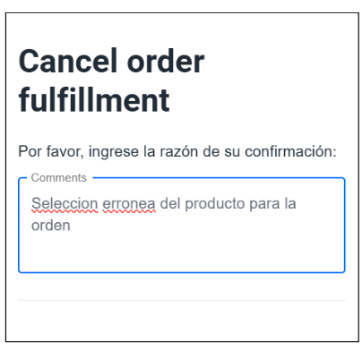
- A form will be displayed where you must enter a brief description of the reason why the event is being canceled.
- Then, click the CONFIRM option.
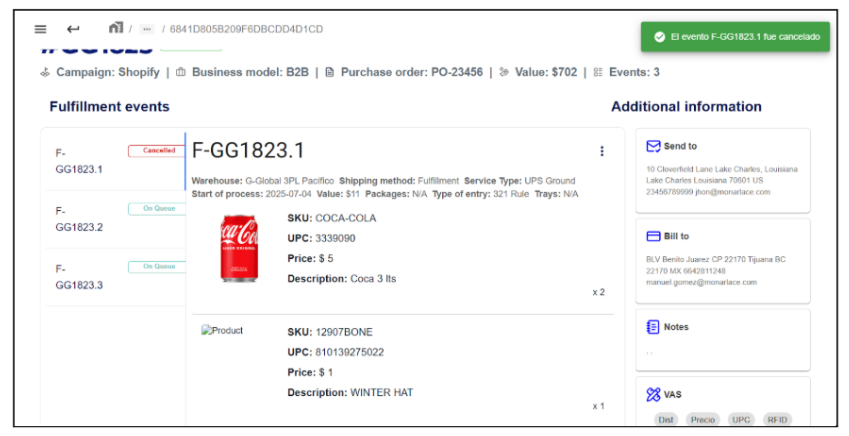
- Upon completion, the system will display a green message indicating that the event has been canceled, along with the event's identification number. The event will be registered as canceled.
Reactivate event.
Allows you to reactivate an event that has been previously canceled.
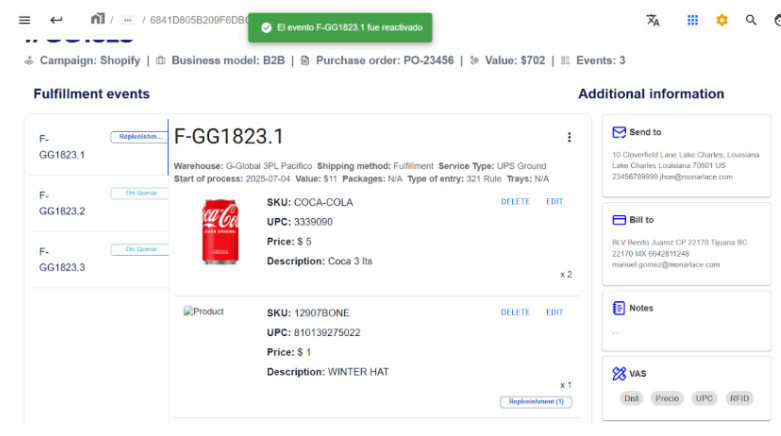
- Click on the corresponding option.
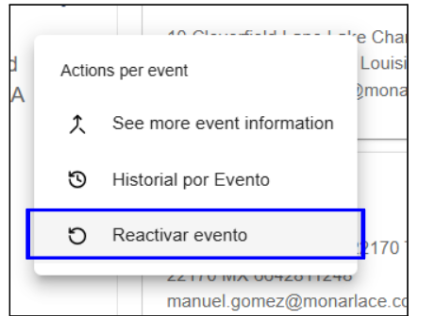
- The system will update the event's status, restoring it to the state it was in before being canceled.
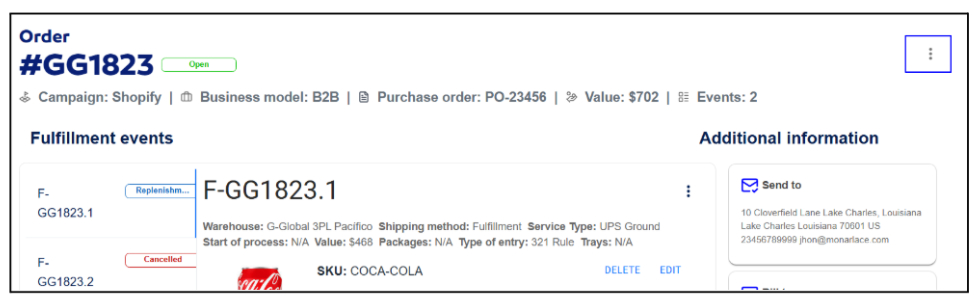
Order Actions
- Click on the three-dot icon located in the upper right part of the order detail.
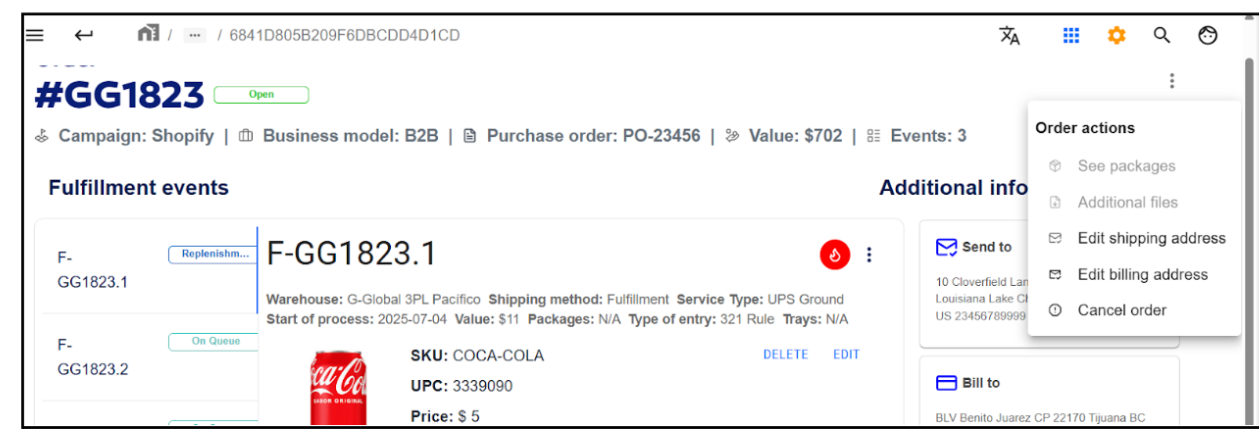
- A panel with different options will be displayed, which are described below along with their functionality.
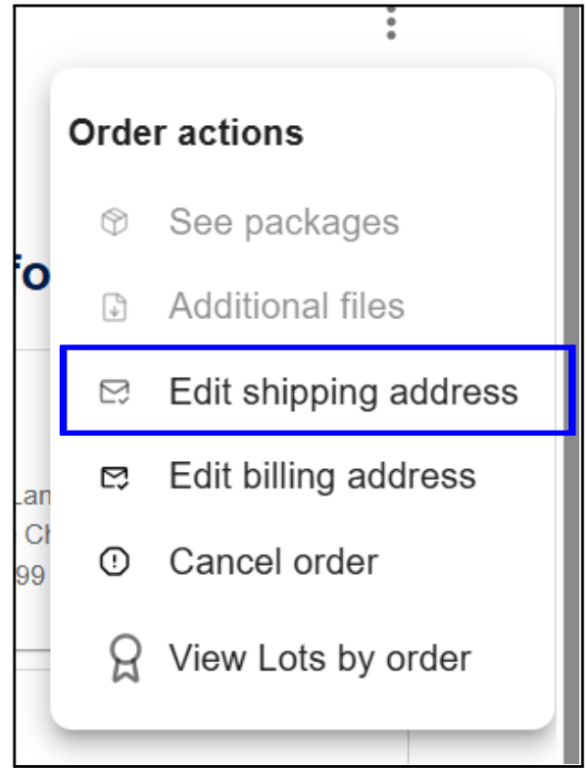
Edit shipping address.
Allows you to modify the shipping address of an order.
- Click on the corresponding option.
- A form will be displayed where you can edit the following fields: Name, Company, Address 1, Address 2, City, State, Country, Postal Code, and Phone Number.
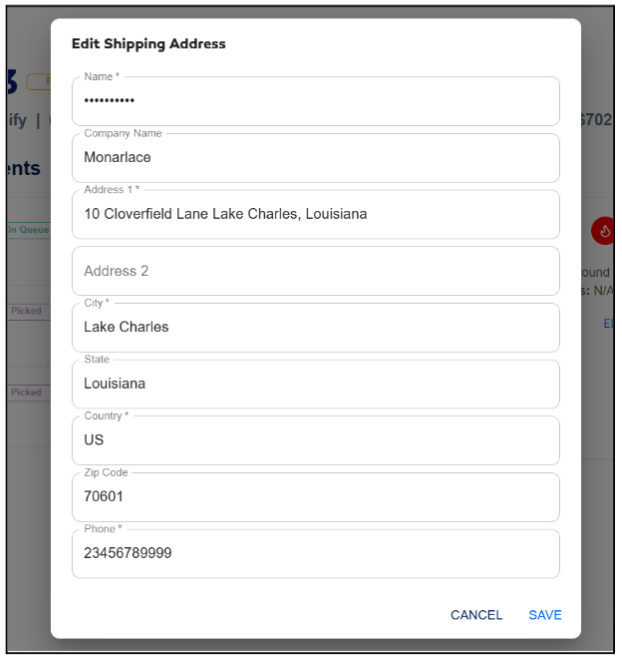
- Once the changes are made, click SAVE to save them.

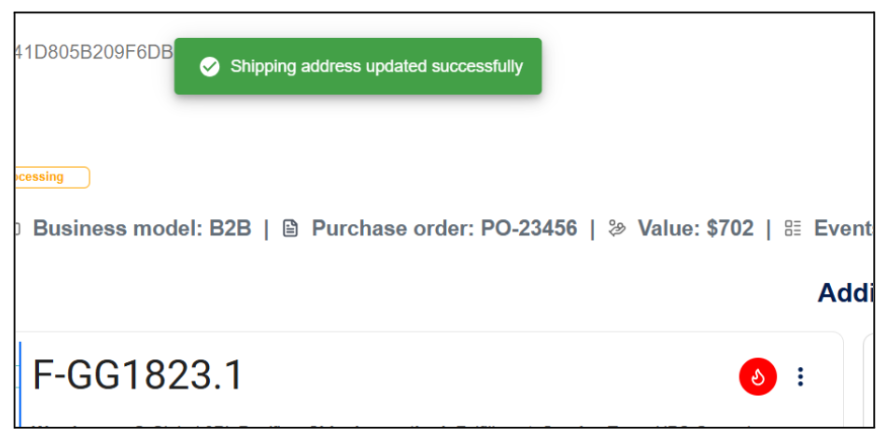
- The system will display a green message confirming that the process was successful.
Edit billing address.
Allows you to modify the billing address of the shipping order.
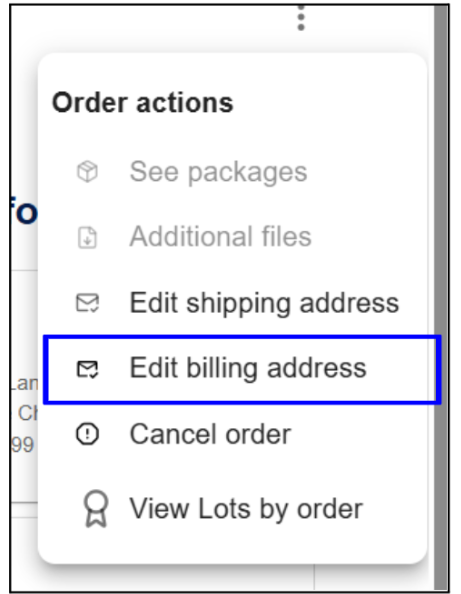
- Click on the corresponding option.
- A form will be displayed where you can edit the following fields: Name, Company, Address 1, Address 2, City, State, Country, Postal Code, and Phone Number.
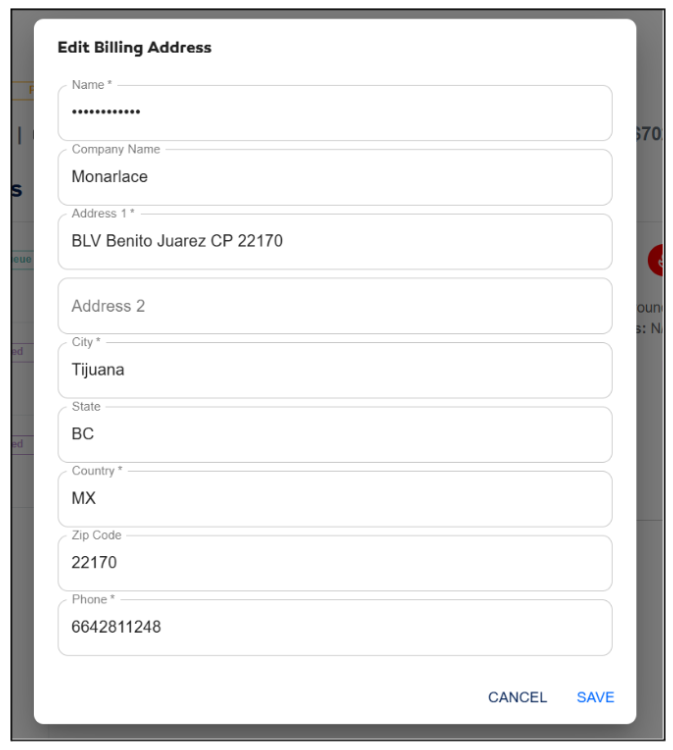
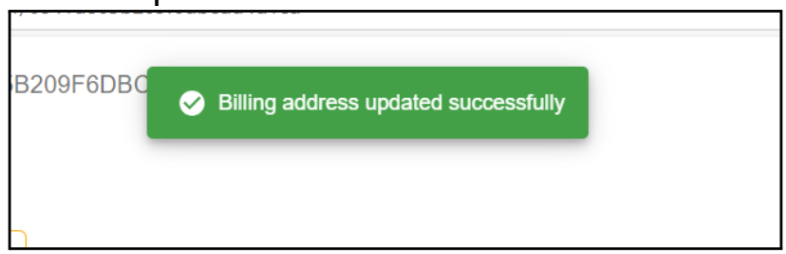
- Once the changes are made, click SAVE to save them.

- The system will display a green message confirming that the process was successful.
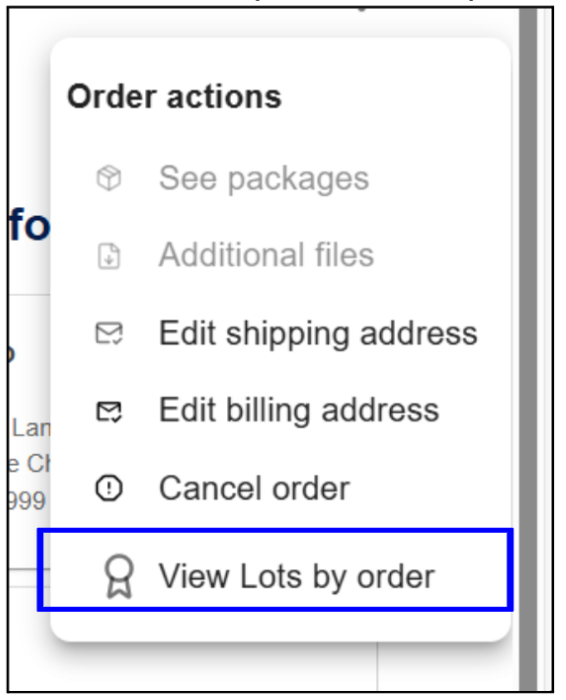
View lots by order.
Allows you to view events by lot number.
- Click on the corresponding option.
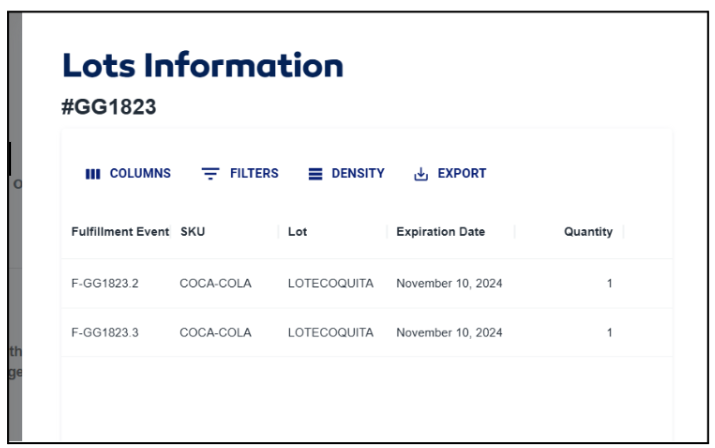
- The system displays a table of events by lot, SKU, Expiration Date, and quantity of items.
Cancel order.
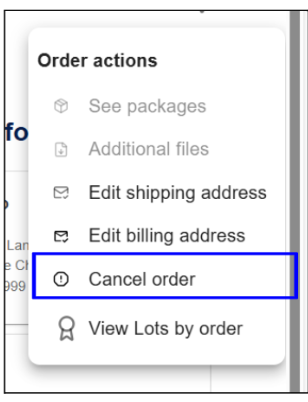
This option allows you to cancel an order in the system.
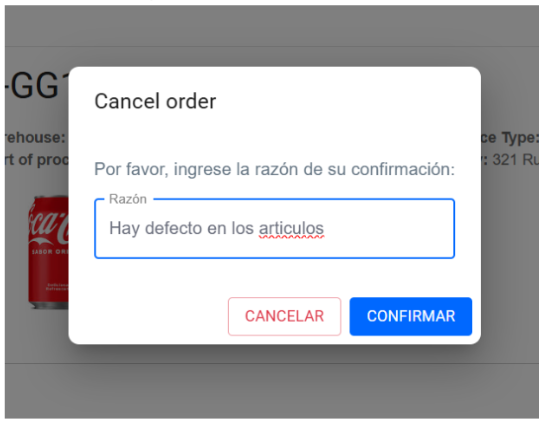
- Click on the Cancel Order option.
- Next, a form will be displayed where you must enter a brief description with the reason for the cancellation.
-
Click CONFIRM to continue with the process.
-
Once confirmed, the order will change its status to Cancelled, as shown in the following image.
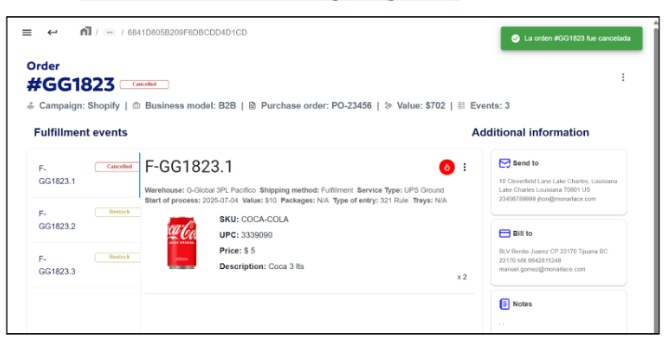
Events that are in Packed or Picked status will automatically change to Restock.
Events in Queue status will be updated to Cancelled.
See packages.
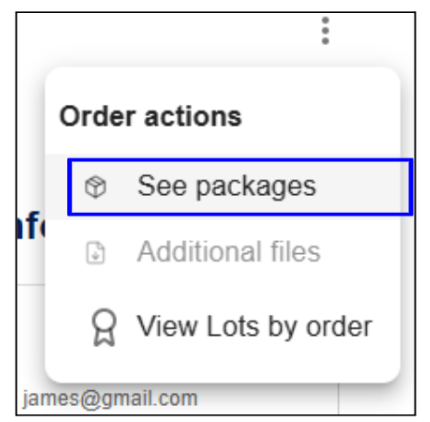
This option allows you to view the tracking number of the event that has been packaged.
- Click on the See Packages option.
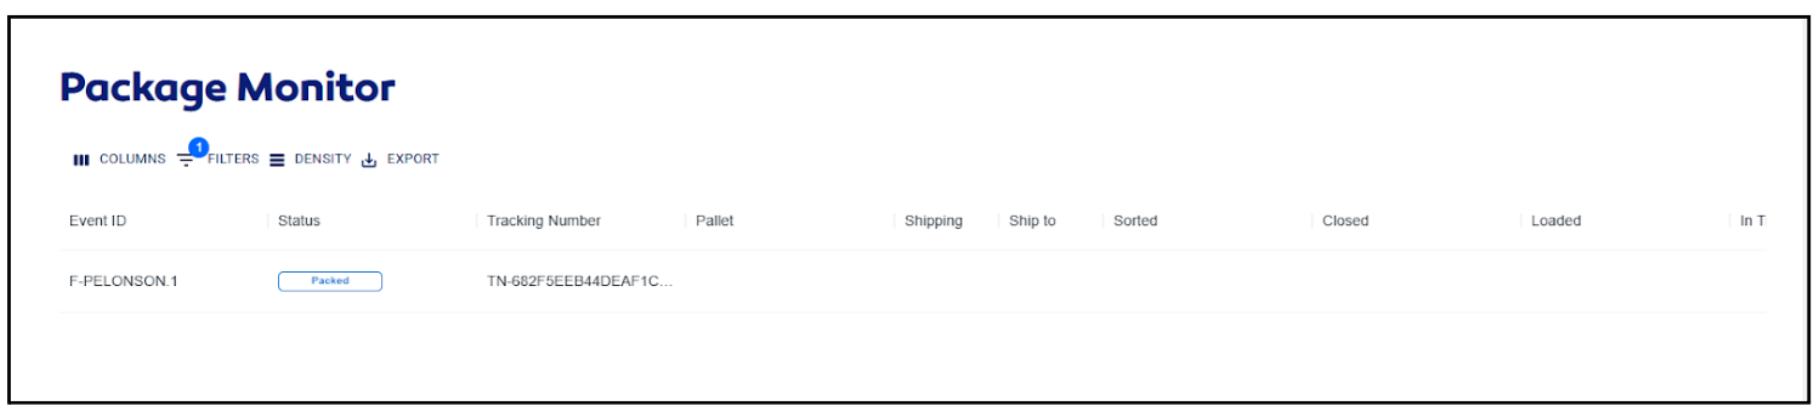
- The system automatically redirects to the Package Monitor module, where you can consult the Tracking Number associated with the event with Packed status.
Packing List
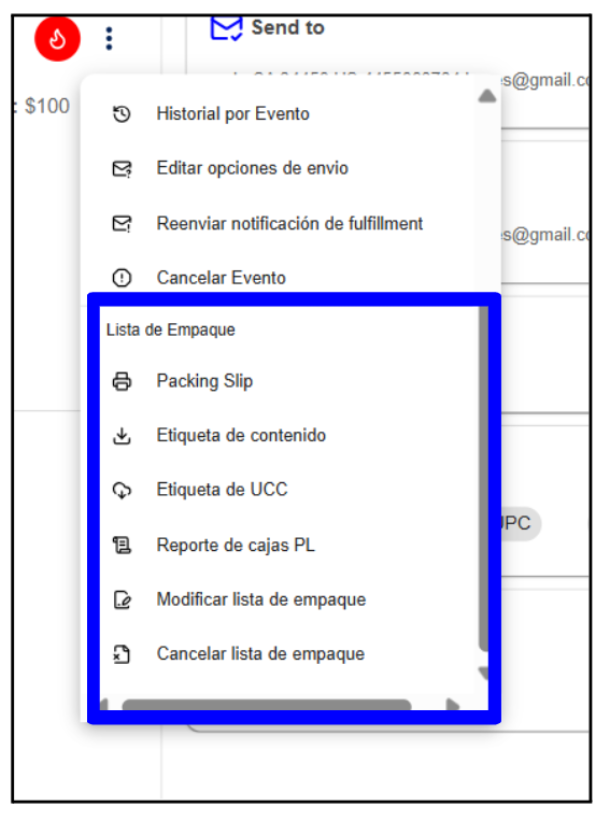
This is a set of options related to the packing of the event. These options are enabled when the event is in the Packed state.
- Click on the three-dot options located to the right of the order name.

- The system displays a panel of options in the Packing List section.
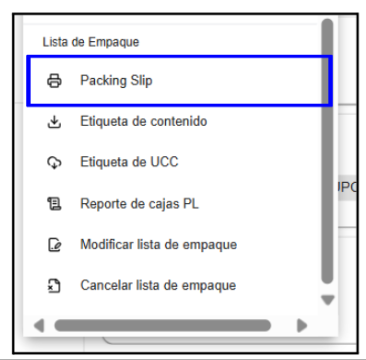
Packing Slip.
This option allows you to download the Packing Slip for the event.
- Click on the Packing Slip option.
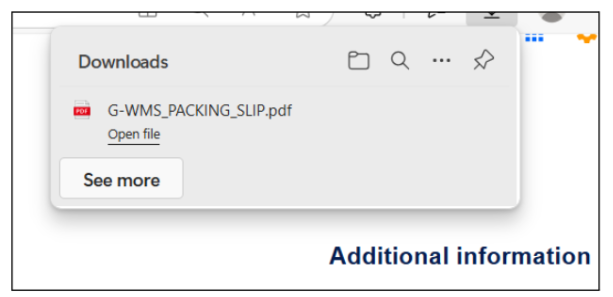
- The system will automatically generate and download a PDF file.
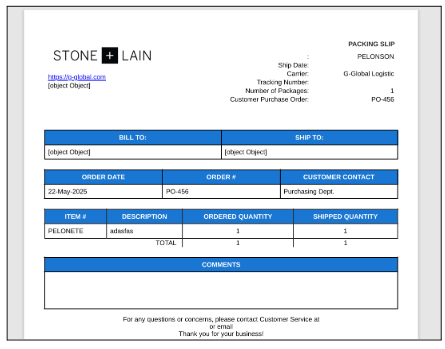
- Once downloaded, you can view the packing details corresponding to the event.
Content Label.
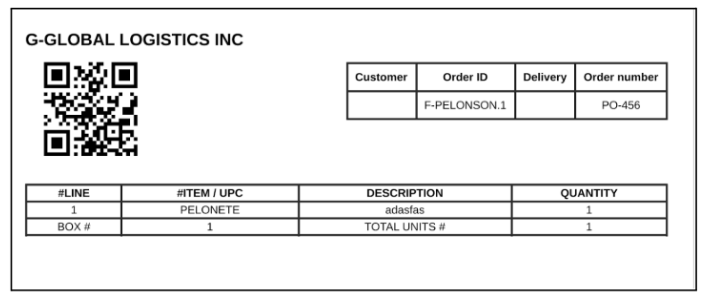
Generates a QR code for the event's package
- Click on the Content Label option.
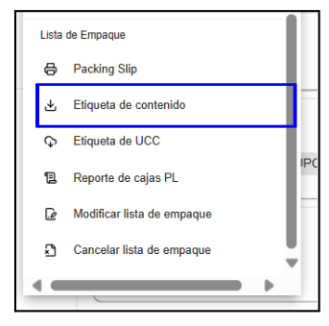
- The system will automatically generate and download a PDF file.
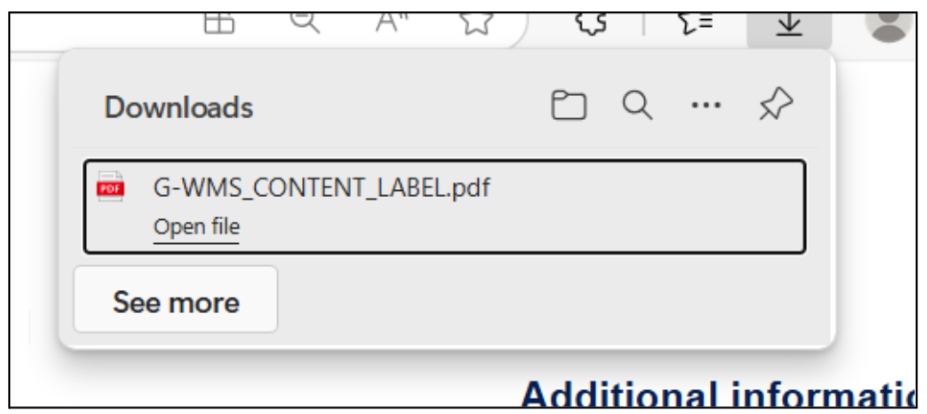
- Once downloaded, you will be able to view the label detail corresponding to the event.
PL Box Report.
This option allows you to download the PL box report for the event.
- Click on the PL Box Report option.
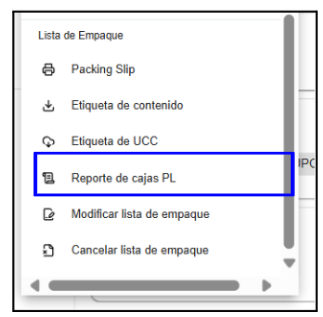
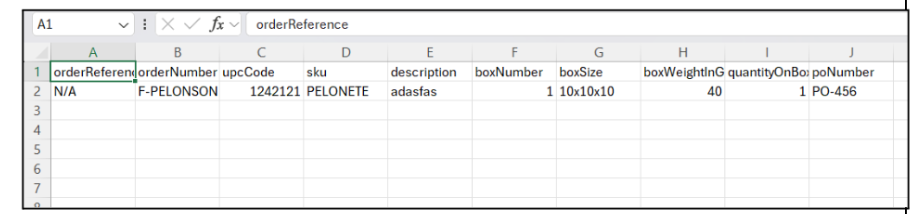
- The system will automatically generate and download an excel file.
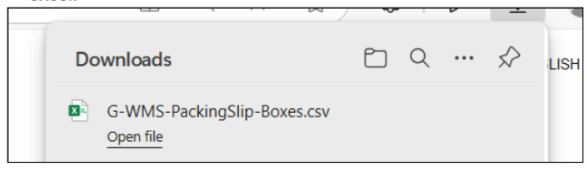
- Once downloaded, you can view the PL Box Report for the event in an excel.
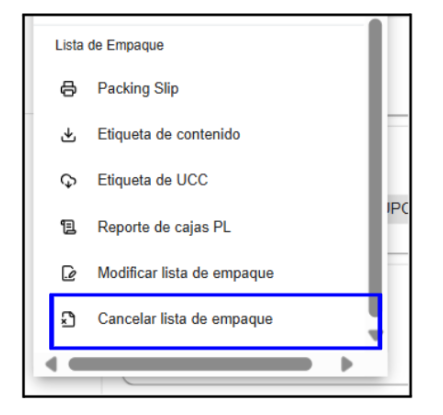
Cancel Packing List.
This action allows you to revert the status of an event from Packed to Picked.
- Click on the Cancel Packing List option.
- A modal will be displayed to assign a Tray. Scan the corresponding tray to continue with the process.
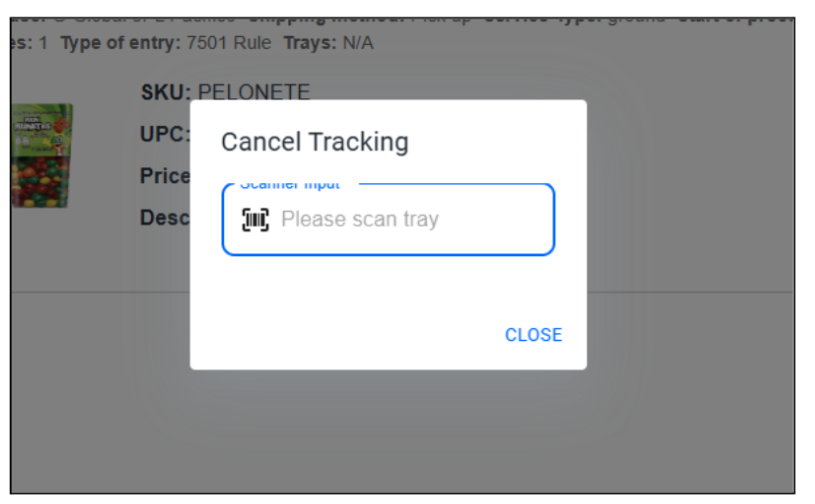
- Once scanned, the system will display a green message indicating that the event's tracking has been successfully canceled.
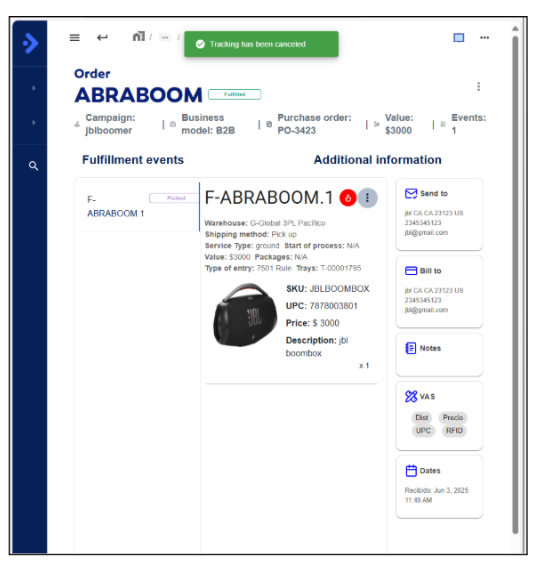
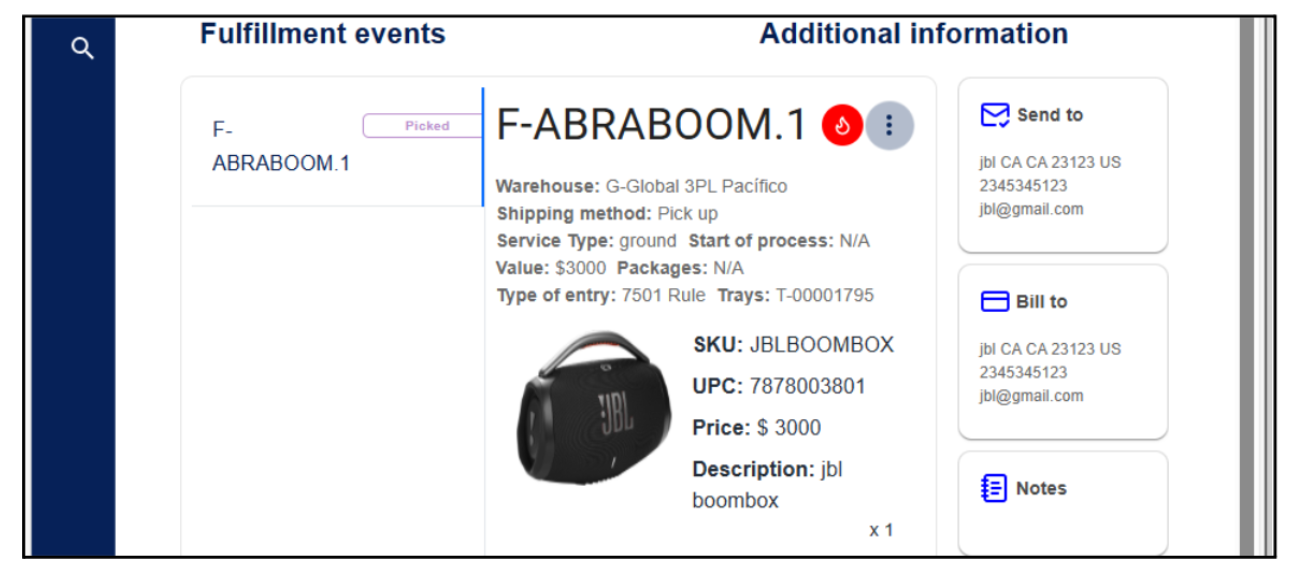
- The event will automatically change its status from Packed to Picked.
Problem solving
When an order event is in Problem Solving status, it means that the picker has reported a problem related to the scanned item. To resolve these types of events, the user must have the Problem Solving role.
How to resolve an order in Problem Solving?.
- Access the Orders Monitor module and use the filters to locate the events in Problem Solving status.
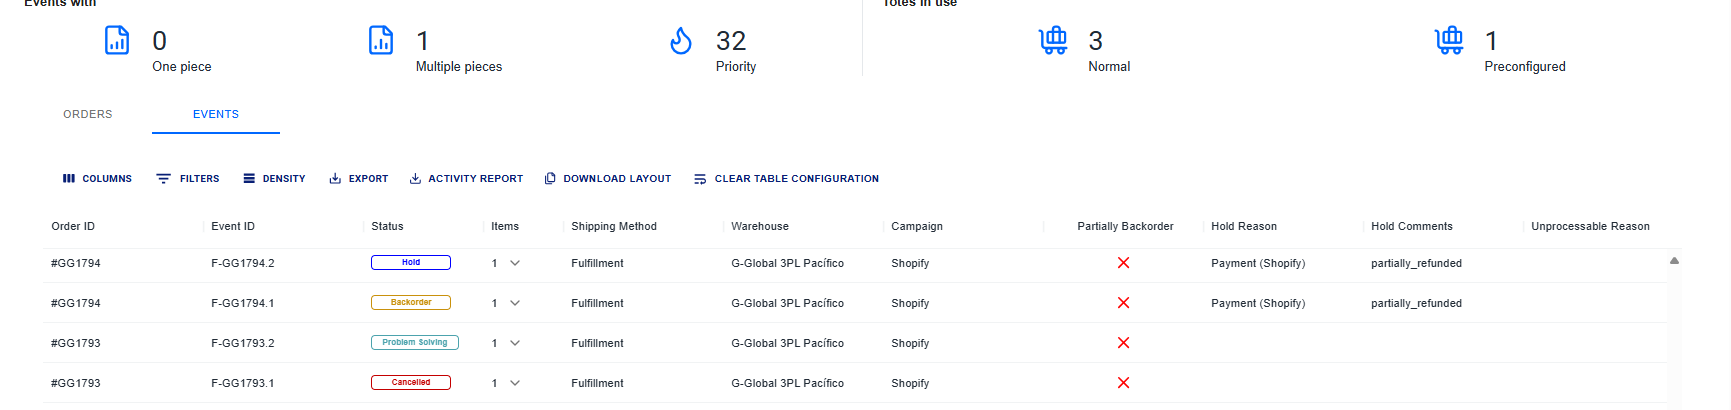
- By accessing the event with a double-click, the system redirects us to the order detail with the event that is in problem solving.
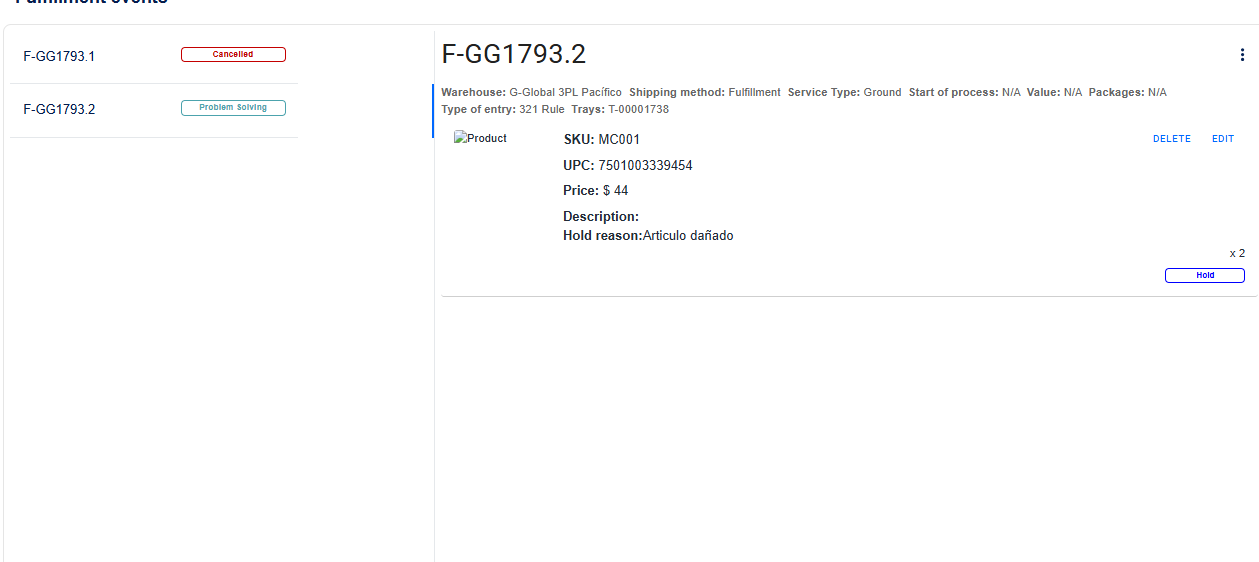
- In the detail view, identify the affected item. In its section, the Hold Reason field will be displayed, which contains a brief description of the reason why the event was moved to Problem Solving status.
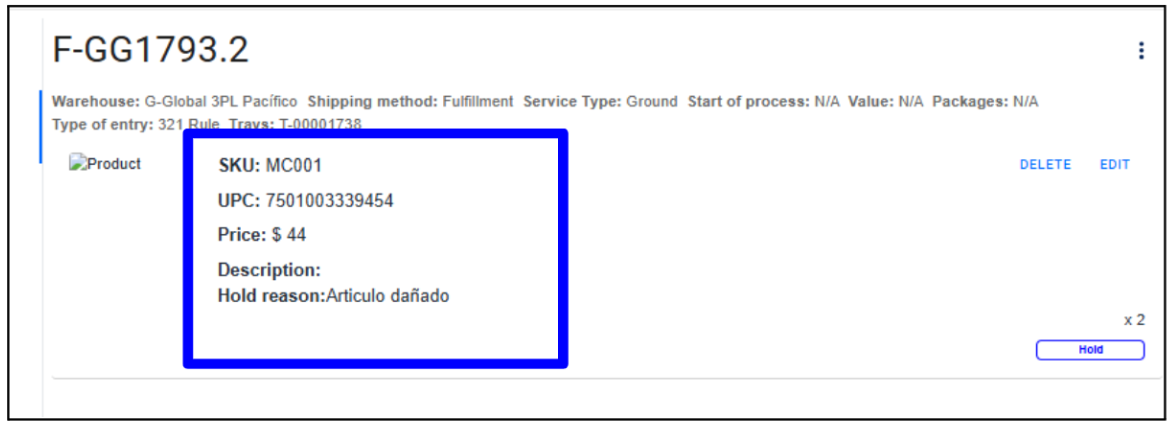
- To resolve the event, click on the three dots located in the event detail.
- A panel of options is displayed. Locate and click on the Mark as Resolved option.
- The event automatically goes On Queue to be processed again in the fulfillment event.
Extra Problem Solving Options.
Assign picker.
- This option allows you to assign a new picker to the event before marking it as resolved.
If the event is not in Problem Solving status, this option will appear disabled.
- Click the three-dot icon to display the options panel and Select the Assign picker option.
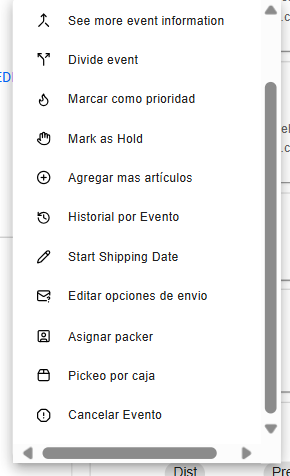
- The system will display a form with a dropdown field where you can select the new picker responsible for scanning the item related to the event.
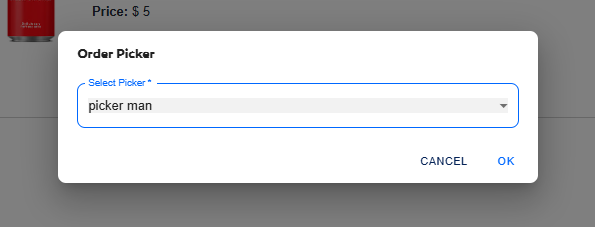
- Once the picker is selected, click OK to continue. If the assignment is successful, the system will display a green message confirming that the process was completed correctly.

Assign packer
This option allows assigning a new packer to the event.
- Click the three-dot icon to display the options panel and Select the Assign packer option.
- The system will display a form with a dropdown field where you can select the new packer responsible for scanning the item related to the event.
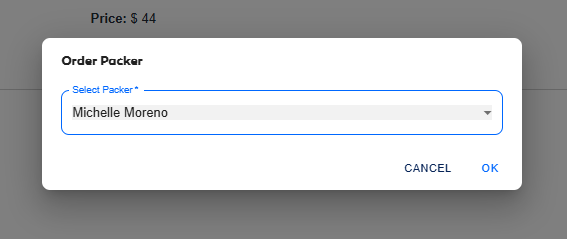
- Once the packer is selected, click OK to continue.If the assignment is successful, the system will display a green message confirming that the process was completed correctly.

Pick by case
This option allows you to scan items by case.
- Click the three-dot icon to display the options panel and Select the Pick by case option.
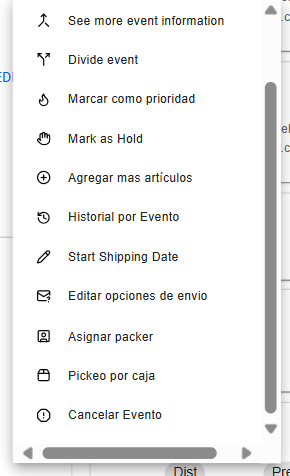
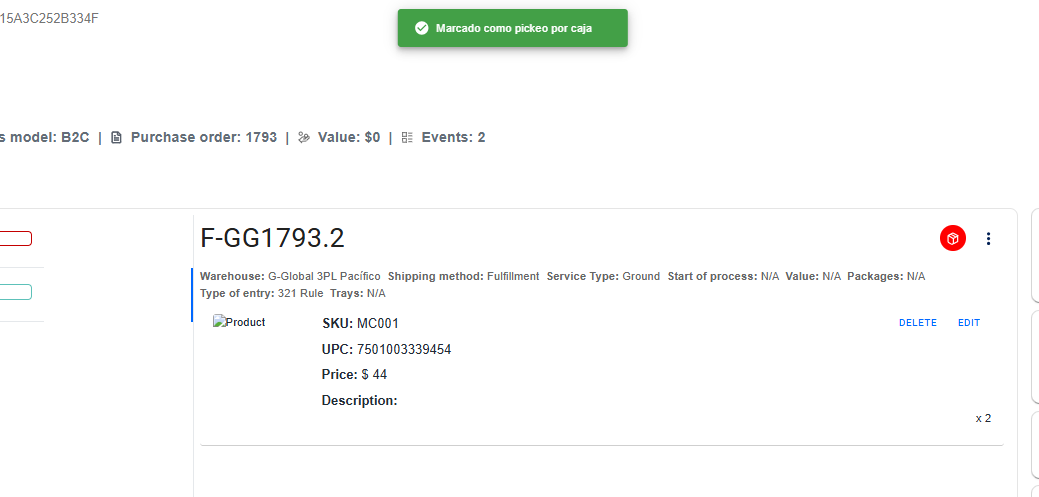
- The system then shows a green message and a case icon in the event detail, indicating that the event packing should be by case.
Pick by piece
This option allows for the individual picking of each unit of the item associated with the event.
This function is enabled when the event has pick by case activated.
- Click the three-dot icon to display the options panel and Select the Pick by piece option.
- The system will display a green message indicating that the event must now be managed by piece picking.
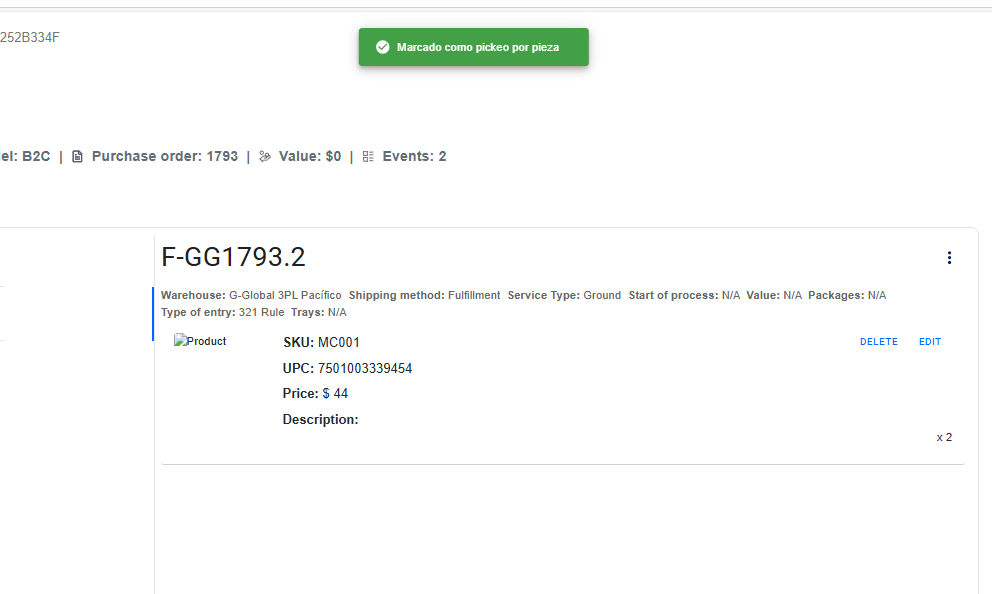
The Pick by piece and Pick by case options are only available before the event changes to the Picked state.