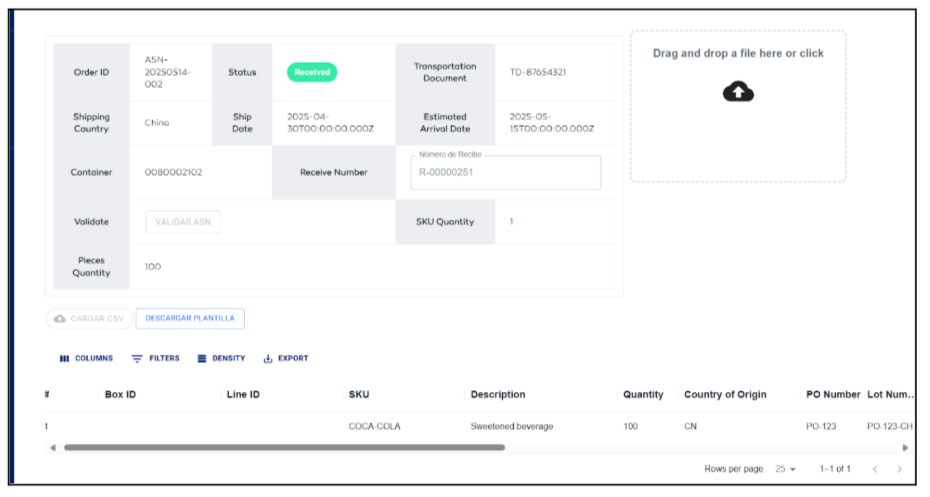
Shipping Notice
The Shipping Notice module allows the management of Advance Shipping Notices (ASNs) sent by clients. This module details the information related to items that will be received, including description, quantity, country of origin, and more.
An ASN serves as a prior validation and confirmation of the packages that will be processed in the system before a receiving order is generated. This validation ensures that the shipping data is complete and aligned with the WMS receiving orders.
Create an ASN
- Click the Create Shipping Notice button at the top of the table.
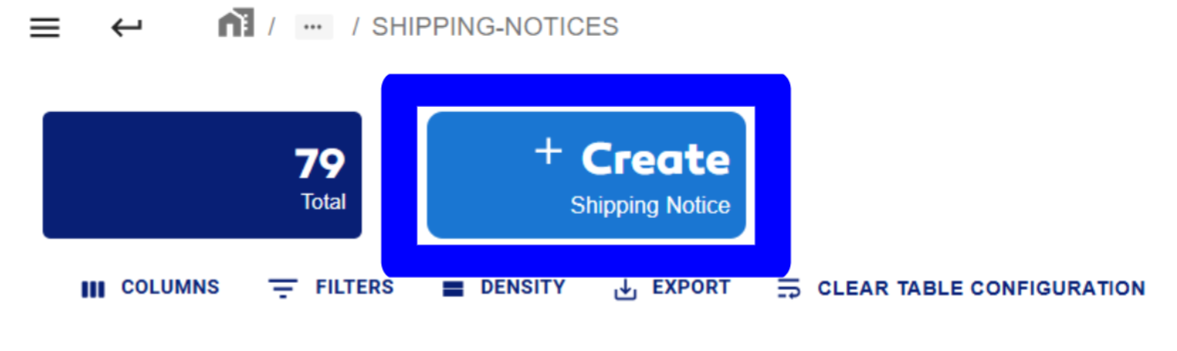
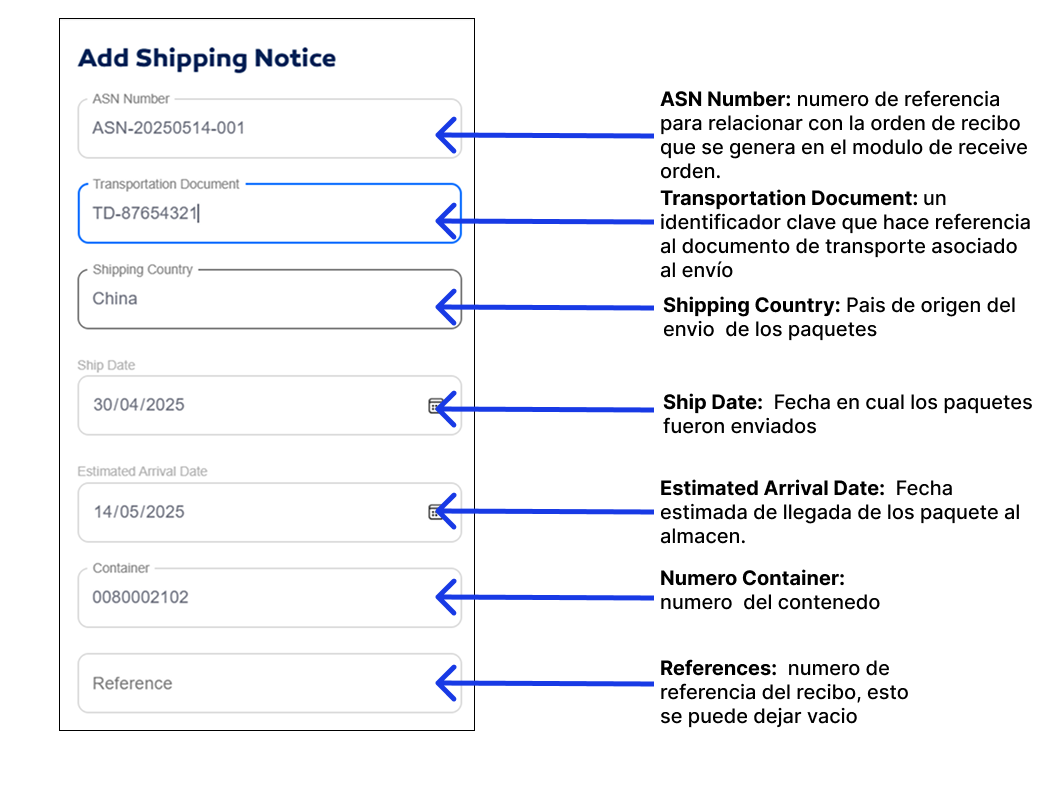
- A form will open, prompting the following information to generate your ASN.
note
The information to fill out the form is provided by the client via email.
- Then click on ADD.

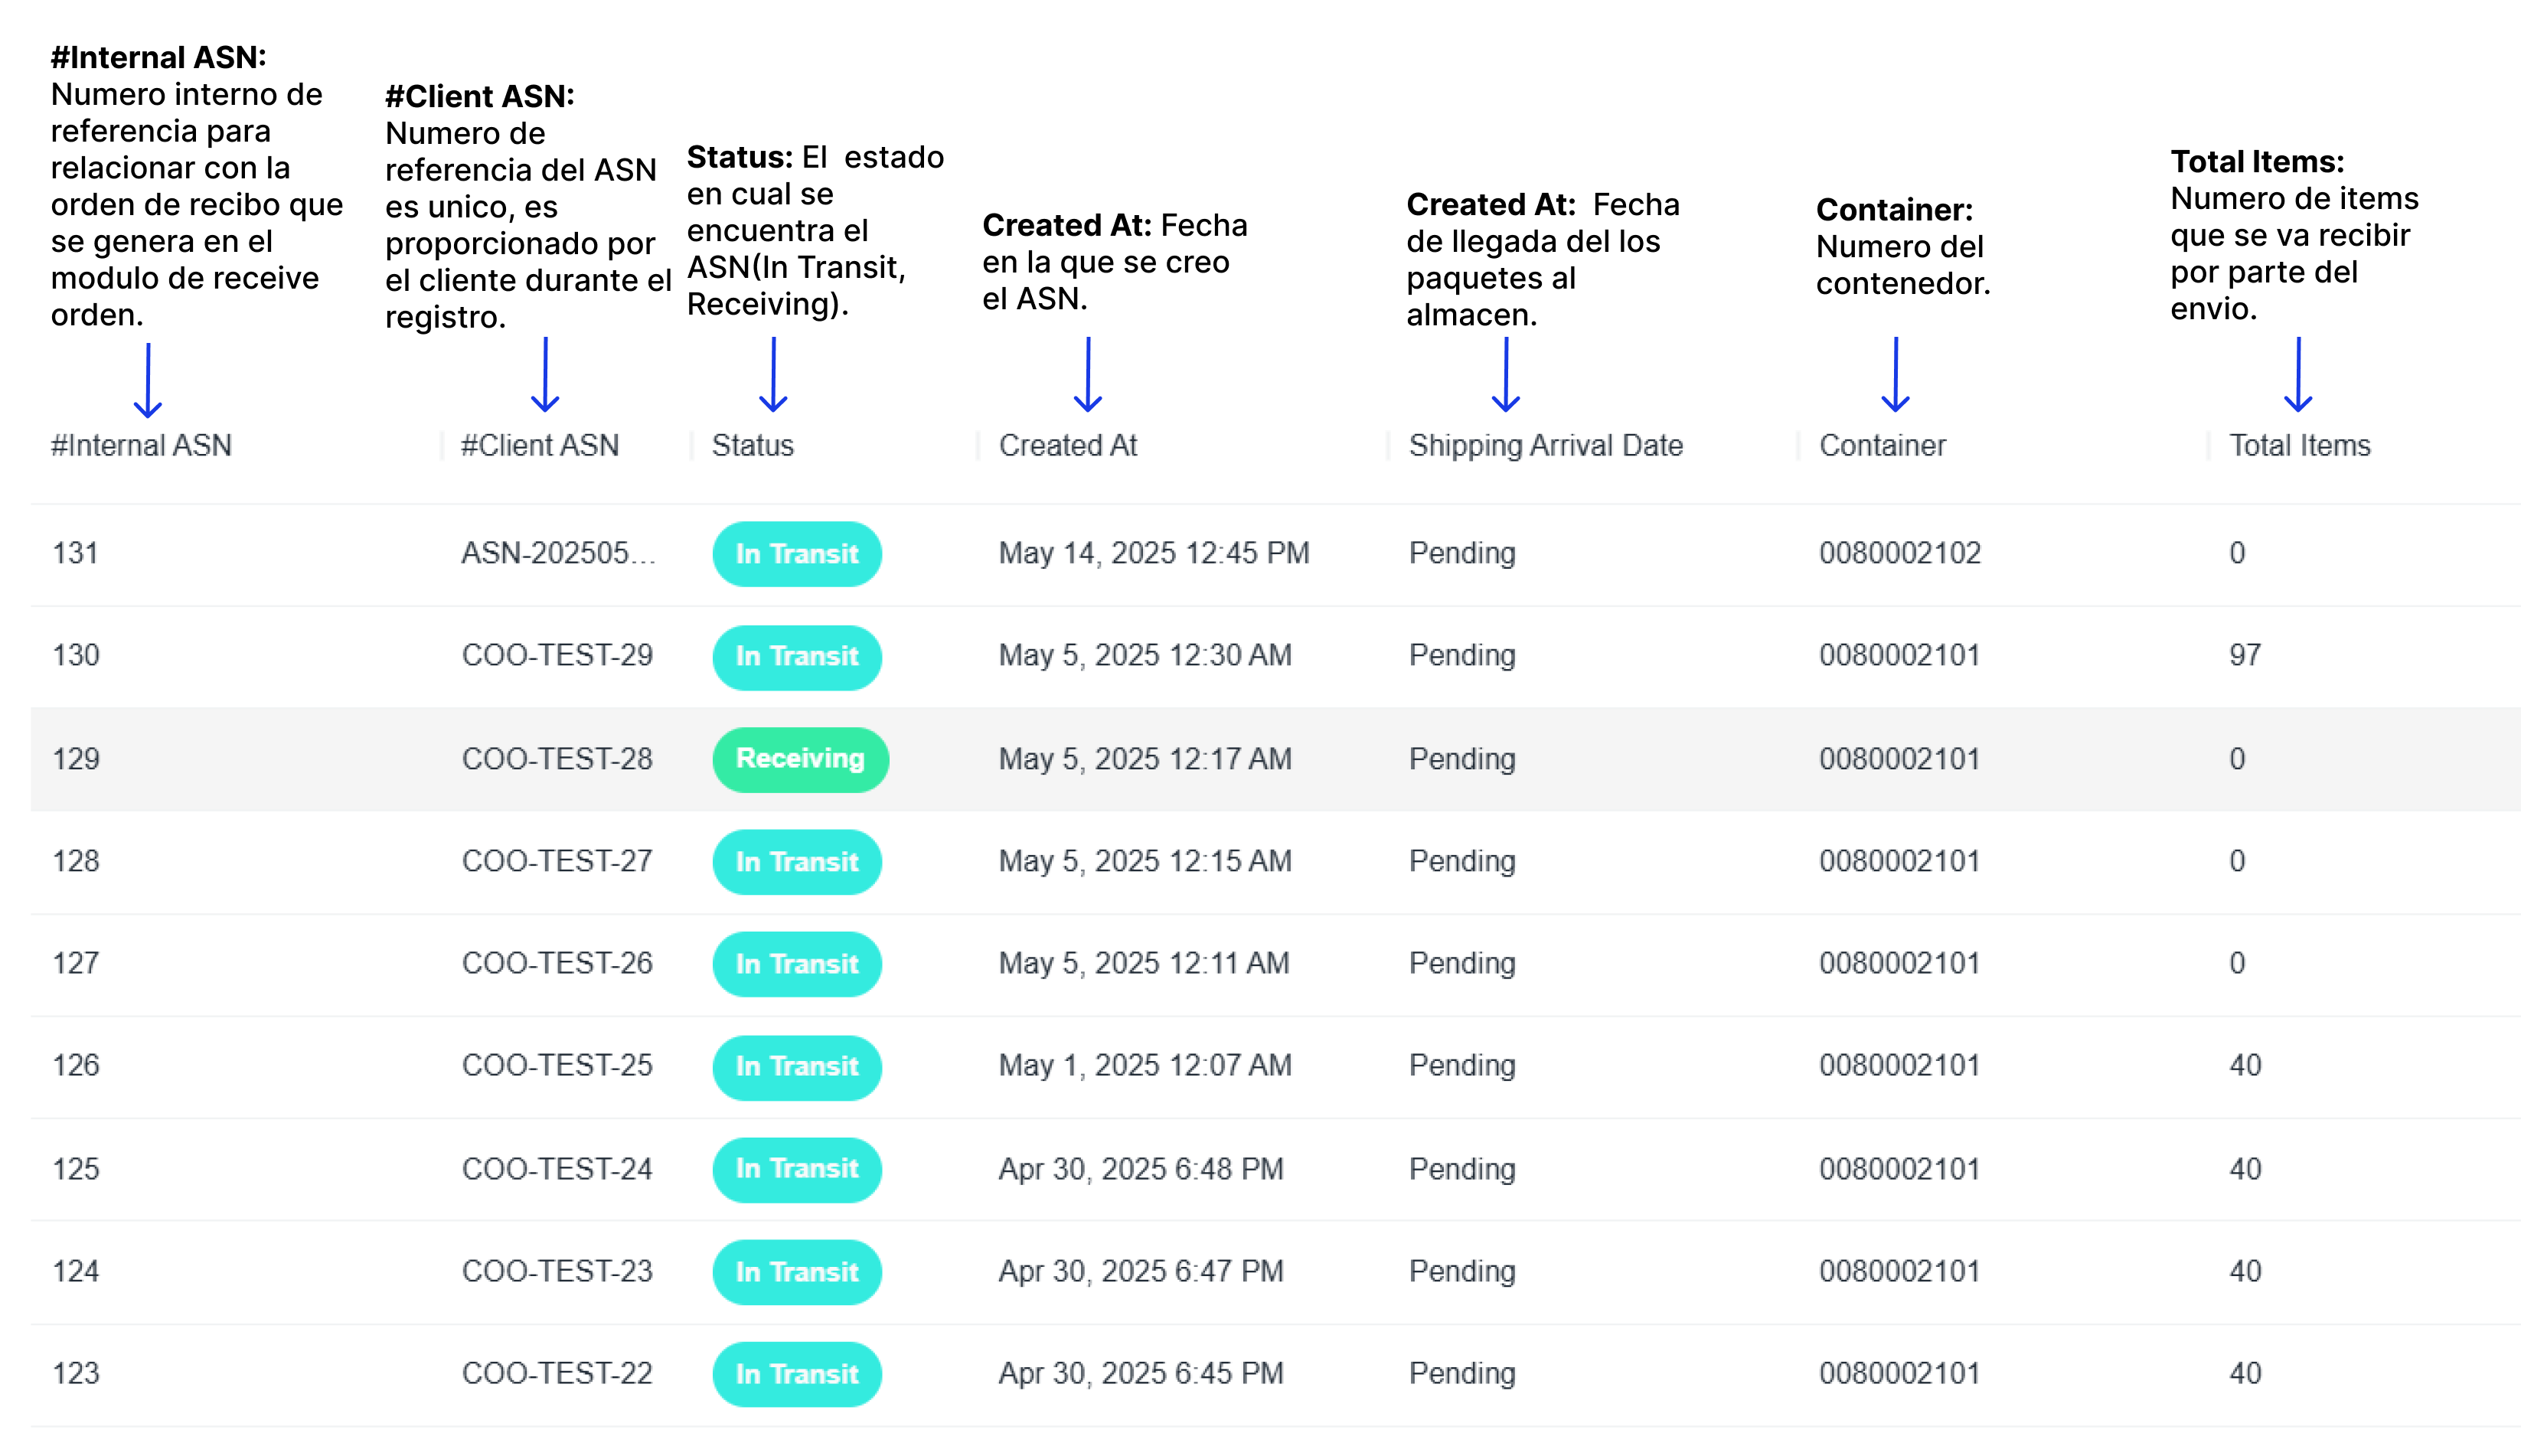
- If the process is successful, a green message will be displayed with the internal ASN number assigned by the system and the table will update as shown.
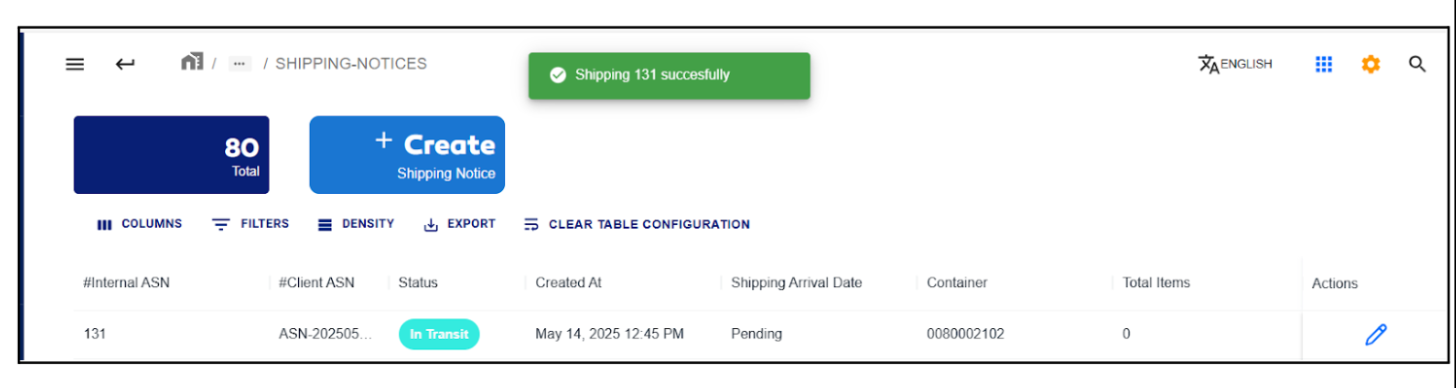
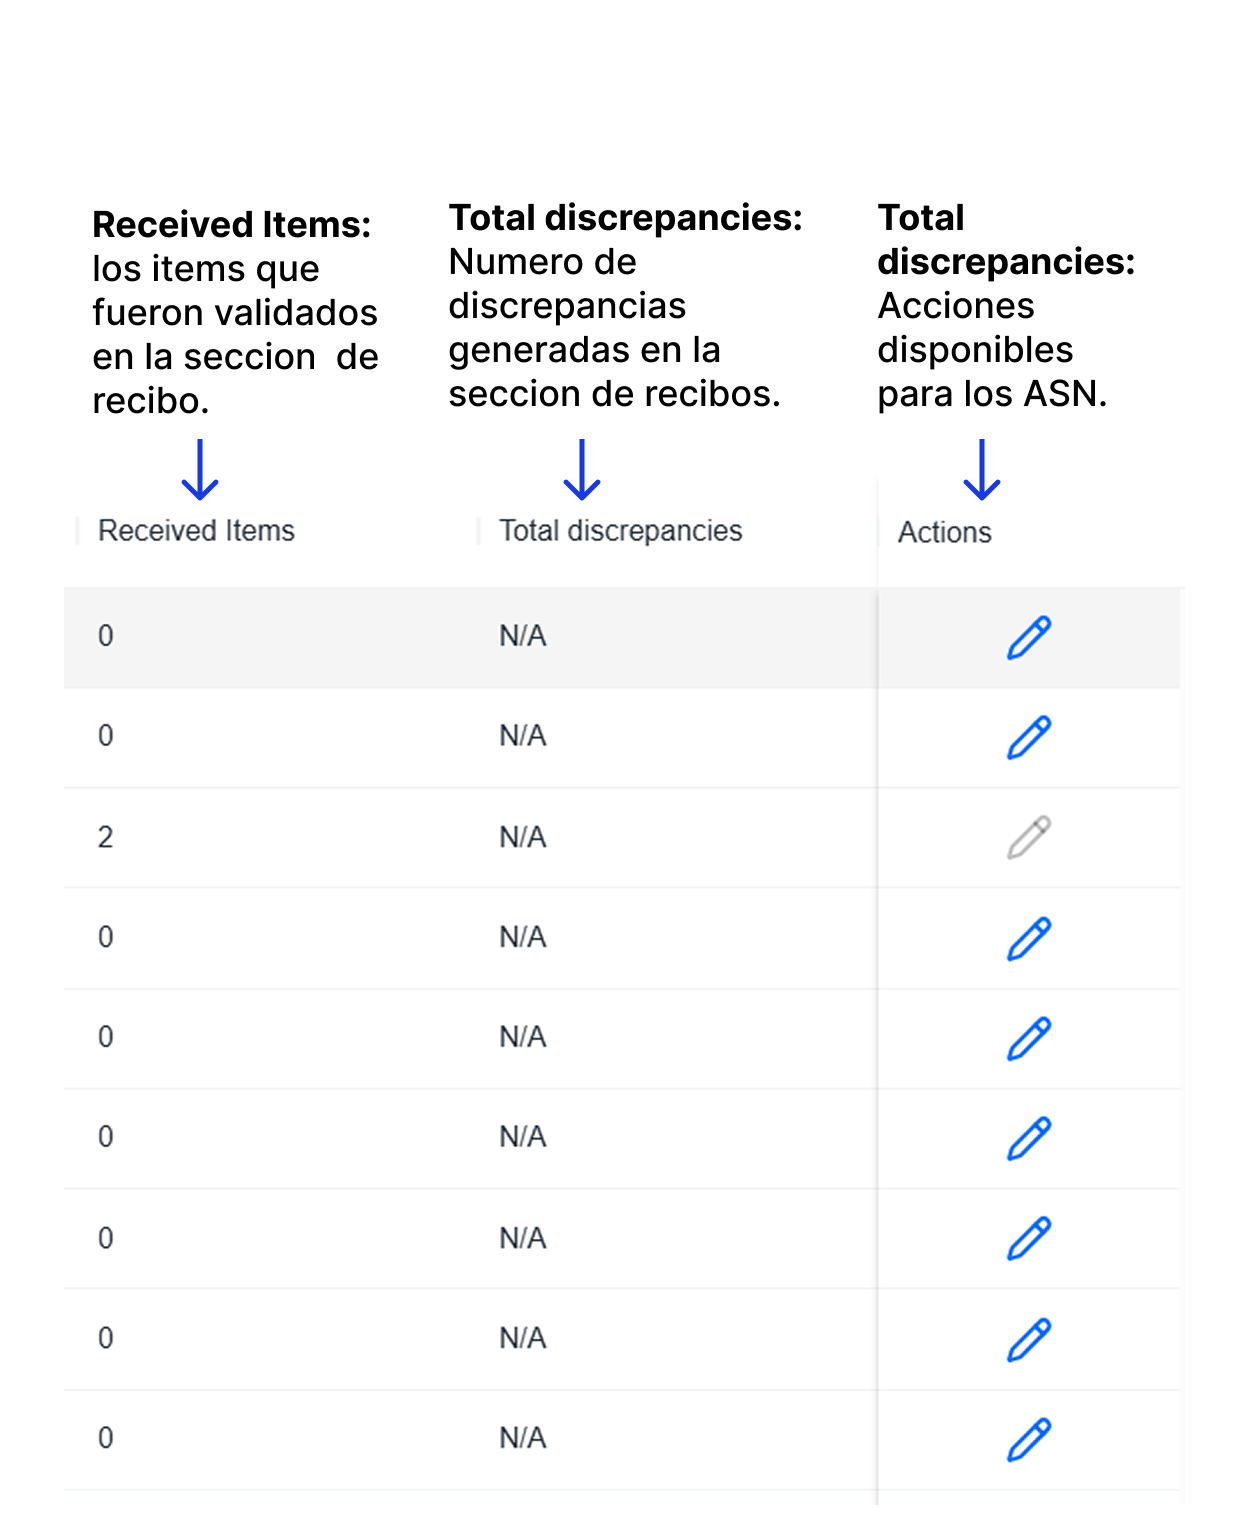
- The table displays the following ASN information:
Edit an ASN
- To update an ASN, click the pencil icon.

- A form will appear with the editable fields.
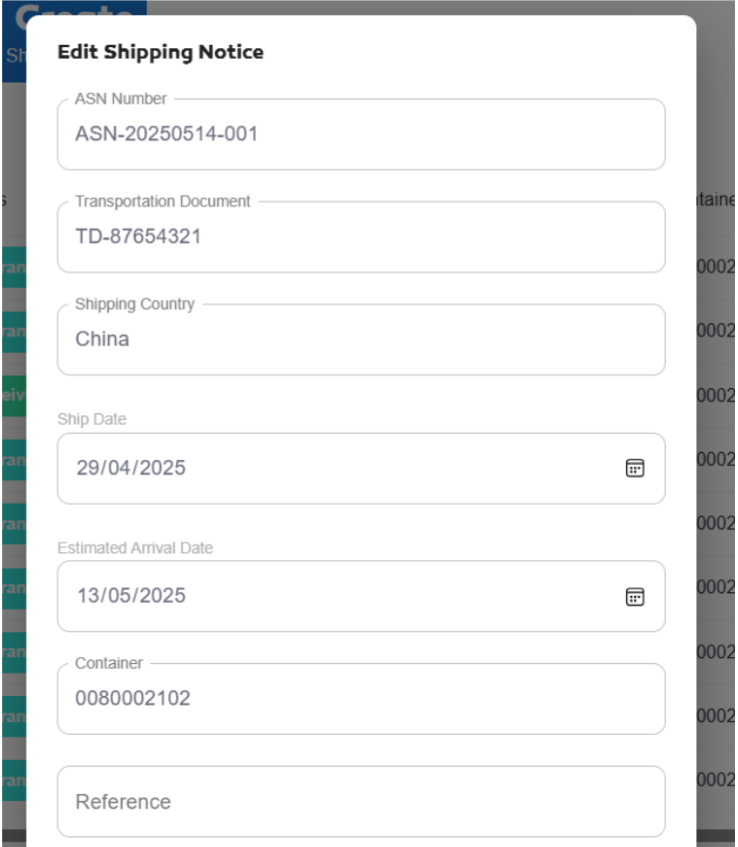
- After editing the data, click the EDIT button.

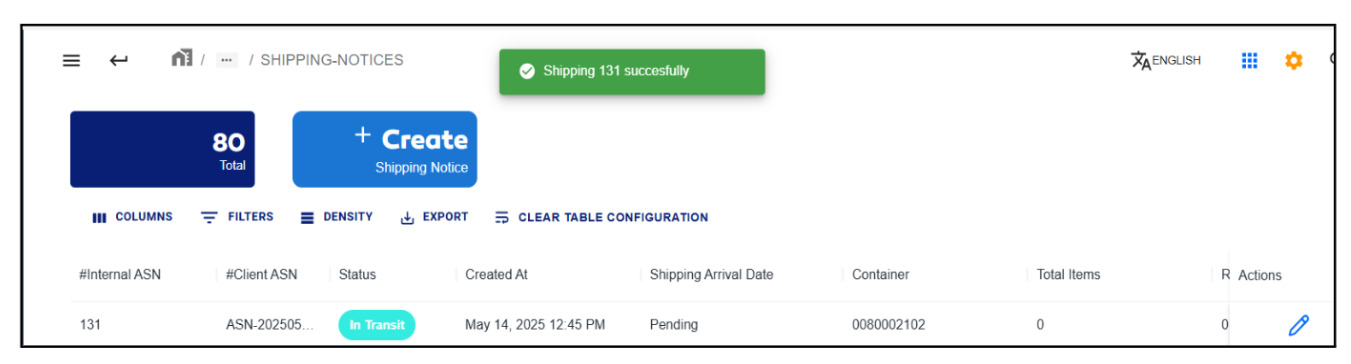
- The system will update the ASN and display a green message with the updated internal ASN number.
Add Items to the ASN
- After creating an ASN, double-click on the desired ASN row to add items.

- The system will redirect to a detailed view of the ASN.
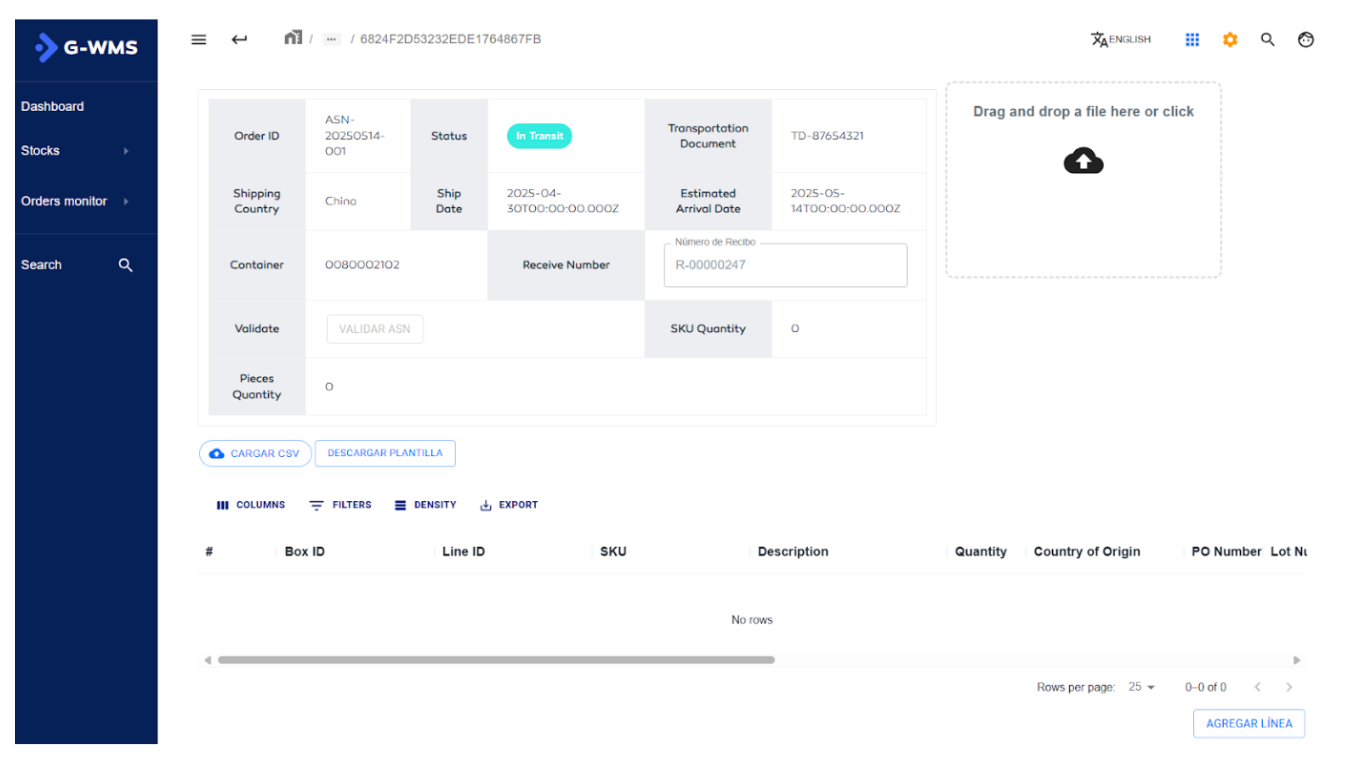
- To add an item, click on Add Line at the bottom of the view.
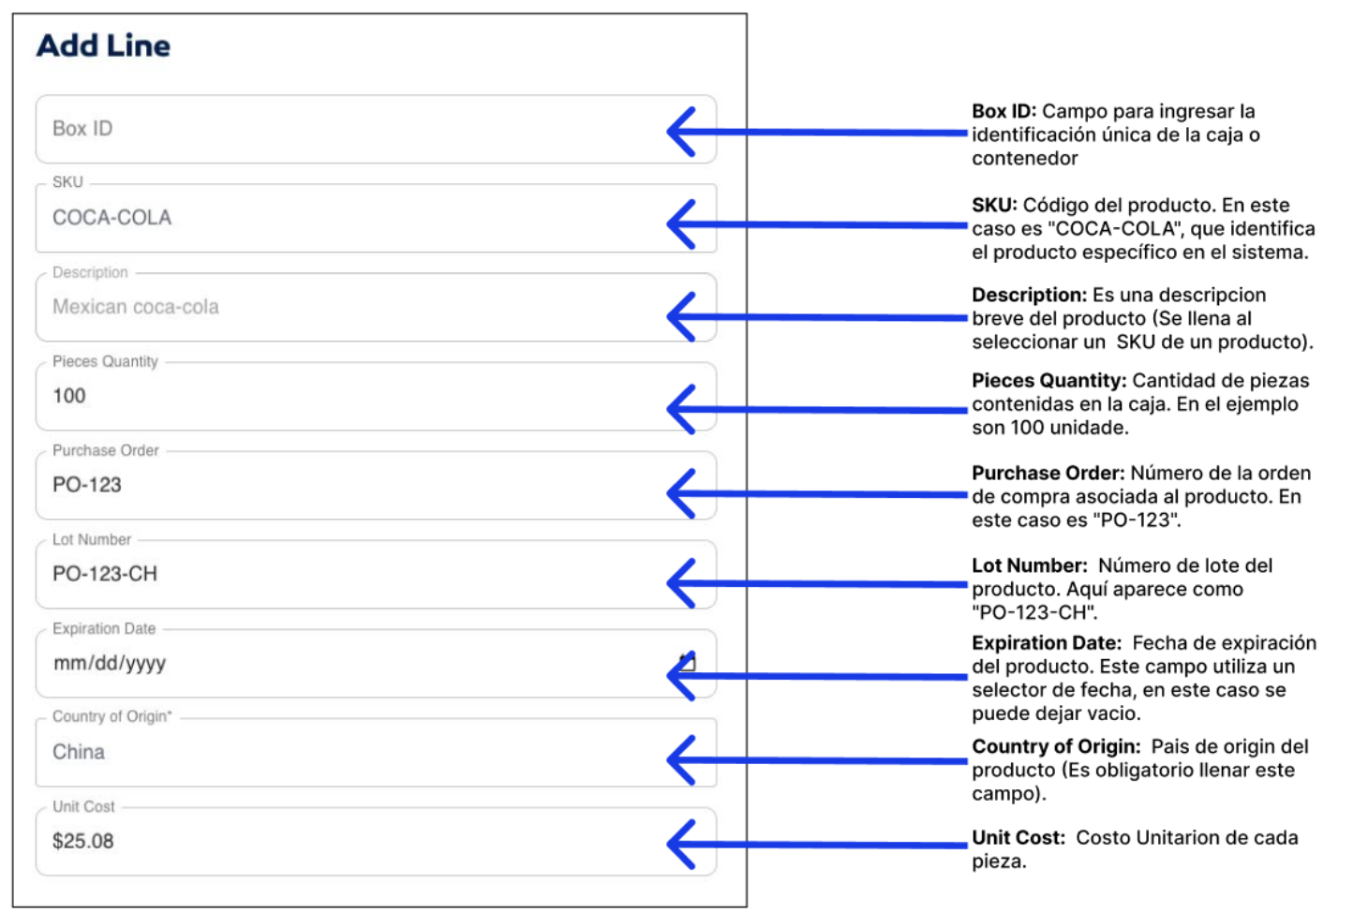
- A form will open requesting the following fields.
- After filling in the fields and confirming the information, click to continue.

- If successful, a green message will indicate that the item line was created.
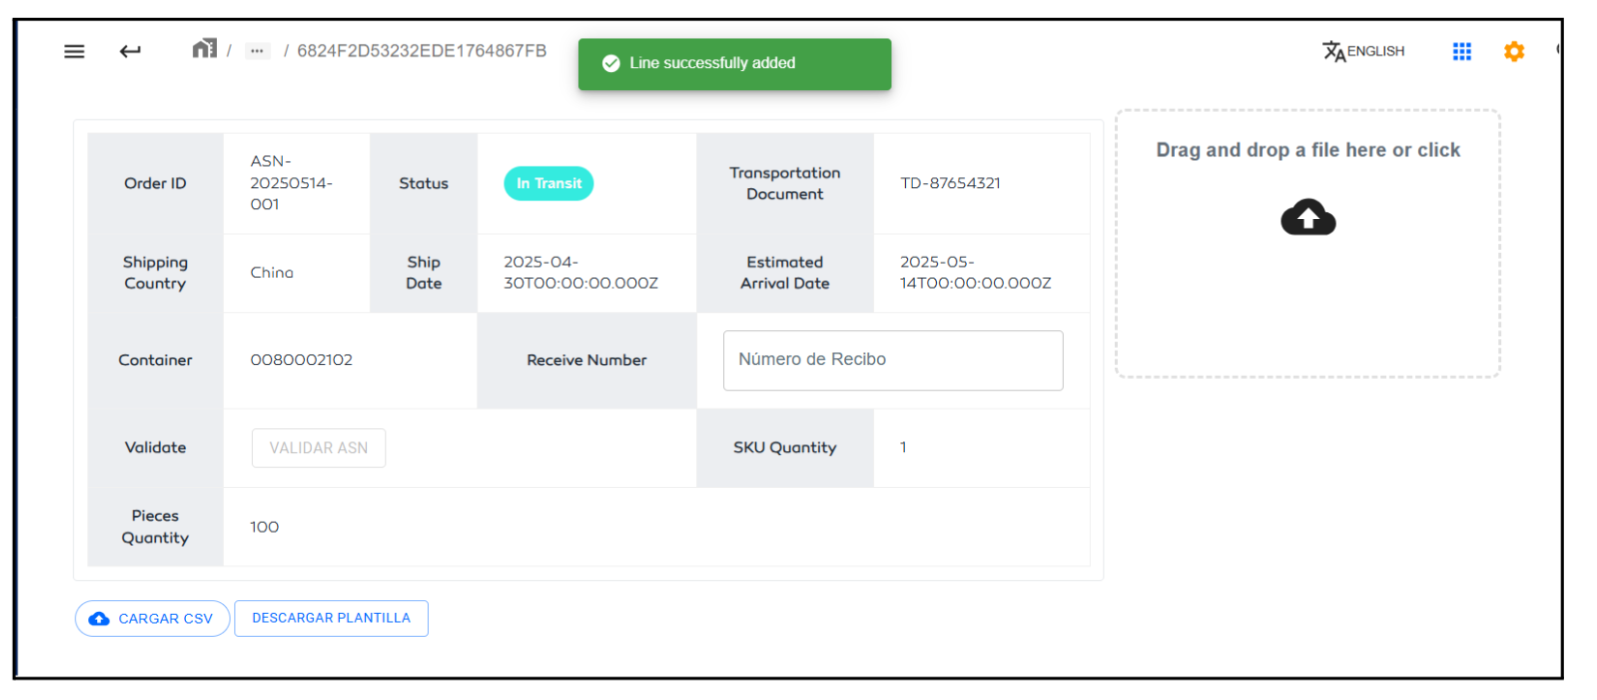
- To verify that the item line was added, check the table at the bottom of the ASN detail section.
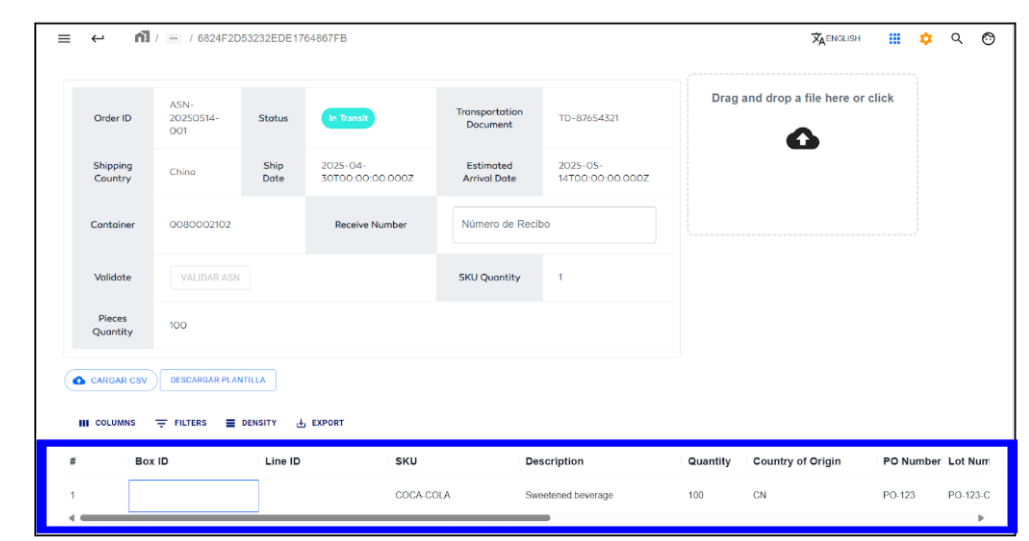
Upload CSV File to Add Multiple Item Lines to an ASN
- Instead of adding item lines manually, you can upload a CSV file with the relevant information. Click on Download Template at the bottom of the ASN detail view.
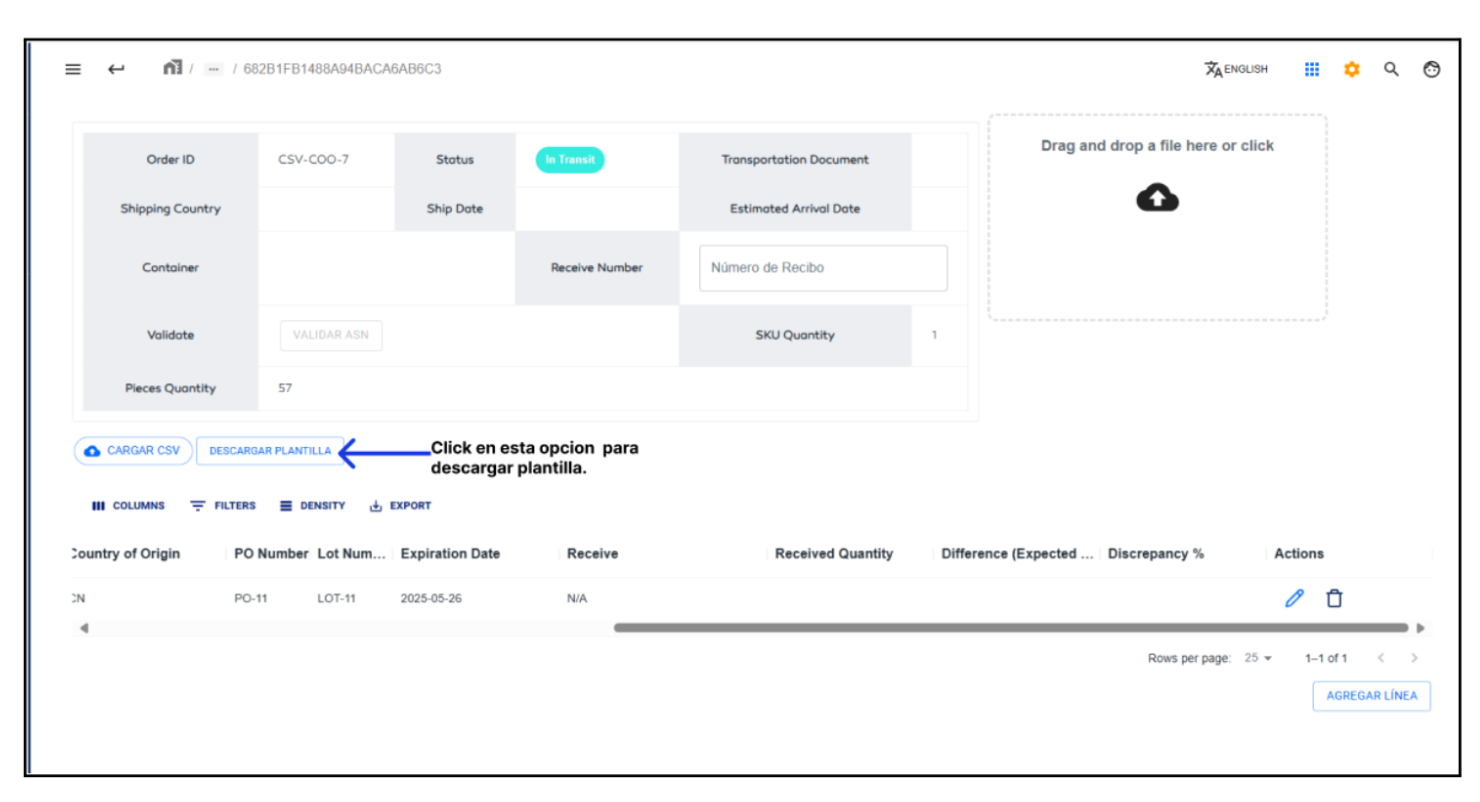
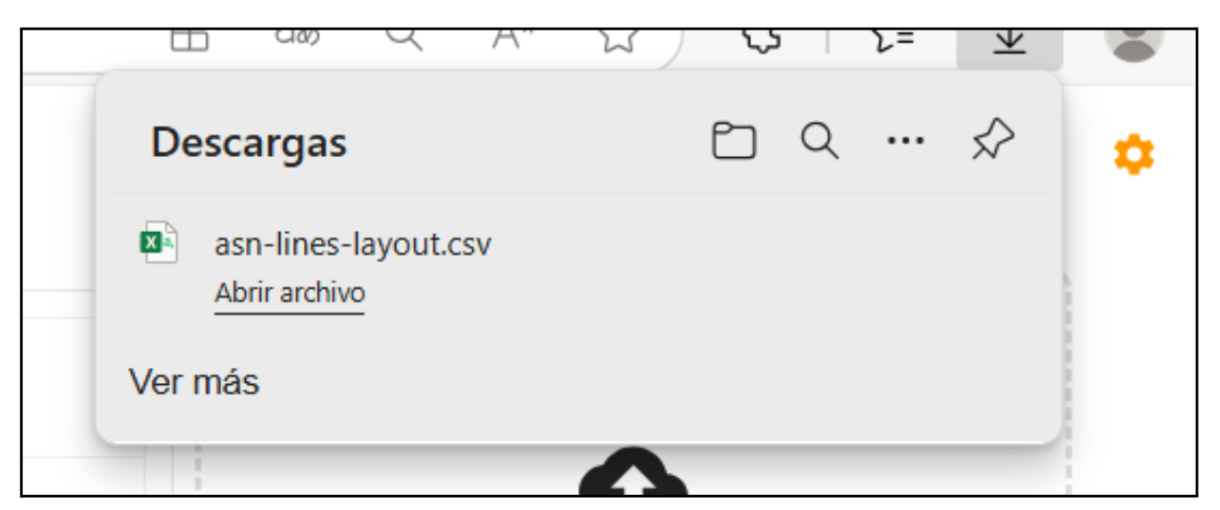
- A CSV file named
asn-lines-layout.csvwill be downloaded. This file serves as a template indicating the structure and required data for uploading item lines.
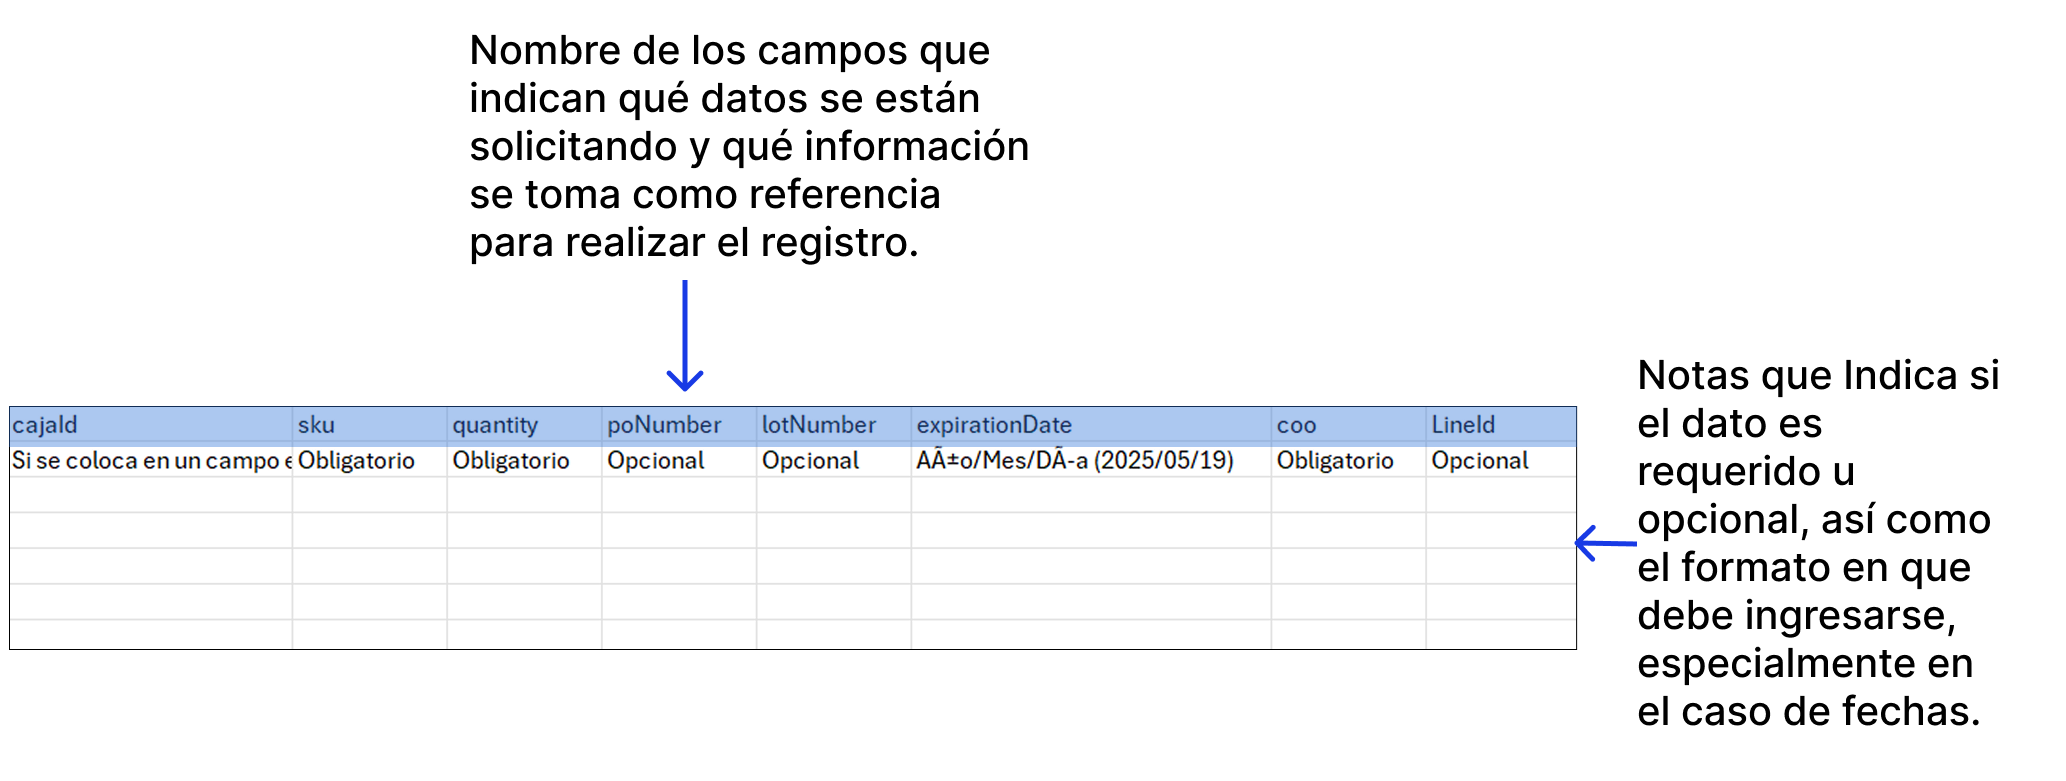
- When opened in Excel, the template will look like this:
- Fill in the file with the item lines you want to add, as shown in the following image:

note
Optional fields can be left blank. Required fields must be filled to proceed.
- Once completed, save the file and in WMS, click UPLOAD CSV.
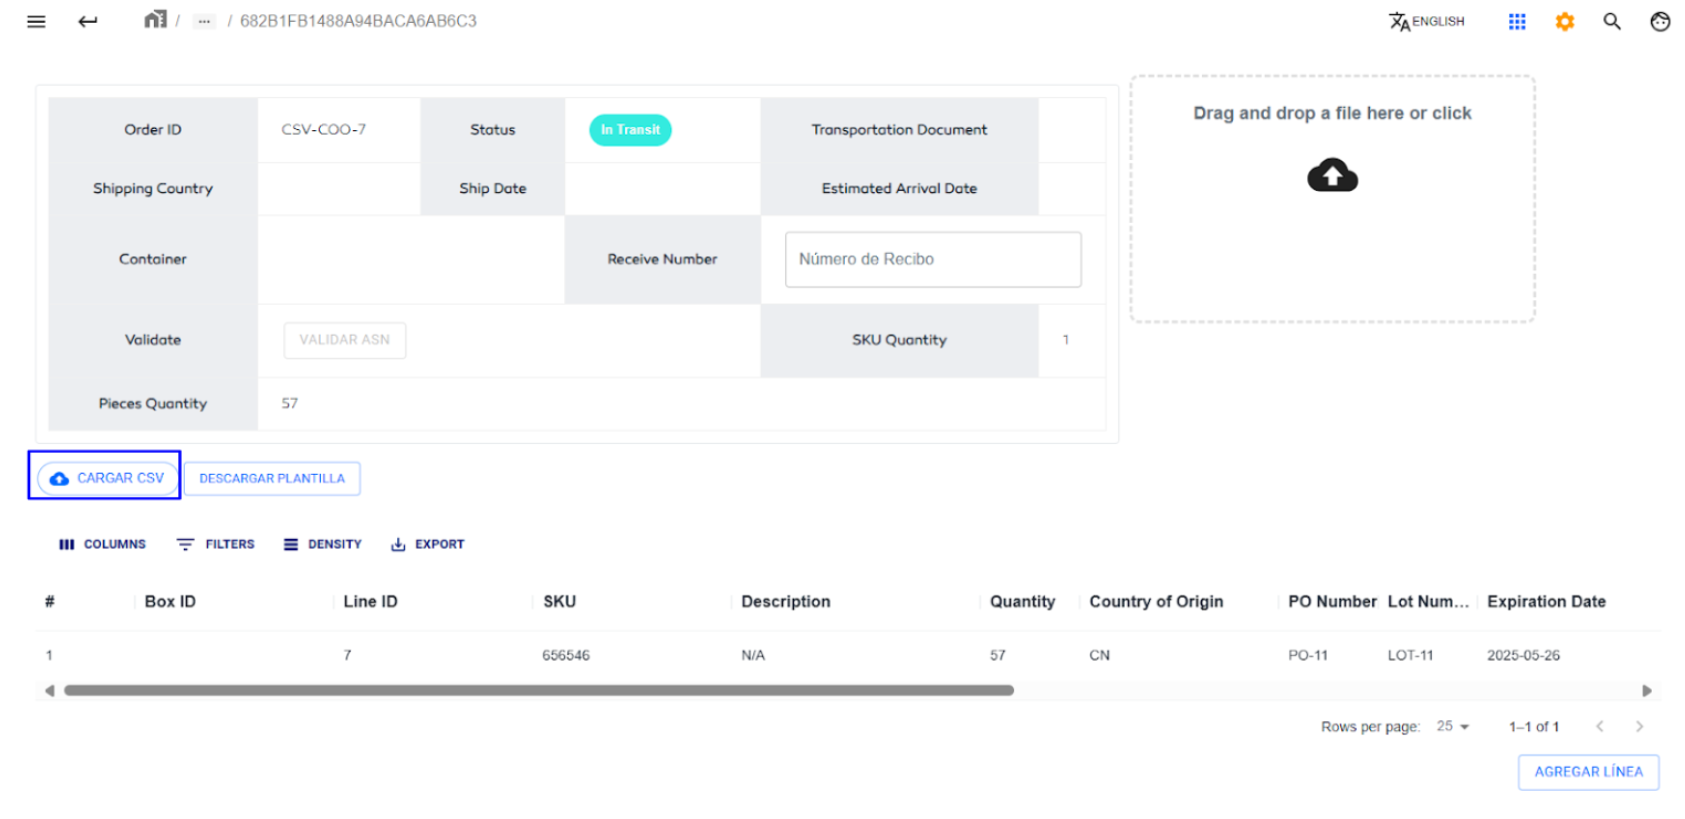
- If the file is valid, a green message will confirm successful import.
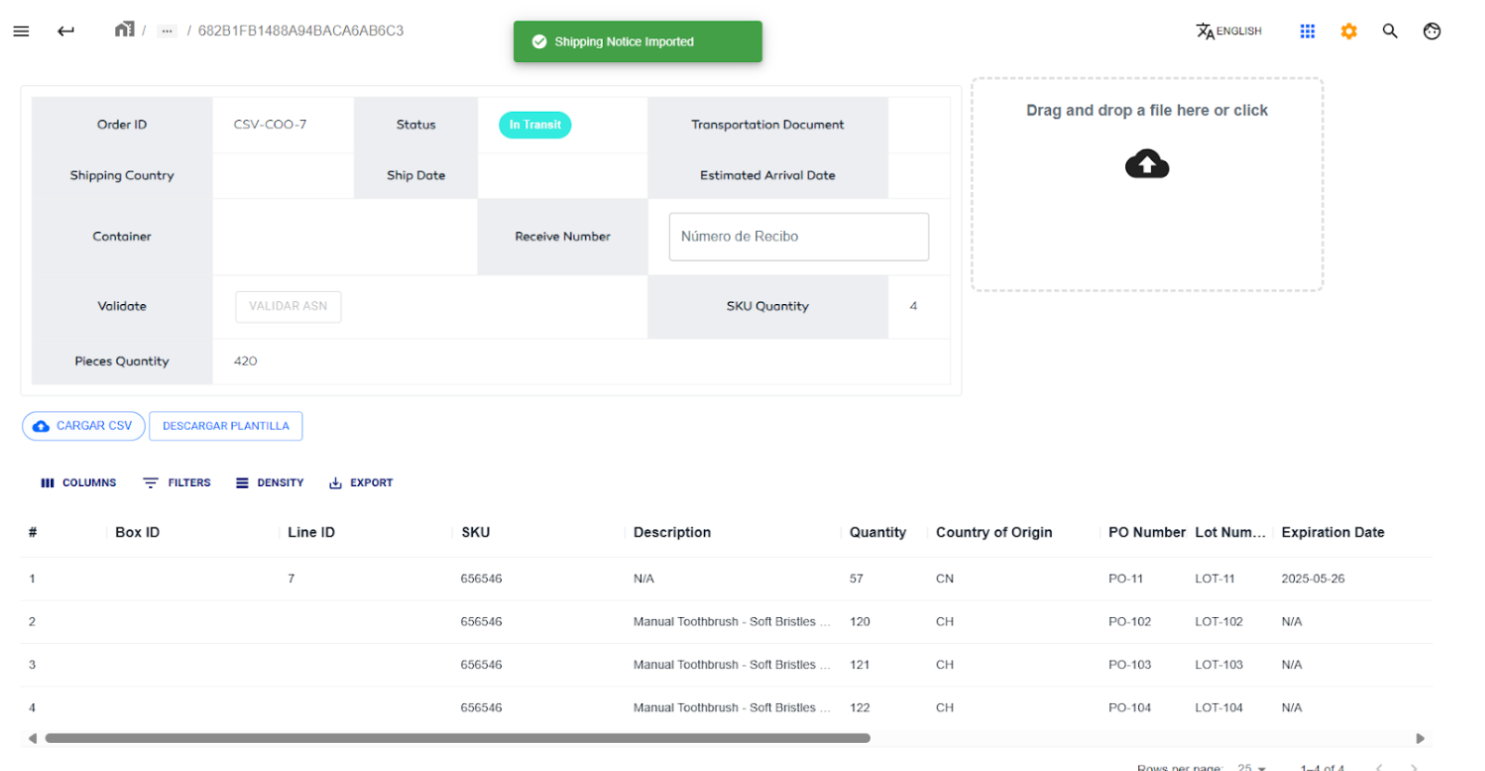
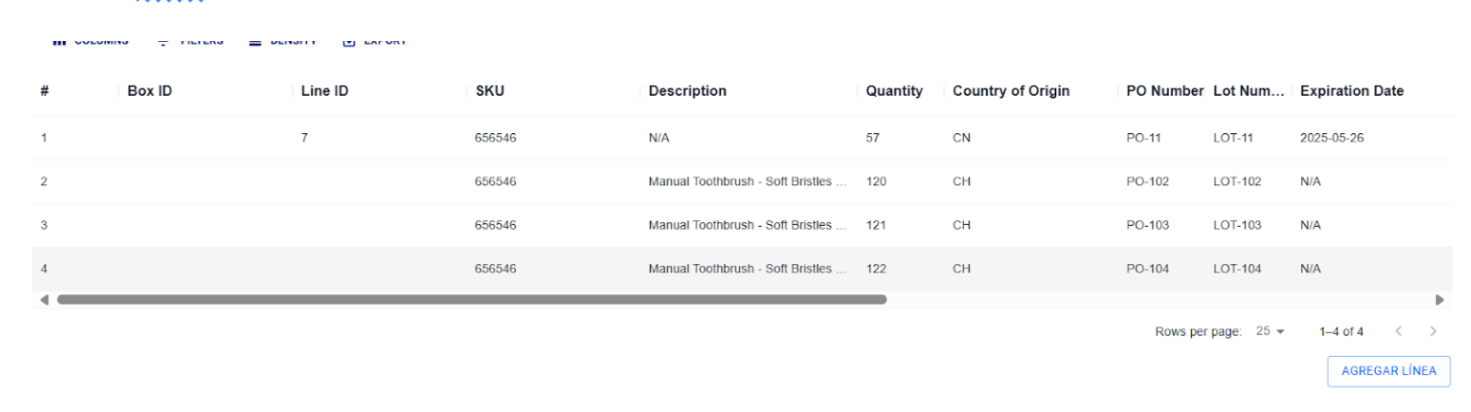
- Finally, verify that the data was imported correctly in the item lines table.
Edit or Delete an Item from the ASN
Edit
- To edit an item line, click the edit icon in the Actions column.

- A form will appear. Editable fields include Pieces Quantity, Purchase Order, Lot Number, and Expiration Date.
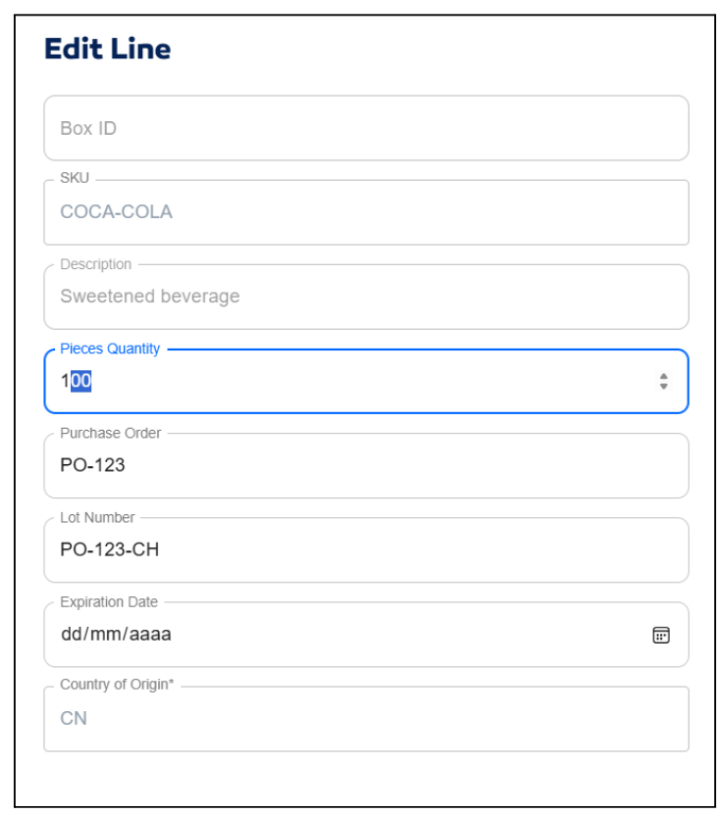
- Click EDIT to save the changes.

Delete
- To delete an item line, click the corresponding icon in the actions column.

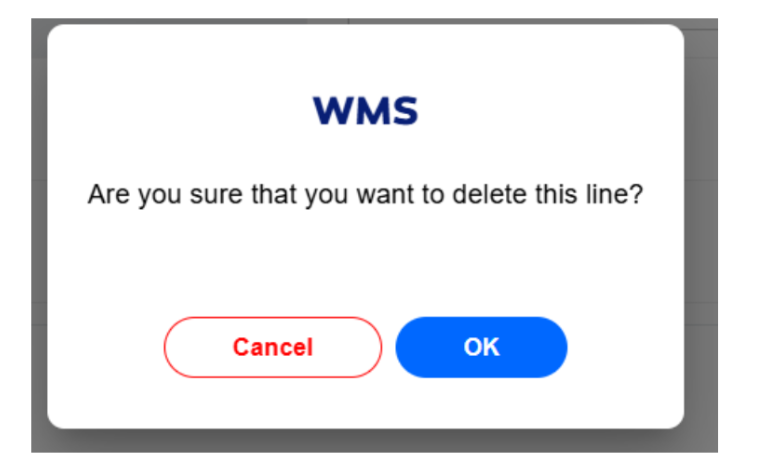
- A confirmation modal will appear. Click OK to proceed.
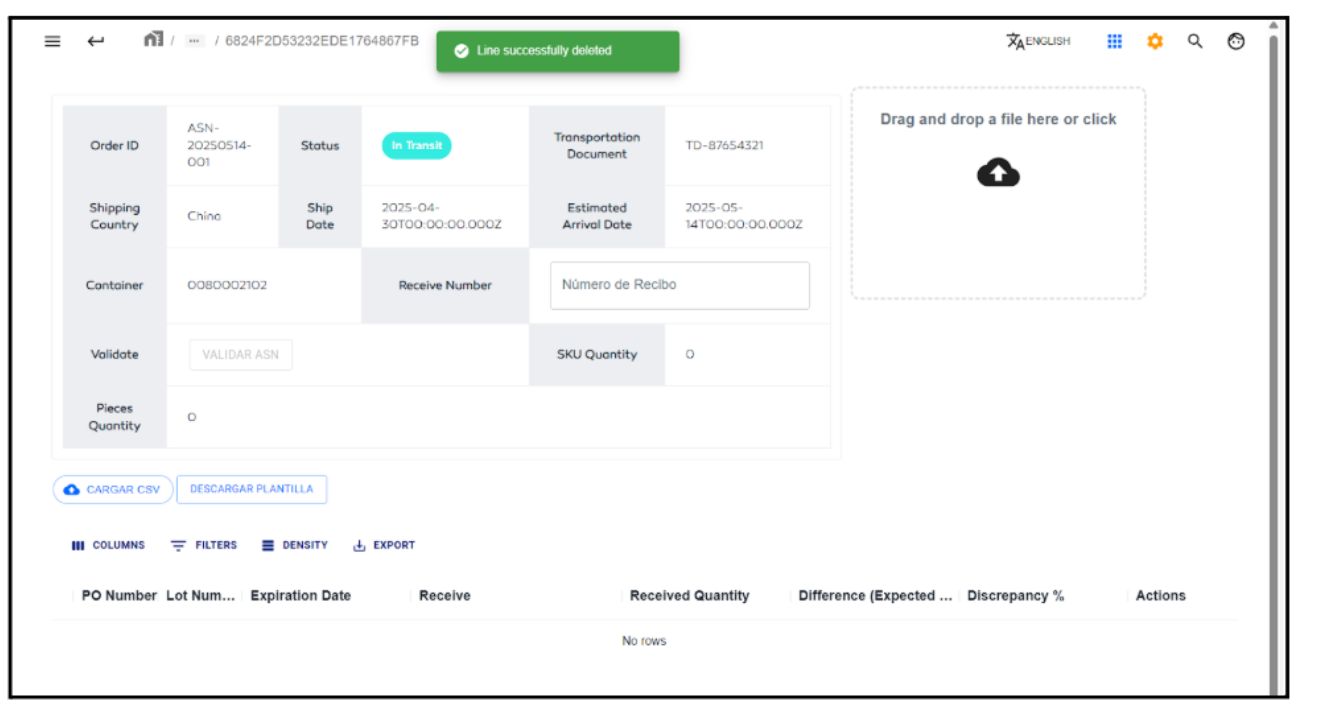
- A green message will confirm deletion and the item will be removed from the table.
Change ASN Status: "In Transit", "Receiving", and "Received"
Change from "In Transit" to "Receiving"
- After creating an ASN and adding the Item Lines, you'll notice the default status is In Transit.
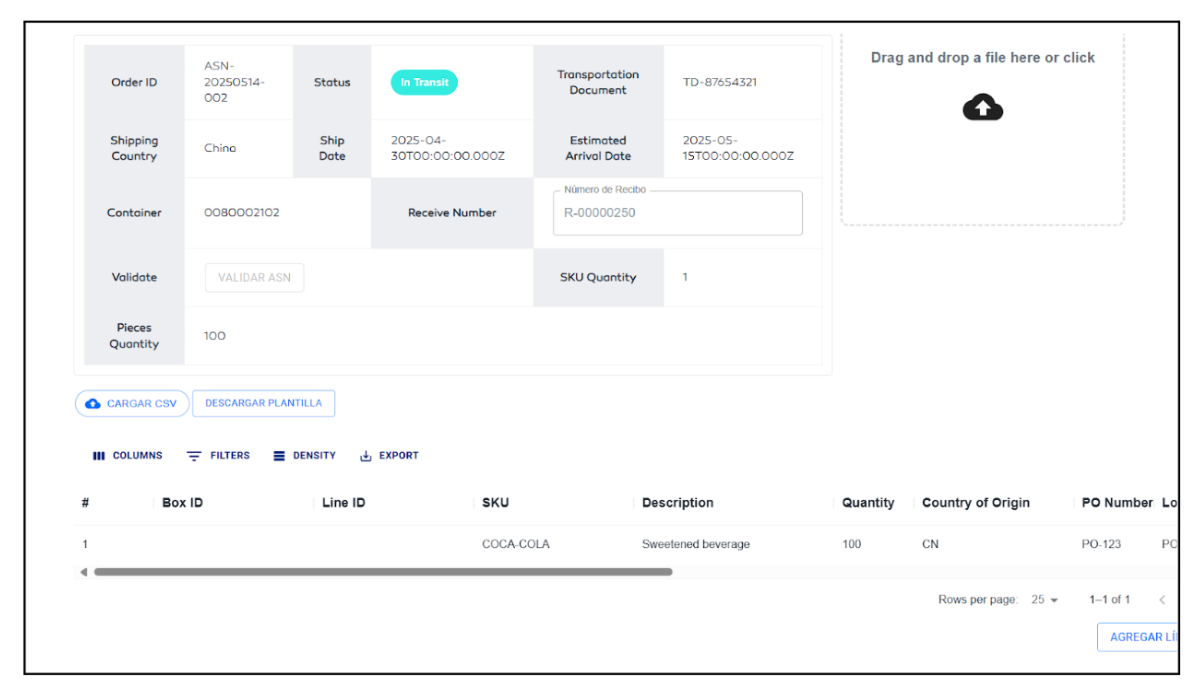
- To change the status to Receiving, a receipt must be created in the Receive Orders module. Once the receipt is created, the ASN status automatically changes to Receiving.
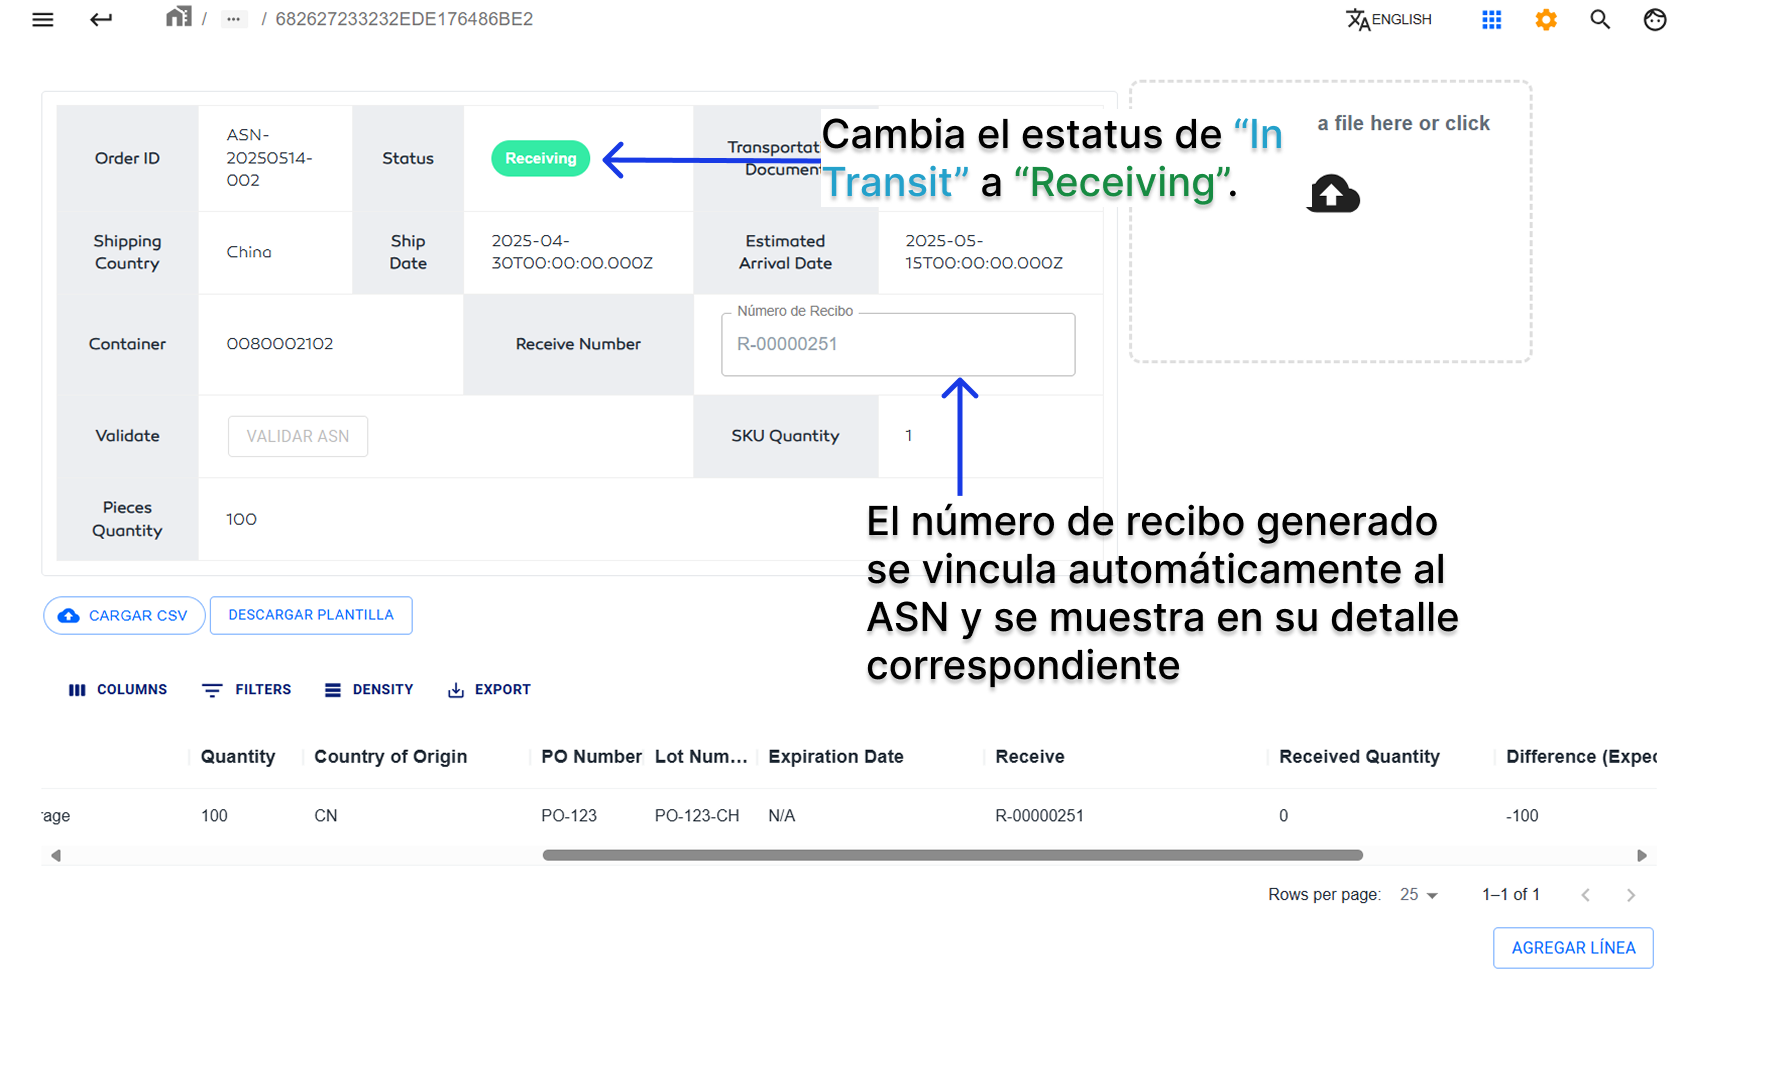
- The Difference (Expected vs Received Quantity) and Discrepancy columns in the item line table will also appear, with default values.

- To update these values, create PPLs in the Receive Orders module, and scan them in the Receive Orders Picking module. Once done, both columns should update to 0, indicating no discrepancies.

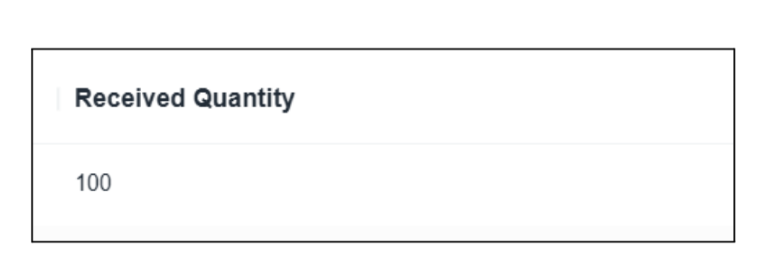
- As each PPL is scanned in Receive Orders Picking, the Received Quantity column updates with the quantity entered into the warehouse.
Change from "Receiving" to "Received"
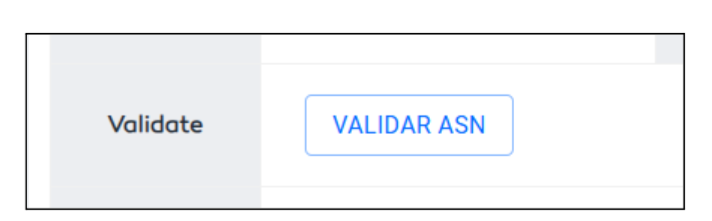
- Once scanning is complete and there are no discrepancies, click VALIDATE ASN in the ASN detail view to change the status to Received.
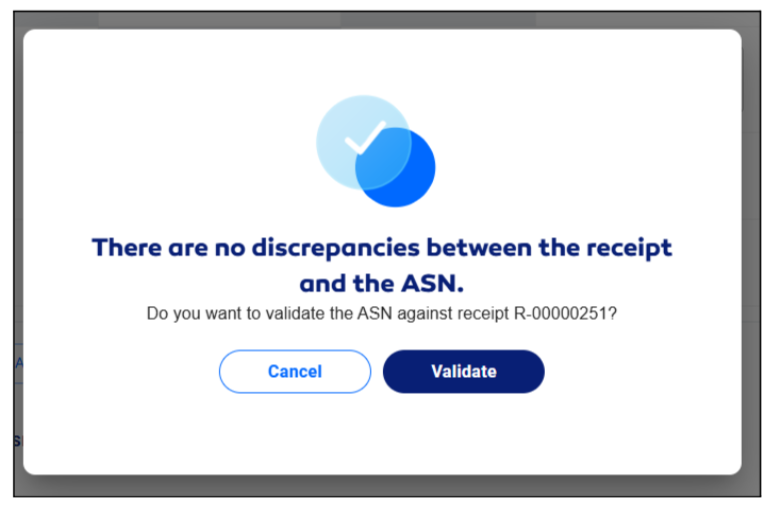
- A modal will appear confirming that no discrepancies exist between the ASN and the receiving order. Click Validate to proceed.
- The system will update the status to Received, notifying the client that the shipment was received without issues, completing the process.