Locations
This module allows you to manage the locations assigned to customers within each warehouse in the WMS system. Basic actions include: registering new locations, viewing them, and deleting them as needed.
Generate a Location
- Click on the Create Location option.

- A form will appear requesting the following fields to be filled:
First, assign a name, select the location type, and indicate whether it is a hard location or soft location (the checkboxes will only be available for locations whose type is different from Over Storage).

What are hard locations and soft locations, and how do they differ?
-
A Hard Location represents a real and constant location within the warehouse, used for structured inventory storage.
-
A Soft Location represents a logical and temporary location, used during dynamic operations such as order picking or internal movements.
-
Both are necessary to maintain inventory control and traceability, adapting to different phases of the logistics flow.
In this section, you must configure the following settings for the location:
- The Minimum and Maximum fields define the minimum and maximum number of SKUs that a location can contain.
- The SKU Accepted field specifies the number of distinct SKUs allowed in the location, as long as the Multiple SKU option is enabled.
- The Multiple SKU checkbox allows storing multiple SKUs in the same location. Activate it if necessary.
- The Block Location checkbox blocks the location to prevent the entry of additional items. If this option is enabled, products can still be removed, but no new items can be added.

The Multiple SKU option is only available for location types Pick Location, Quarantine, and TOTE.
Next, you must specify the warehouse to which the location will be assigned. The Order Picking field is optional and can be left blank if not applicable. You can also select the COO (Country of Origin) for the location, if inventory control by country of origin is required. This option is useful for certain customers who request physical separation of inventory based on its country of origin. This field is also optional and can be left unselected if not required. Finally, select the legal entity (Selected Registered Name) and the customers (Companies) to which the location will be assigned.

The Select Registered Name field is only available for location types Pick Location, Over Storage, and Quarantine. On the other hand, the Select Country of Origin field is only enabled for location types Pick Location and Over Storage.
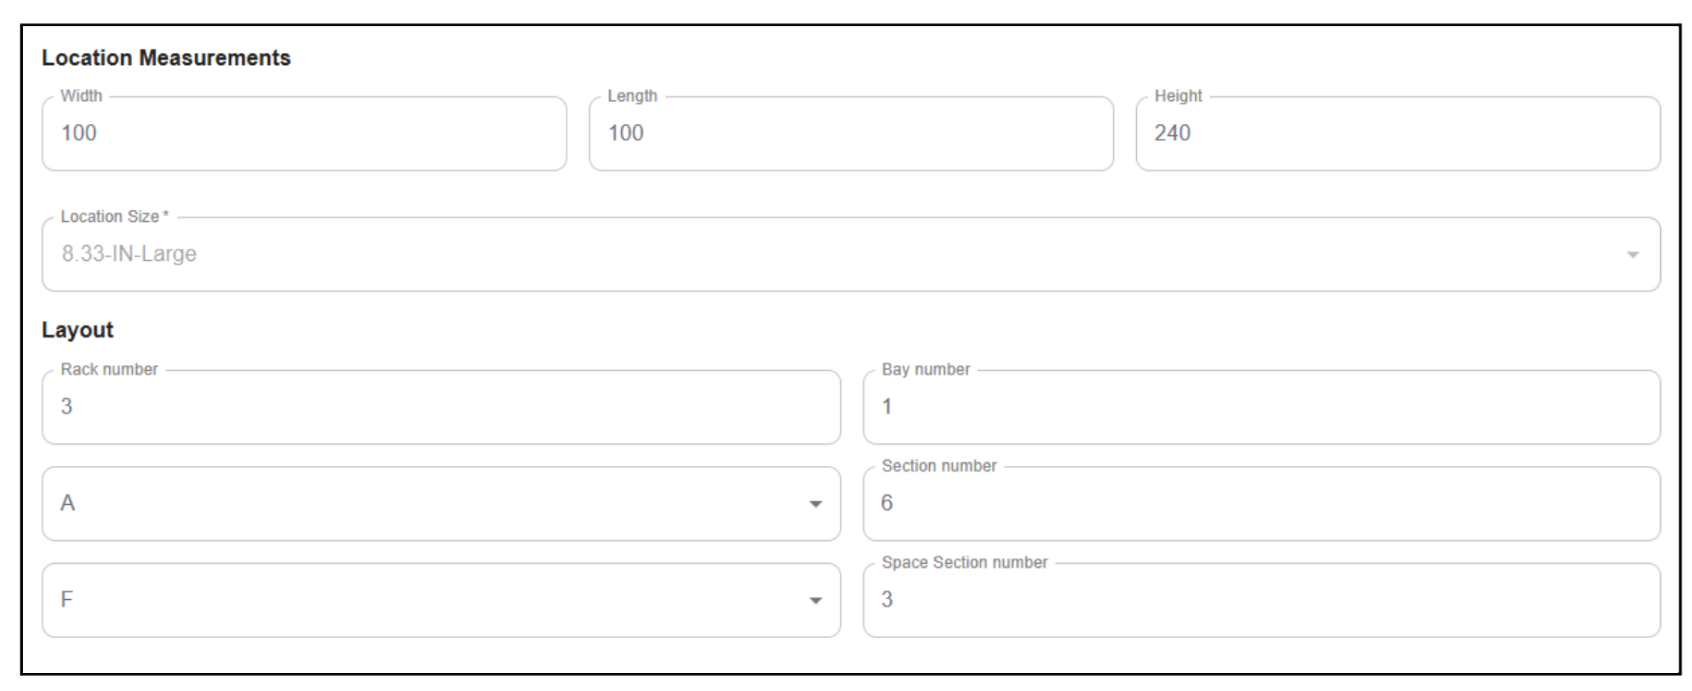
Lastly, configure the physical dimensions and the layout structure of the location in the warehouse. In the Location Measurements section, enter values in the Width, Length, and Height fields, which represent the width, length, and height of the location in inches. Then, select a value in the Location Size field, which corresponds to a standardized size category according to system policies. In the Layout section, define the structural elements that physically position the space within the warehouse. Complete the fields Rack number, Bay number, Section number, and Space Section number (these fields are optional but provide more detail about the location's dimensions).
- After verifying the data entered in the form, click on the CREATE LOCATION option to proceed.
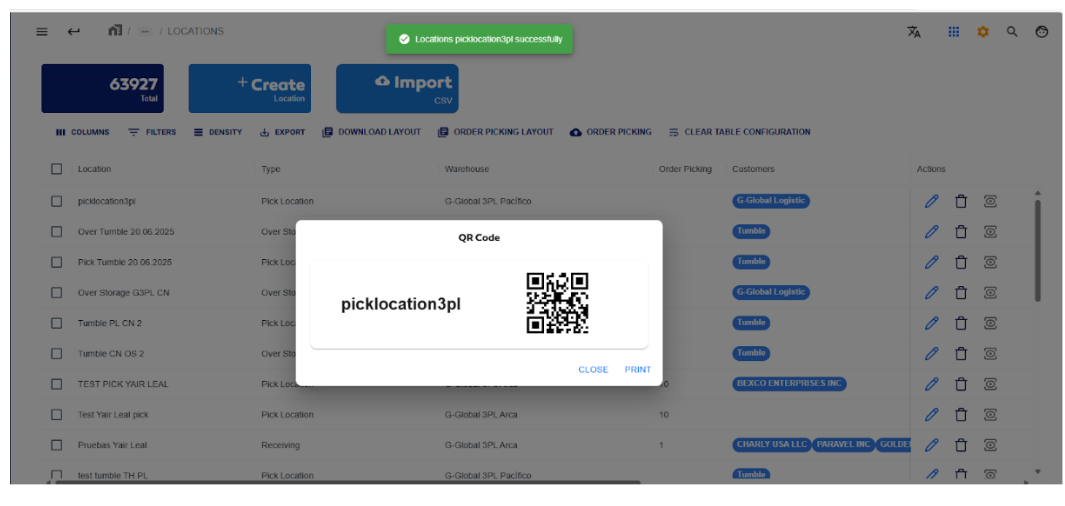
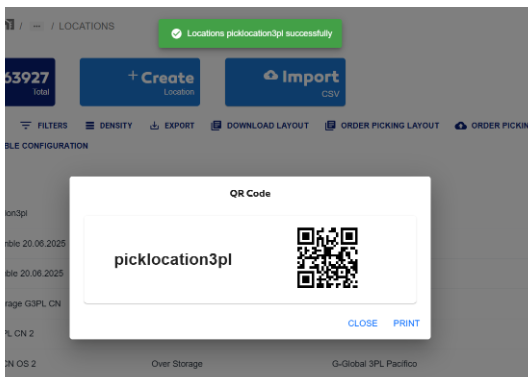
- Next, a green message will appear with the name of the previously assigned location, along with a modal containing the name and QR code, which will be used during the picking process.
Create a Location via a .CSV File
- Click on the Download Layout option to download a template in CSV format.
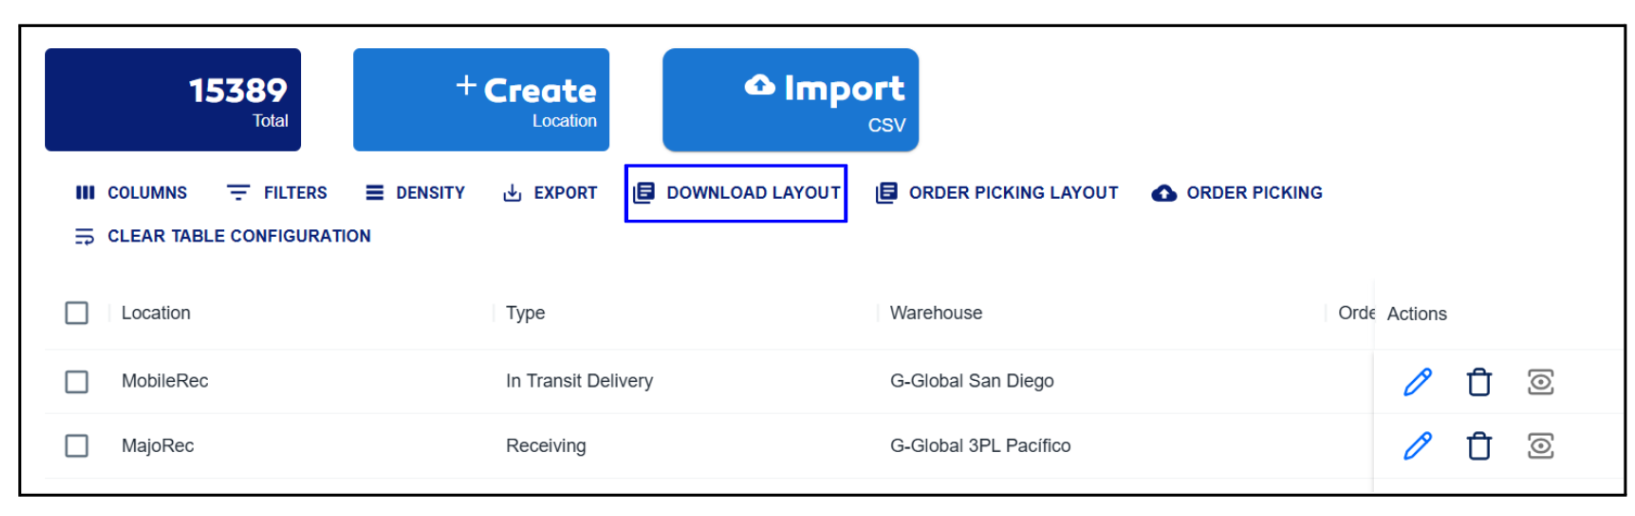
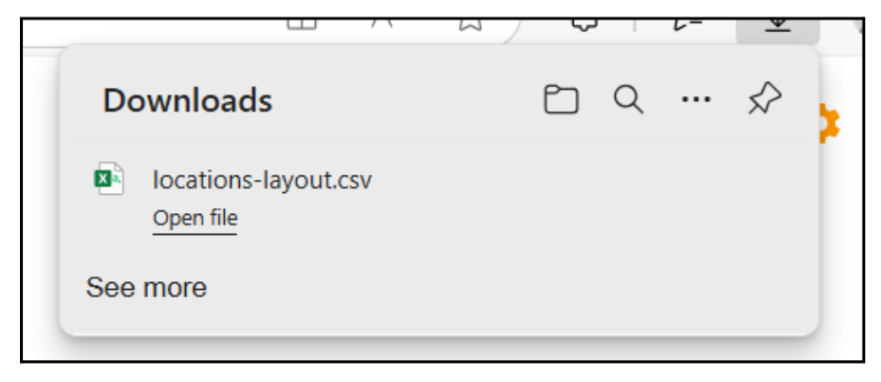
- A file named locations-layout.csv will be downloaded. Once the download is complete, open it with Excel.
- When opening the file, a template will appear indicating how to fill in the data correctly for the import process.
- The first row contains the names of the fields representing the required data to register a location; do not modify this row, as any changes will prevent the system from processing the import correctly.

- The second row indicates which columns are mandatory and which are optional. This row can be modified or deleted, as it only serves as a visual guide and does not affect the import process.
- To begin, first complete the mandatory columns (marked as "required"). For example, you must add values in the name, type, minimum, maximum, warehouses, and companies fields, among others.

Below is a detailed explanation of how to obtain the correct values for the following columns:
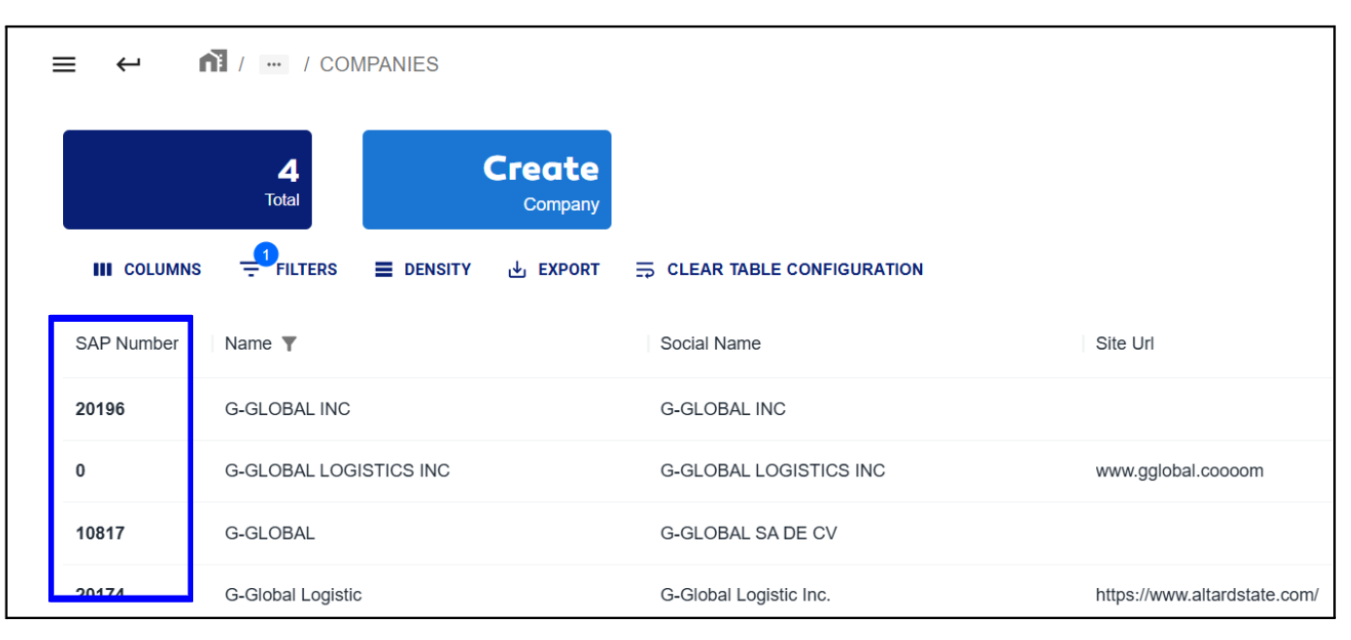
- Companies column: Go to the Companies module and locate the SAP Number column corresponding to the company. This is the data you must enter in the template, as shown in the following image.
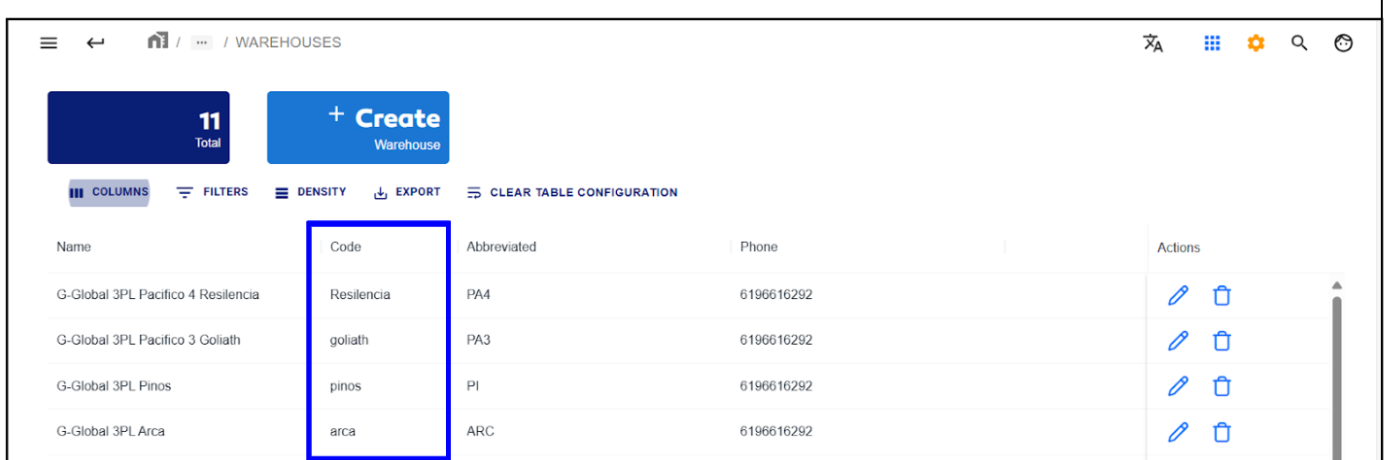
- WareHouses column: Navigate to the Warehouses module and take the value from the Code column. This is the code that must be entered in the corresponding column of the file.
- Type column: You must enter exactly the same value that appears in the dropdown field of the location registration form.
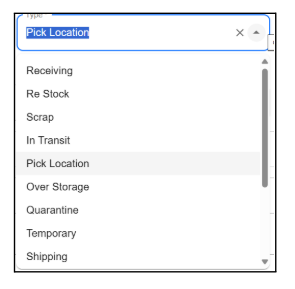
- Optional columns can be filled in according to the level of detail required for the location information. For example, the COO column allows you to add the country of origin for the location, and the blockInventoryEntry column accepts the value "True" to indicate that no inventory can be added to that location.

To correctly fill in the COO column, you must use the country codes registered in the WMS system, as the system only recognizes those values. To check the valid codes, access the location creation form in the Location module and review the Select Country of Origin dropdown field, where the country codes are displayed in parentheses.
Columns marked as optional can be filled with data if available. Otherwise:
- If the field is numeric, you can enter 0.
- If the field is text, you can enter N/A.
- If marked as Boolean, enter false.
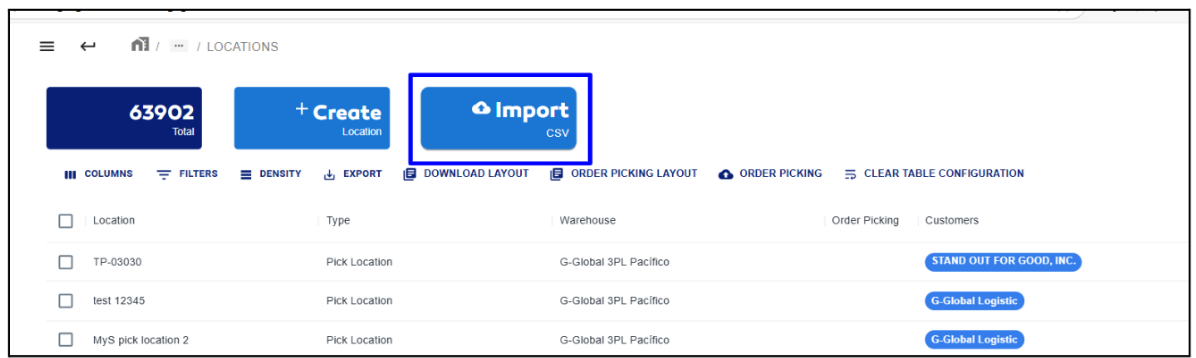
- Click on the Import csv option.
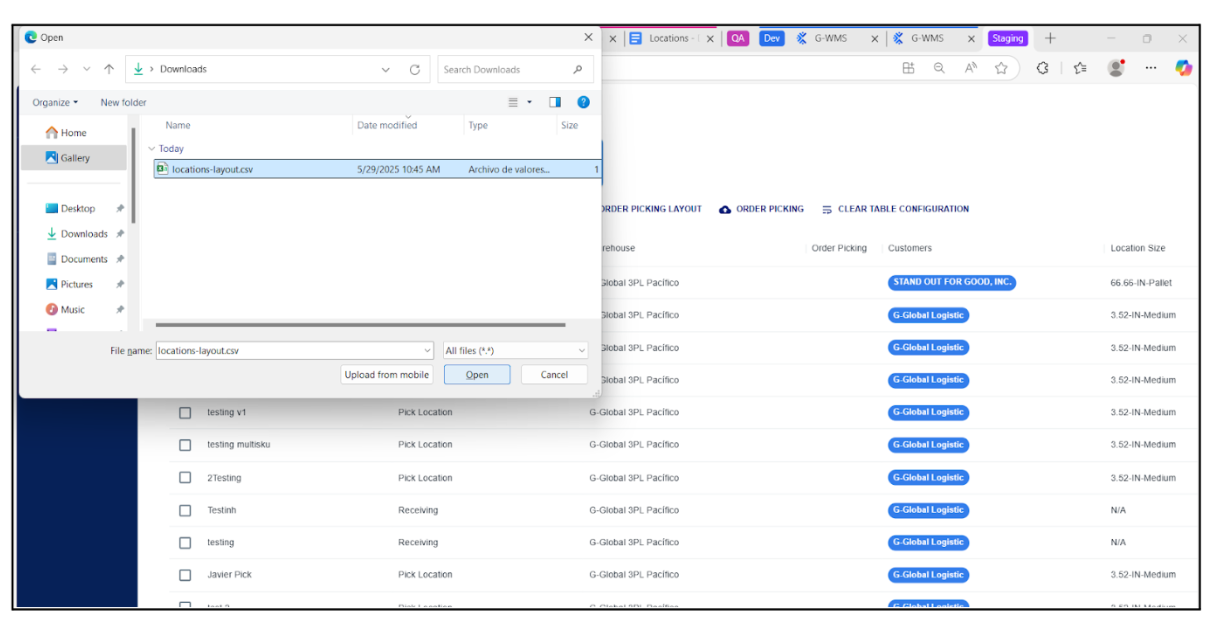
- Select the previously modified file to export and click Open.
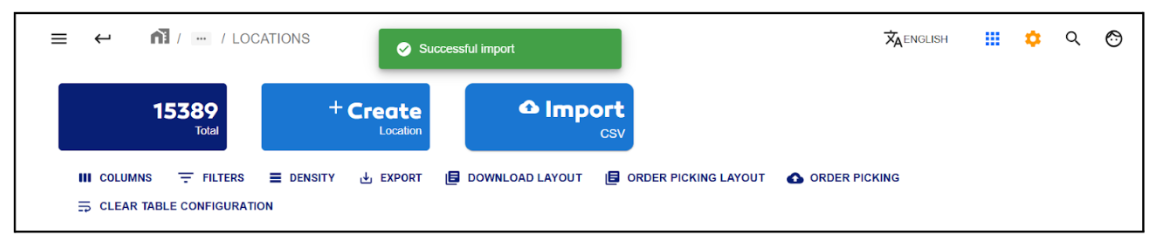
- The system will then display a green message indicating that the import process was successful.
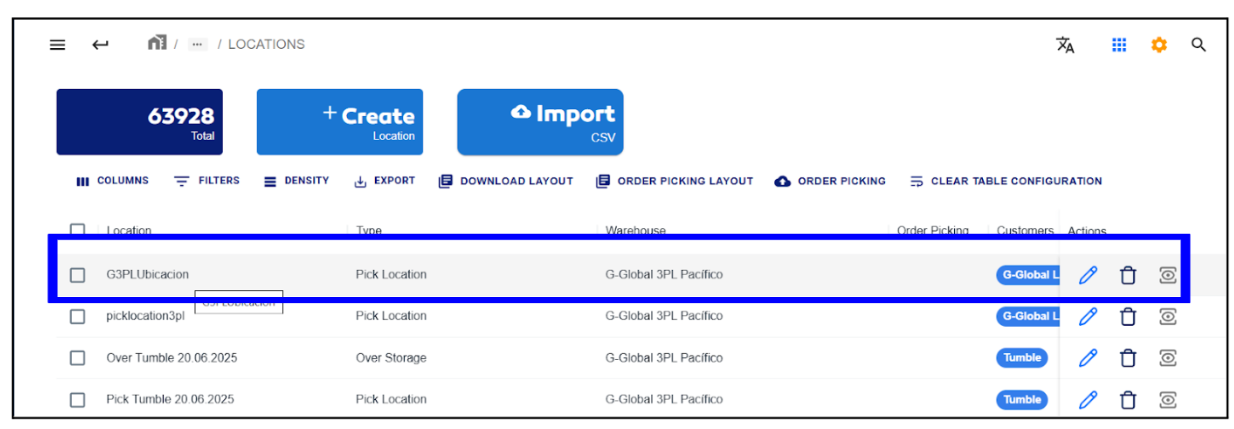
- Next, the data of our previously exported location will be displayed.
Edit a Location in the Portal
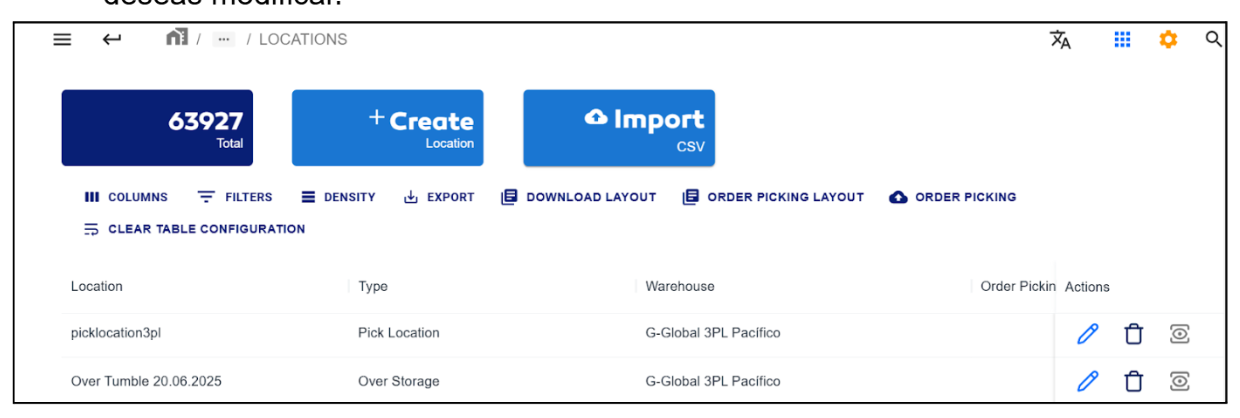
- Click on the Edit option in the Actions column of the location you want to modify.
- A form will appear with the current data of the selected location.
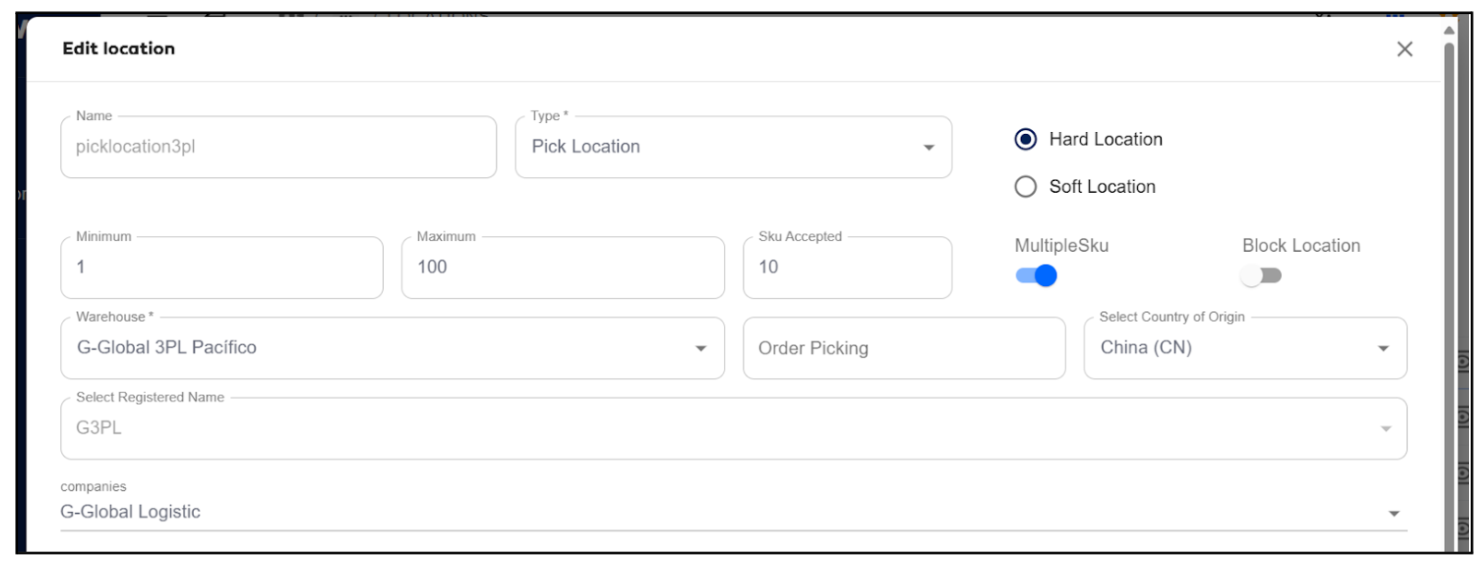
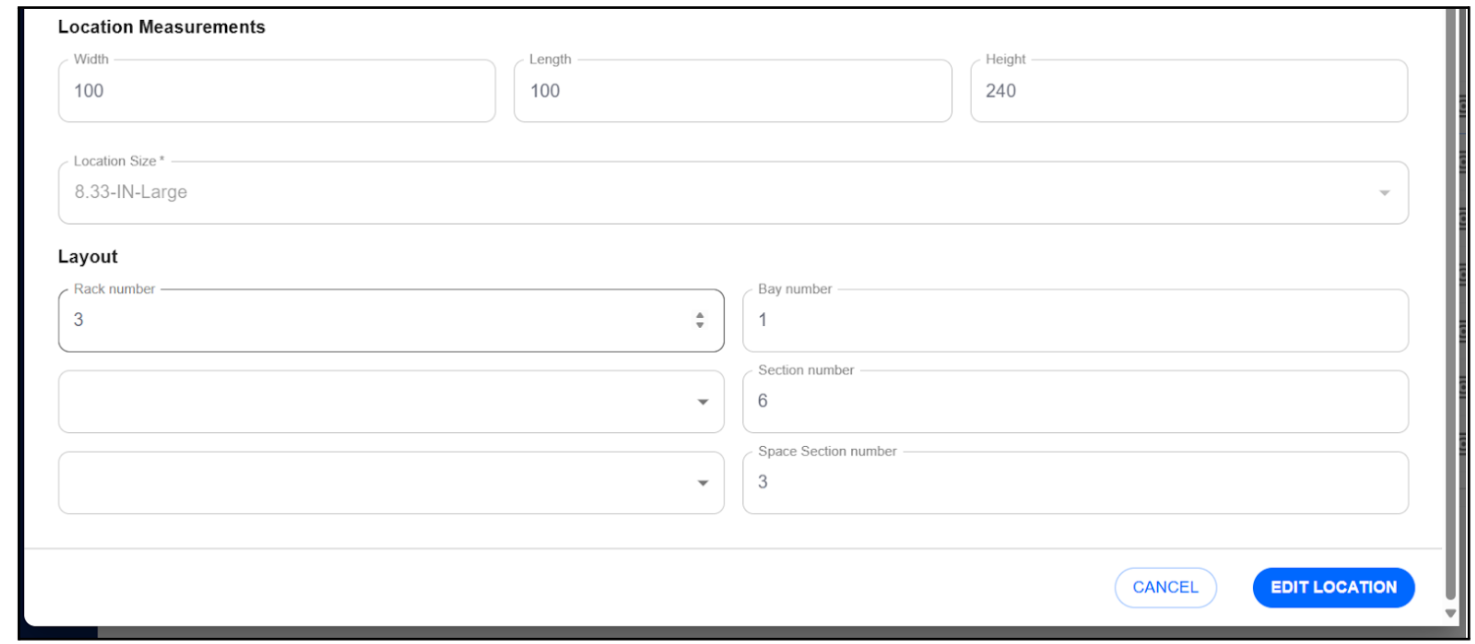
The Select Country of Origin field can be modified depending on the configuration set for the customer in the Companies module, as shown in the following image.
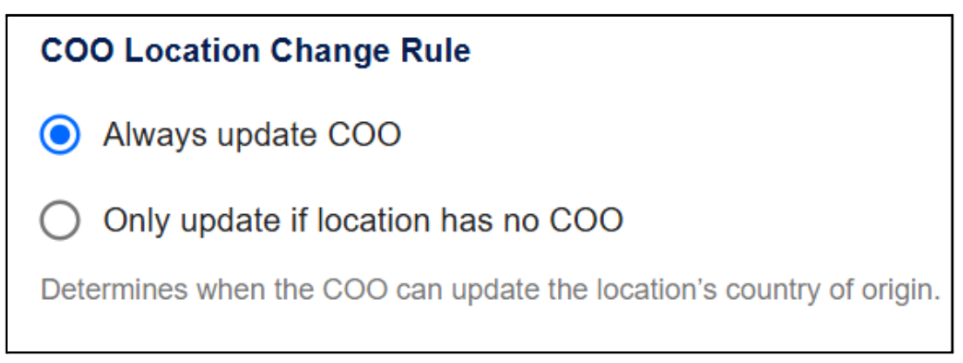
For example, if the company assigned to the location has the Always update COO option enabled, this means you can update the country of origin without restrictions. On the other hand, if the Only update if location has no COO option is enabled, you can only assign the country of origin if the location does not already have one registered. Once assigned, it will no longer be possible to modify it again, as the restriction of no further updates will apply.
Before changing the COO of a location, verify that the location you want to update does not contain any SKUs. If it has stored items, you must empty the location, as the system will not allow the change while there is inventory present.
- After making the necessary changes, click on EDIT LOCATION to save the update.

- Upon completion, the system will display a green message confirming that the location was updated successfully. Additionally, a modal will appear with the location name and its QR code.
Edit a Location via a .CSV File
Another option the system offers for editing a location is importing a .csv file, which represents a simpler and more efficient alternative, especially useful in certain cases. For example, if you previously generated locations by importing a .csv file, you can reuse that same file to modify the information you need to update or generate one for a location, according to the required changes.
Below are the steps required to apply this functionality.
- Click on the Download Layout option to download a template in CSV format.
.
- A file named locations-layout.csv will be downloaded. Once the download is complete, open it with Excel.
If you already have a .csv file with data generated because you imported it to create locations using the template, you can use it to speed up the process.
-
Open the previously downloaded template and edit only the data you want to modify. Also, ensure you enter the information for the fields already registered in the system that you do not want to change, to avoid overwriting information during the import. If you want to understand how to correctly edit the template, refer to the section create a location via a .csv file, where the process is explained in more detail.
-
After editing, your file should look something like this:


In the "Name" column of the template, the name you enter must exactly match the name of the location already registered in the system that you want to edit. If you enter a different name, the system will interpret it as a new location, since no record exists with that name, and will proceed to create it as a new entry.
- Then, in the system, click on the Import csv option.
- Select the previously modified file. Next, the system will display a green message indicating that the import process was successful.

Below is evidence of the information the location contained before being modified:
- Before
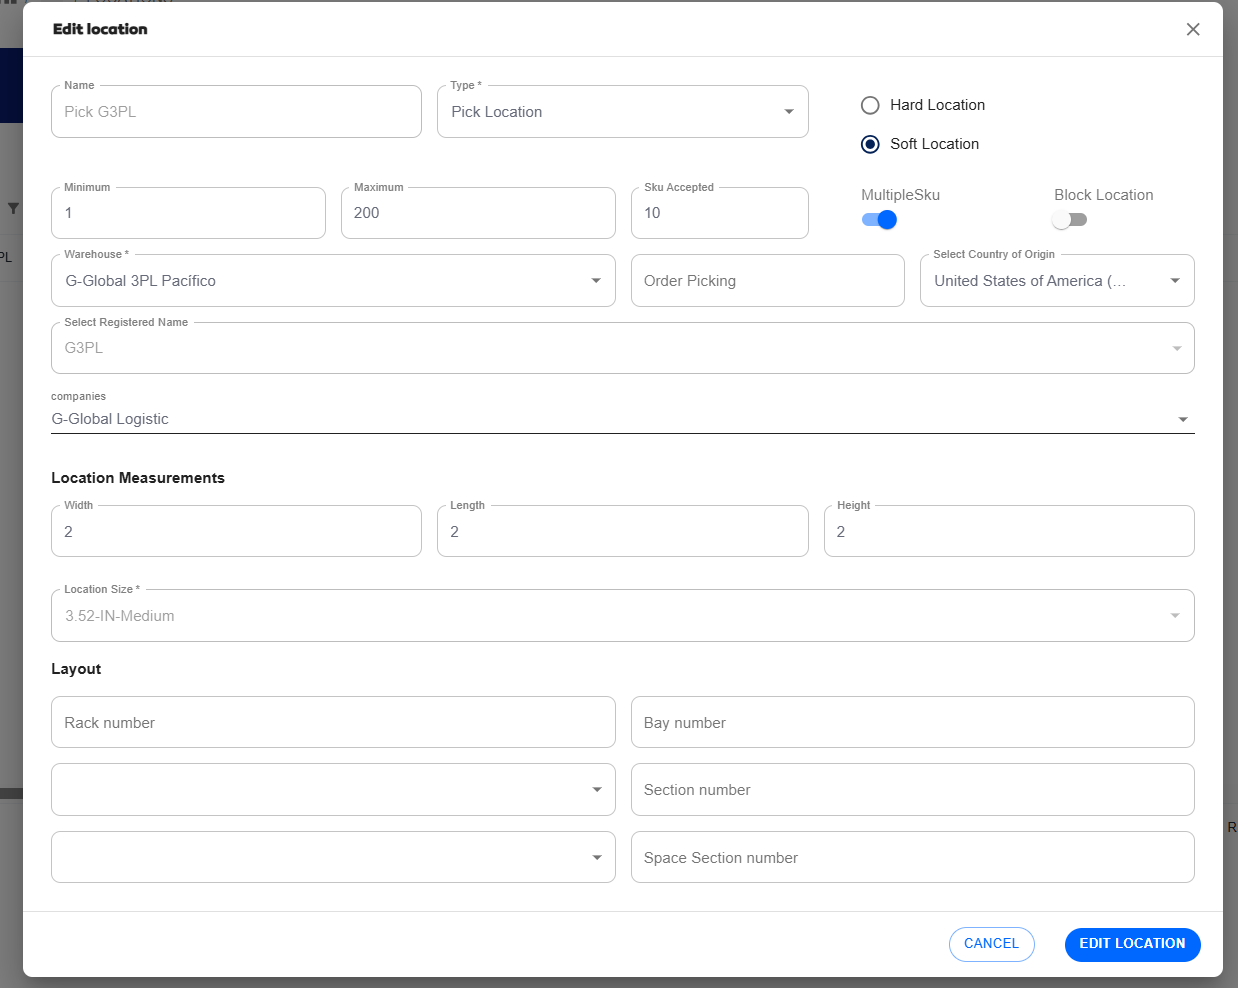
- After
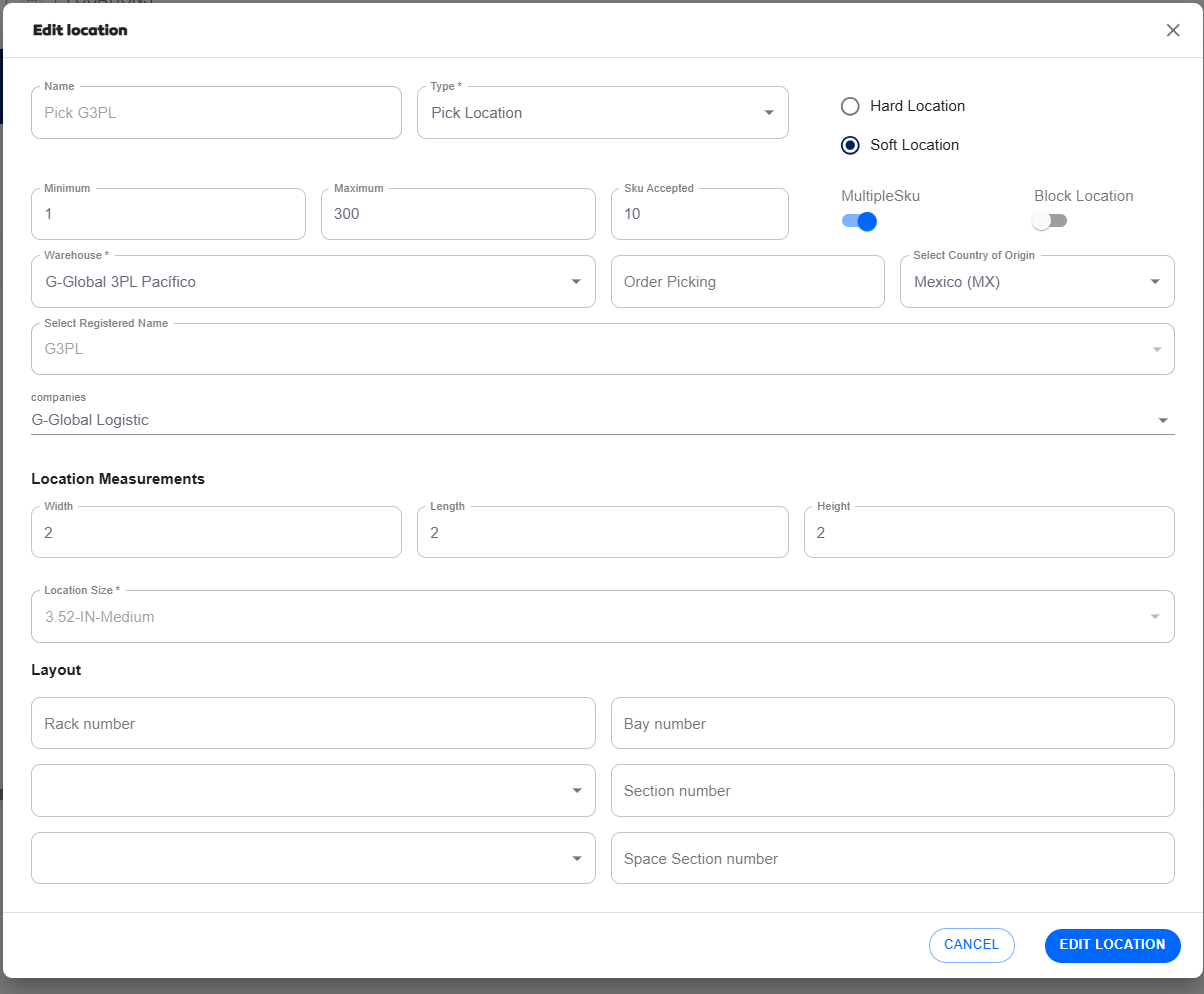
When editing locations via a .CSV file, if the location is of type Over Storage or Pick Location, it is possible to modify its COO (Country of Origin). However, the following conditions must be met to avoid errors during import:
-
The company must have the Always update COO option enabled, which allows changing the COO.
-
Or, the location must not have a COO assigned and must not contain items with a COO different from the one you want to assign.
If these conditions are not met and the location contains inventory, the system will display an error message when attempting to update the COO.
View Location Information
-
Double-click on the location whose information you want to view.
-
The system will redirect you to a page displaying the following details.
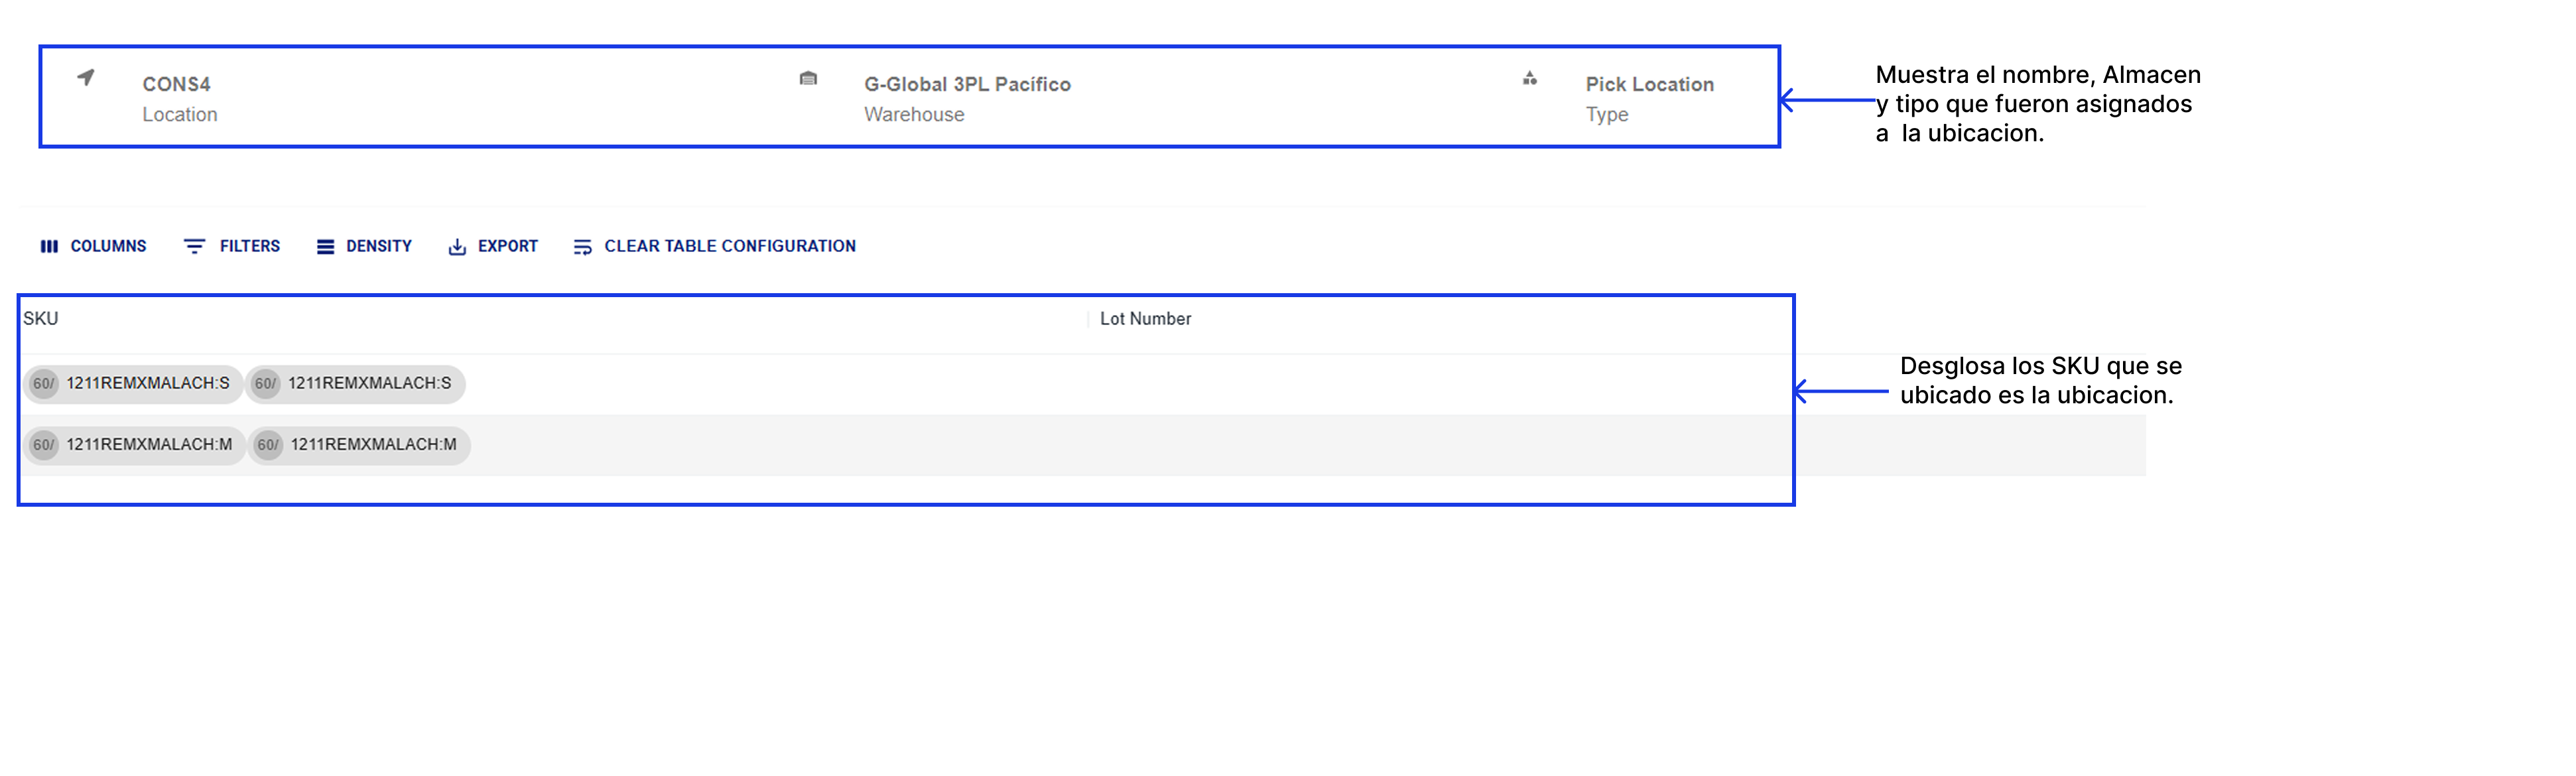
Delete a Location
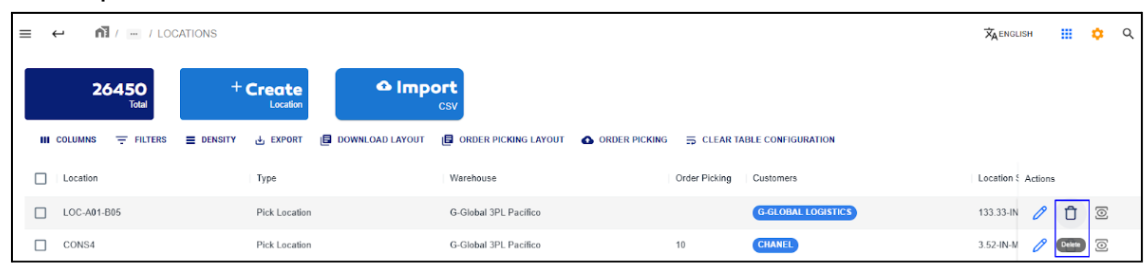
- Click on the Delete option in the Actions column of the location you want to delete.
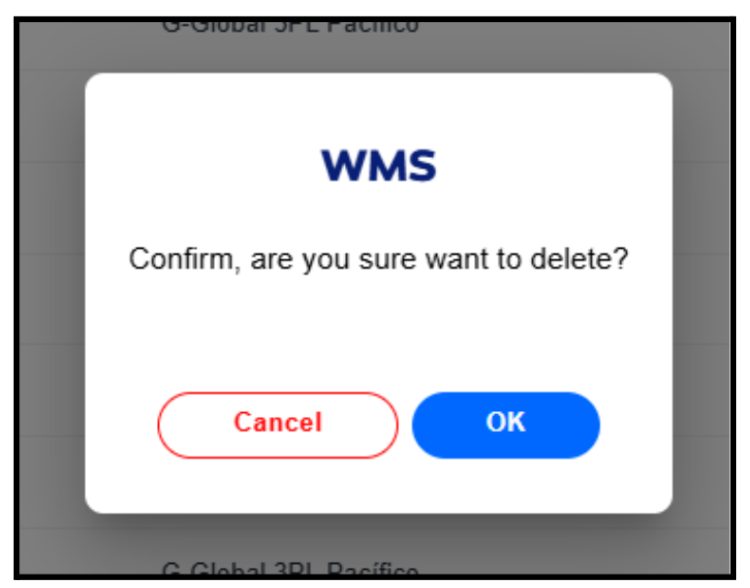
- A confirmation message will appear asking if you want to proceed with the process. Click OK to confirm.
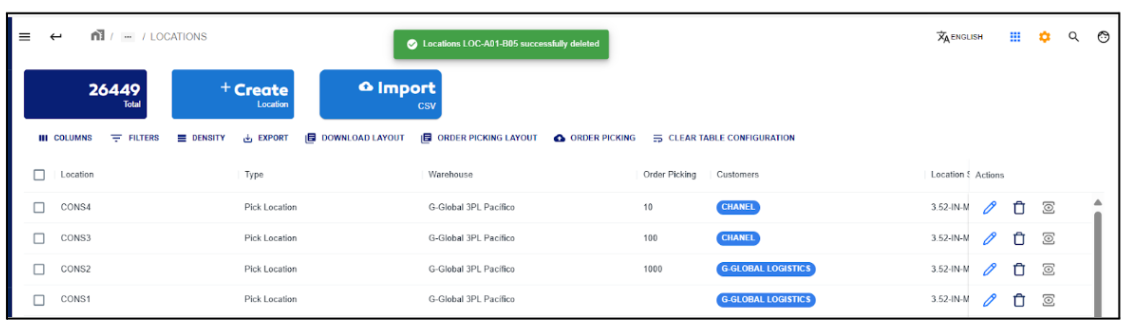
- Finally, the system will display a green message indicating that the location has been successfully deleted.
If you attempt to delete a location that contains inventory, the system will not allow the process to continue. Instead, it will display a red message indicating that the location does not have empty containers.
Print Location Labels
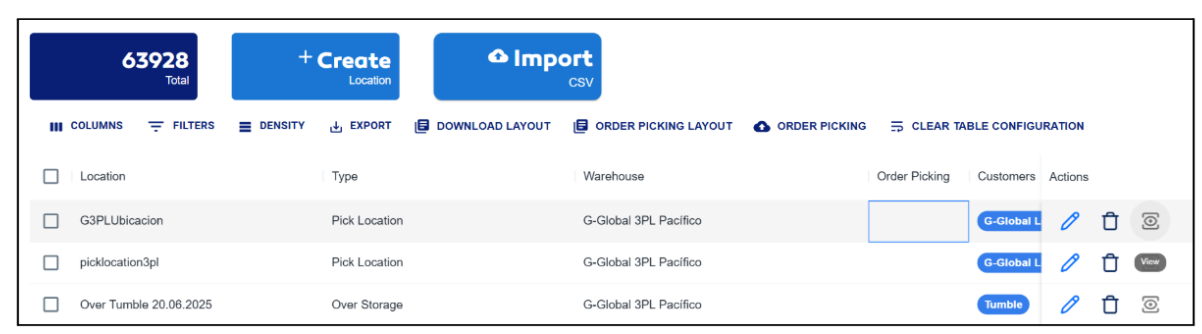
- In the Location module, click on the View option in the Action column corresponding to the location you want to check.
- A pop-up modal will appear with the location name and its respective QR code.
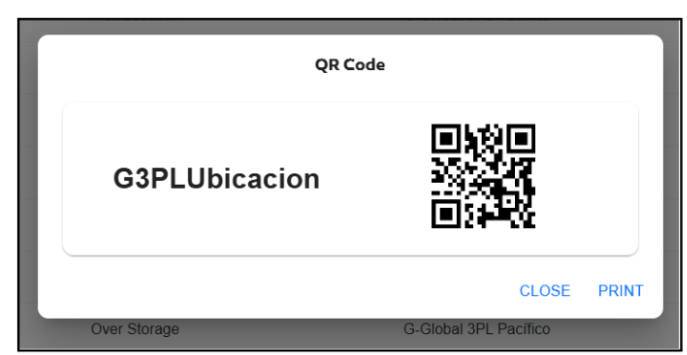
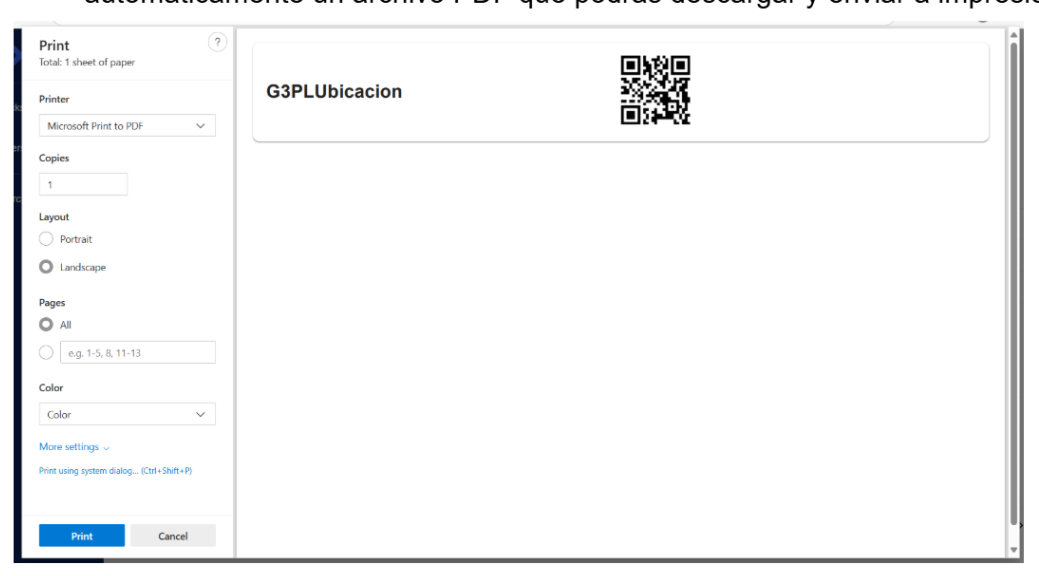
- To print the QR label, click on the PRINT button. The system will automatically generate a PDF file that you can download and send to print.