Item Master
This module allows you to manage client items in the WMS, detailing the necessary actions to register a product, as well as to update or delete its information in the system. It's considered one of the most important modules, as the information generated here is relevant for other modules within the WMS.
Create an Item Master
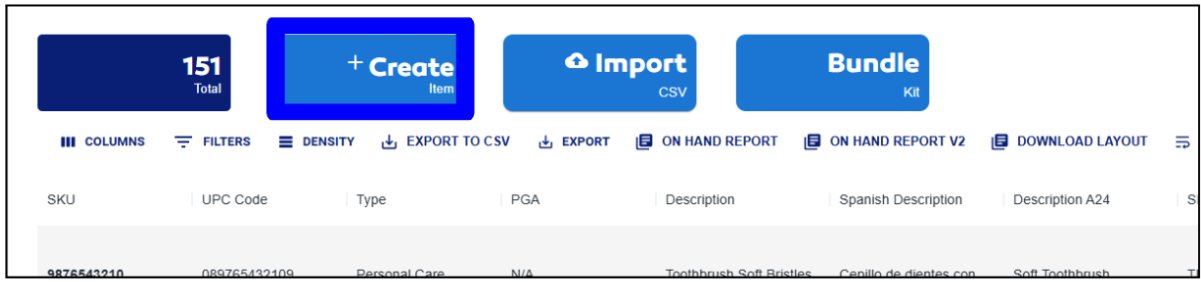
- Click the CREATE ITEM button:
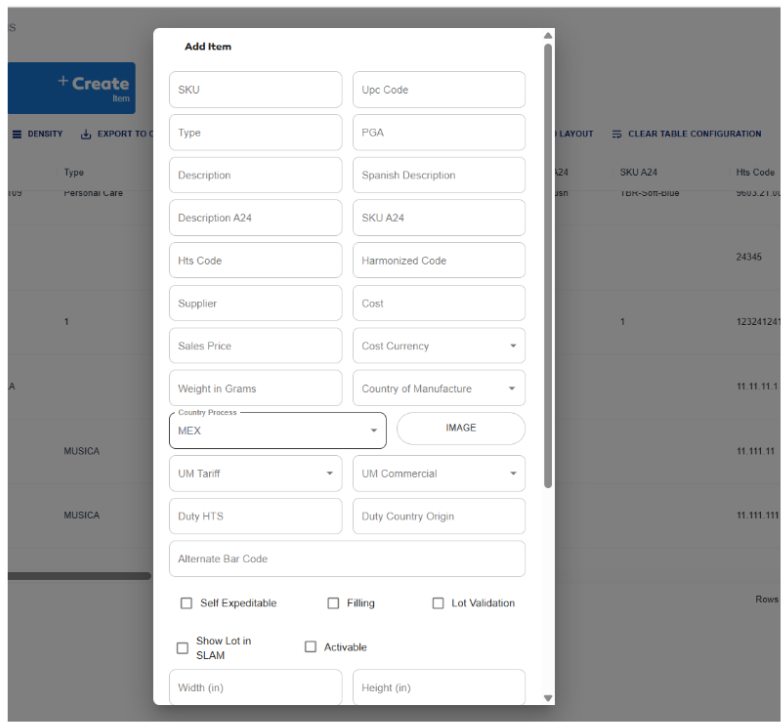
- A form will appear requesting the following data to carry out the registration process.
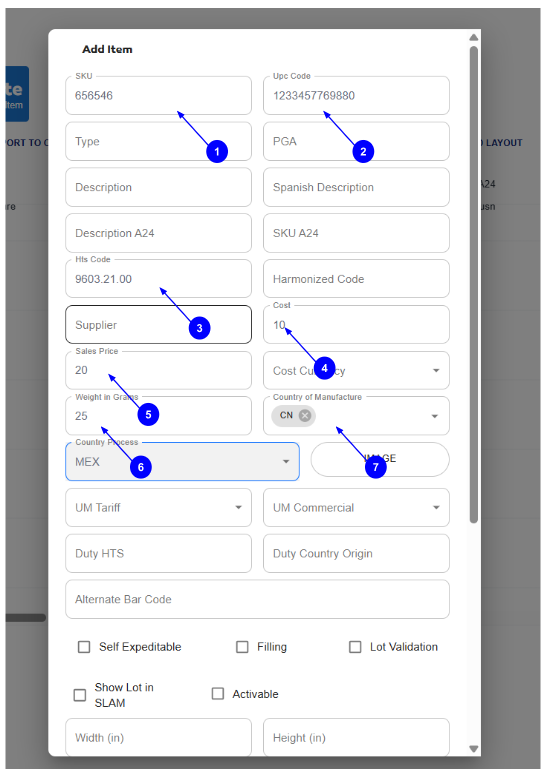
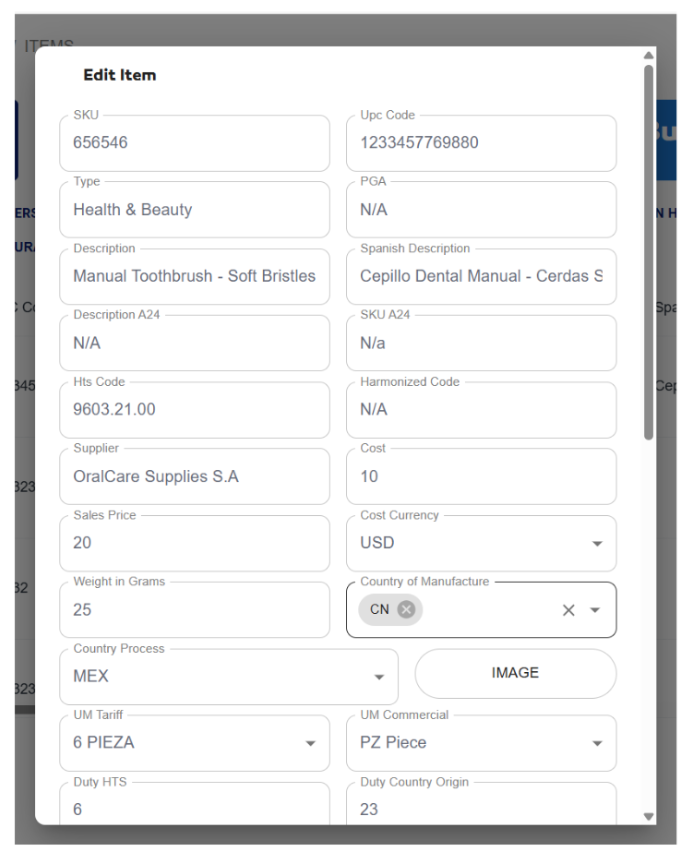
- The required fields to complete the registration are as follows:
| Field No. | Field Name | Description |
|---|---|---|
| 1 | SKU | Product reference number. |
| 2 | UPC Code (Universal Product Codes) | These are the barcodes used for retail and e-commerce. |
| 3 | HTS Code | 10-digit code to identify the import tariff rate in the United States. |
| 4 | Cost | The manufacturing cost of the product. |
| 5 | Sales Price | The price at which the product is sold to customers. |
| 6 | Weight in Grams | The weight of the product in grams. |
| 7 | Country of Manufacture | The two-digit code for the country of manufacture. |
- The optional fields can be left empty or used to provide more detailed product information. They are as follows:
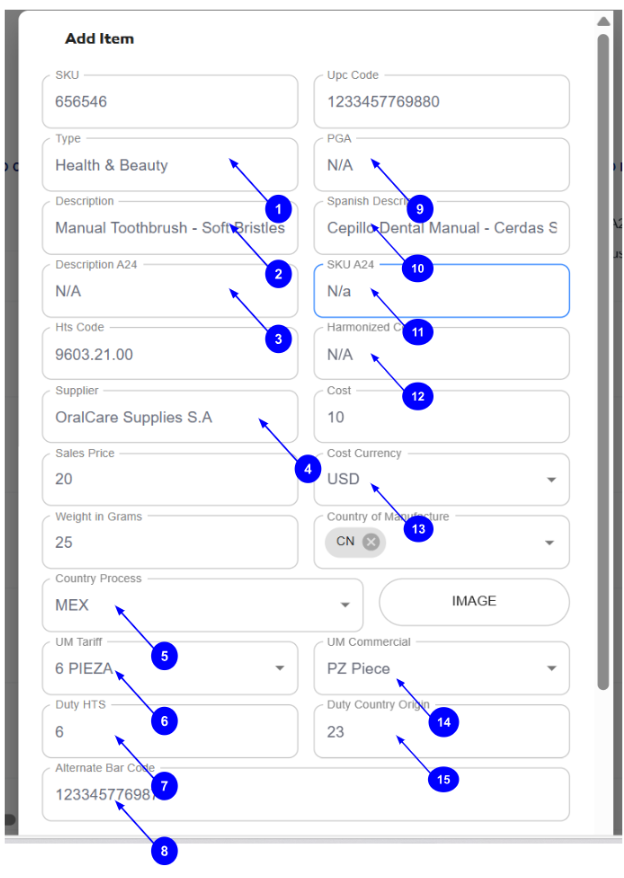
| Field No. | Field Name | Description |
|---|---|---|
| 1 | Type | Defines the product type, for example, footwear or textile. |
| 2 | Description | A brief description of the product. |
| 3 | Description A24 | A brief description of the product in Spanish. |
| 4 | Supplier | The name of the supplier. |
| 5 | Country Process | The location where the product is processed. If the order is processed in Tijuana, this field should be MEX. If the order is processed in San Diego, this field should be USA. |
| 6 | UM Tariff | Unit of Measure for tariffs. |
| 7 | Duty HTS | Duty Participation percentage, 2 integers and 2 decimals, e.g., 33.33. |
| 8 | Alternate Bar Code | An alternative barcode for a secondary means of data identification. |
| 9 | PGA | Essential condition. |
| 10 | Spanish description | Product description in Spanish. |
| 11 | SKU A24 | Internal product SKU code. |
| 12 | Harmonized Code | Mexican tariff code of 8 to 10 digits. |
| 13 | Cost Currency | Indicates the currency type (USD, MXN) in which the product cost is expressed. |
| 14 | UM COMMERCIAL | Commercial Unit of Measure. |
| 15 | DUTY COUNTRY ORIGIN | Country of origin percentage, 2 integers and 2 decimals, e.g., 22.22. |
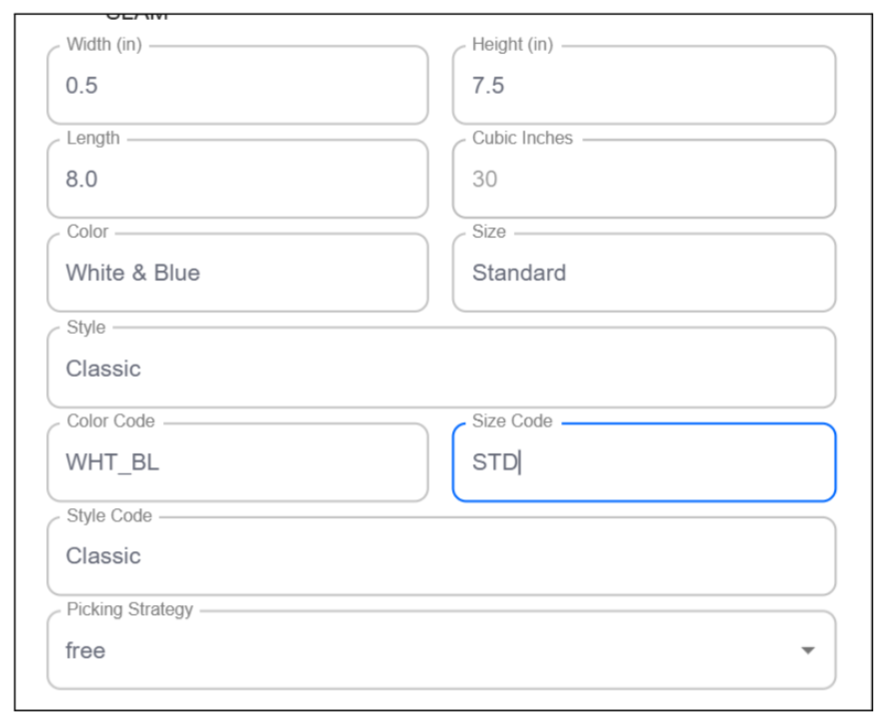
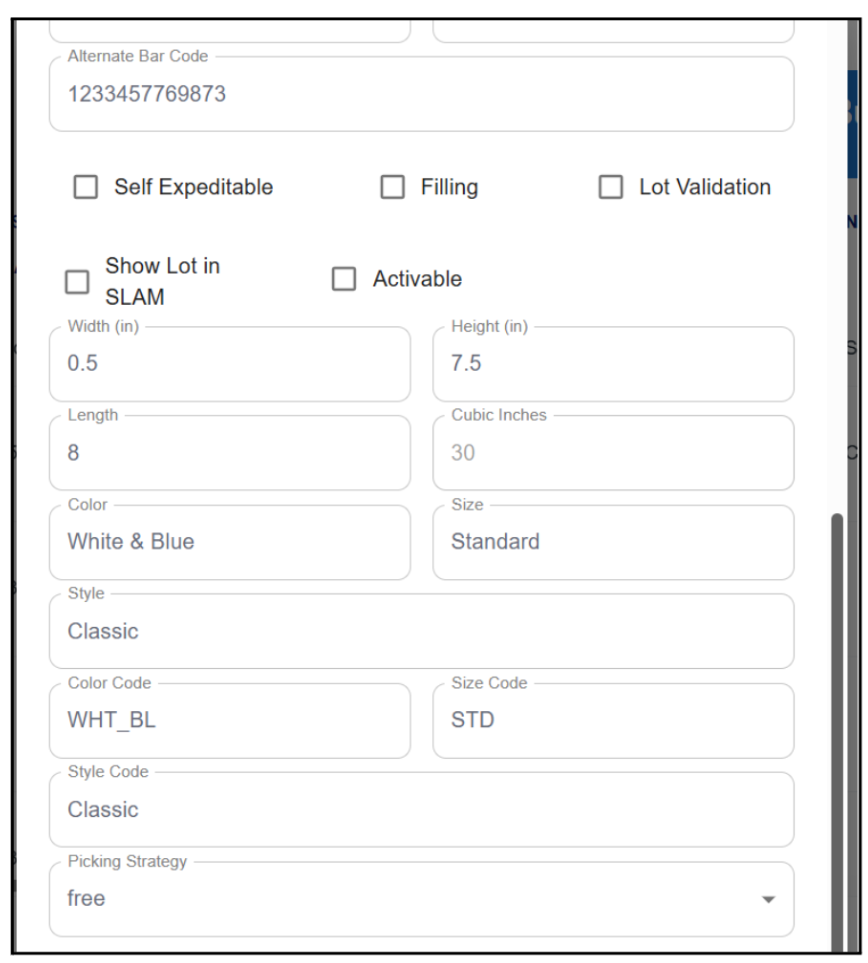
- To provide more product characteristics like color, size, or picking strategy, you can fill in some of these fields as shown in the following image.
-
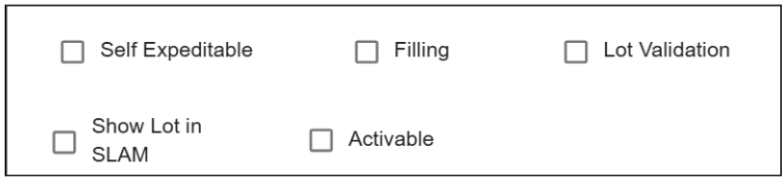
The registration form includes some optional settings in the form of checkboxes. These options are disabled by default, but if you want to activate any functionality related to the product, simply check the corresponding box. Below are the available options that can be configured for each product:
- Self Expeditable: Allows the item to be entered directly and pass the initial validation without needing to scan the box first.
- Filling: Prevents the item from being picked or automatically scanned in SLAM if it does not have a UPC code. In these cases, the code must be entered manually.
- Lot Validation: Activates lot number validation within the SLAM application.
- Show Lot in SLAM: Enables the display of the item's lot number during the SLAM process.
- Activable: Adds an additional validation in SLAM. When this option is activated, the form will request a verification code. This validation is executed when the item's UPC is scanned.
- Verify that the data is correct and click the SAVE button to save the product.
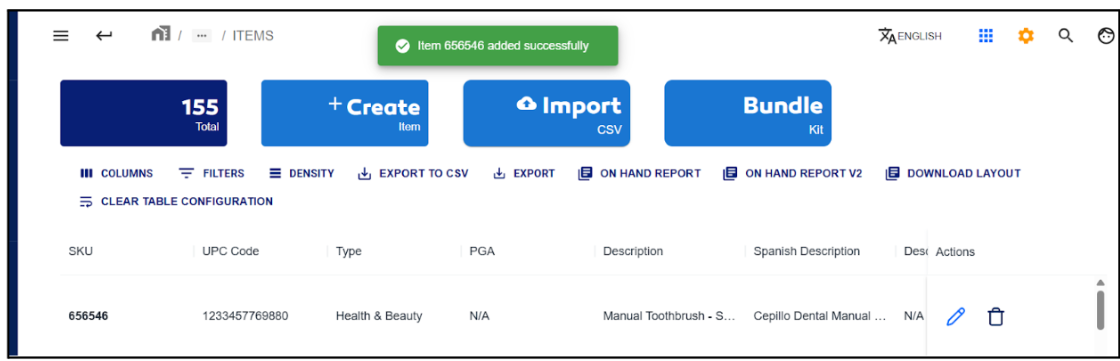
- If everything is correct, a green message will appear indicating that the registration was successful.
Create Kits
- Click the Bundle kit option.

- A form will open where you must select the parent SKU, which will represent the composite item or main kit. Then, select the child SKUs, which are the individual products that will make up the kit.
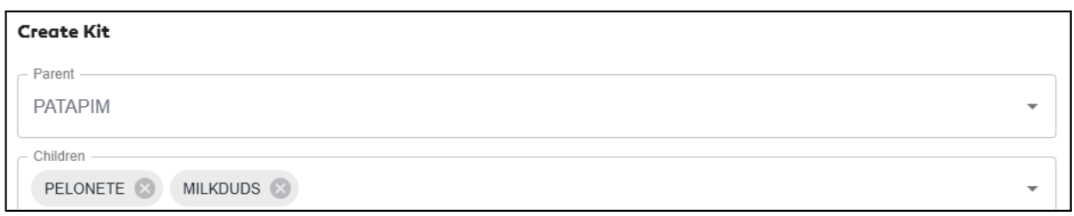
- After selecting the child SKUs, additional fields will be enabled for you to indicate the required quantity of each to form the parent SKU.
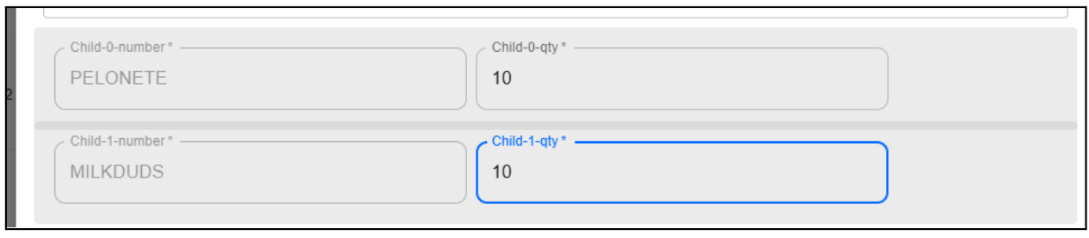
- Once the information is complete, click the SAVE option to save the changes.

- The system will then display a green message confirming that the process was completed successfully.

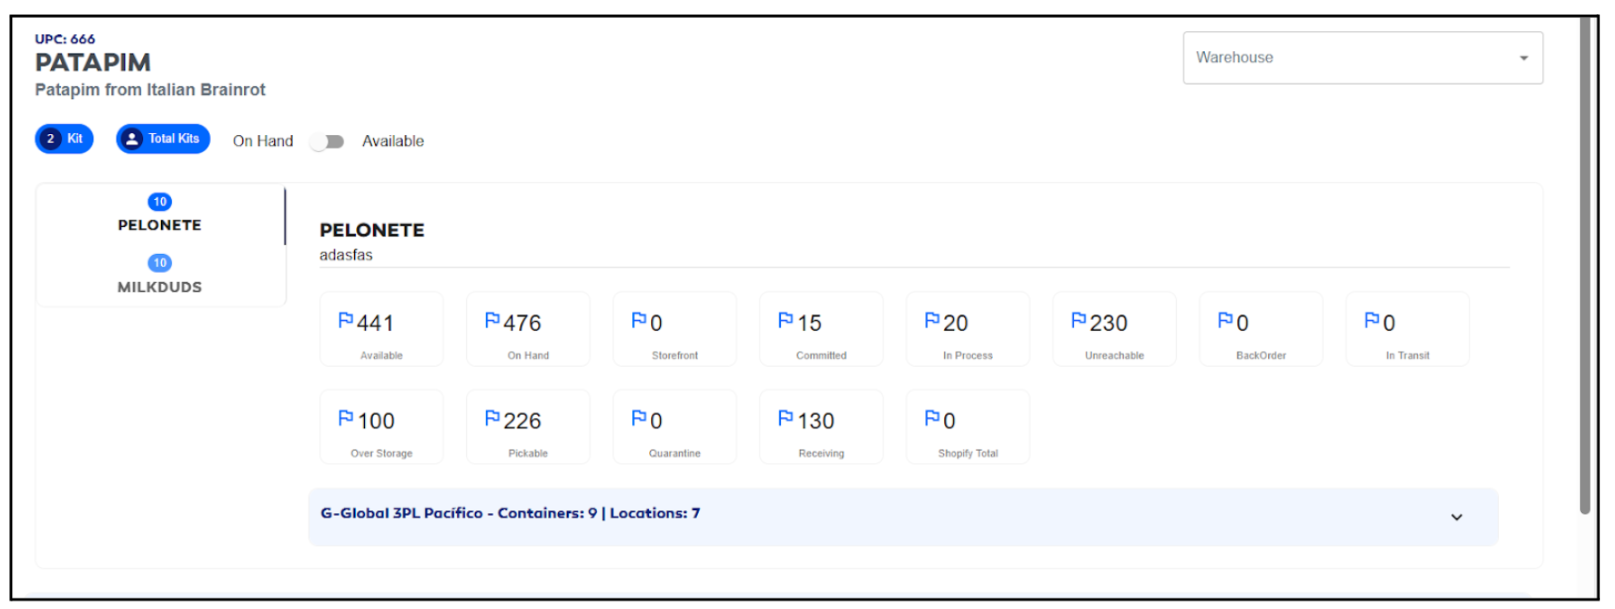
- To verify that the kit was created correctly, go to the Stock module, filter by the parent SKU, and by double-clicking on the record in the table, the system will display the child SKUs that are part of the composite item.

Update an Item Master
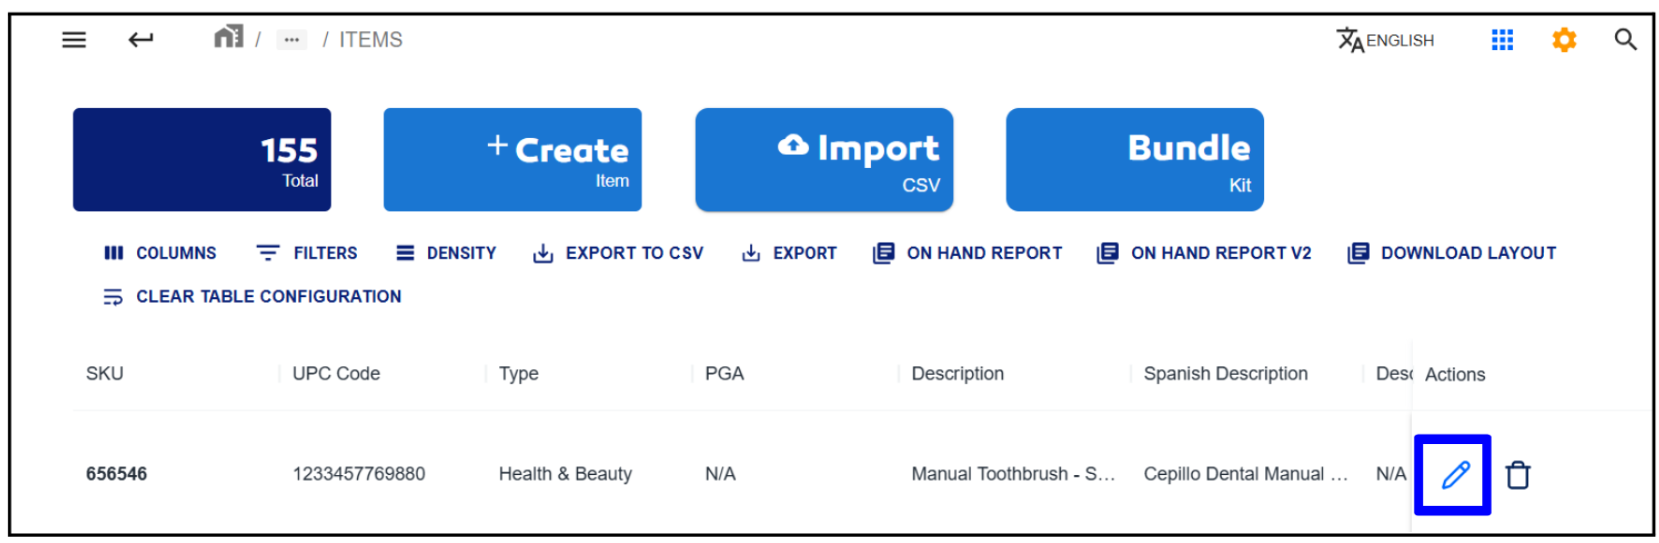
- Click the pencil button to edit the product:
- A form will be displayed with the data fields you wish to modify.
- Click the SAVE button to save the changes:

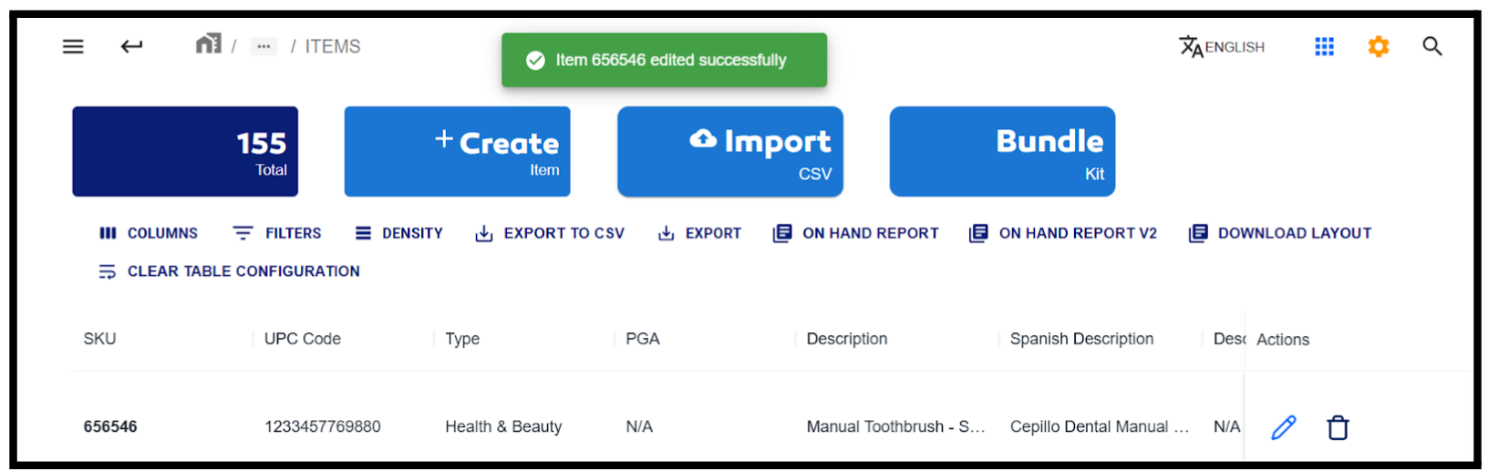
- The table will be updated with a green message indicating the item that was updated, as shown in the following image.
Delete an Item Master
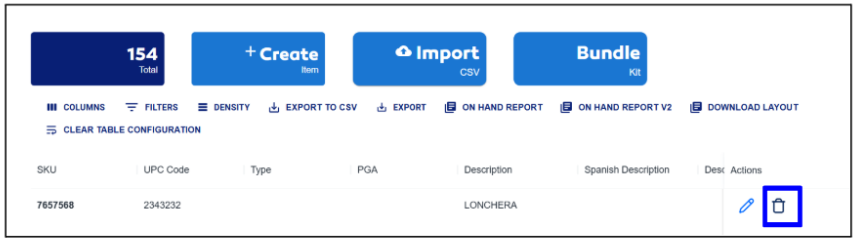
- Click the 🗑 button to delete the product:
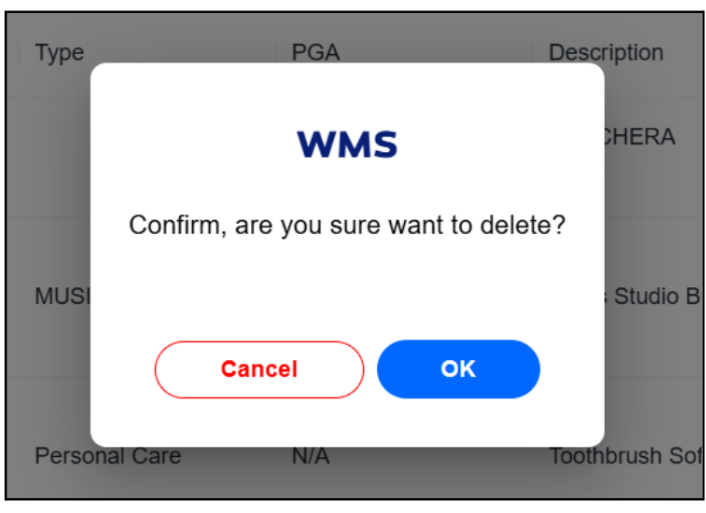
- A confirmation message will appear before deleting. To delete, click OK.
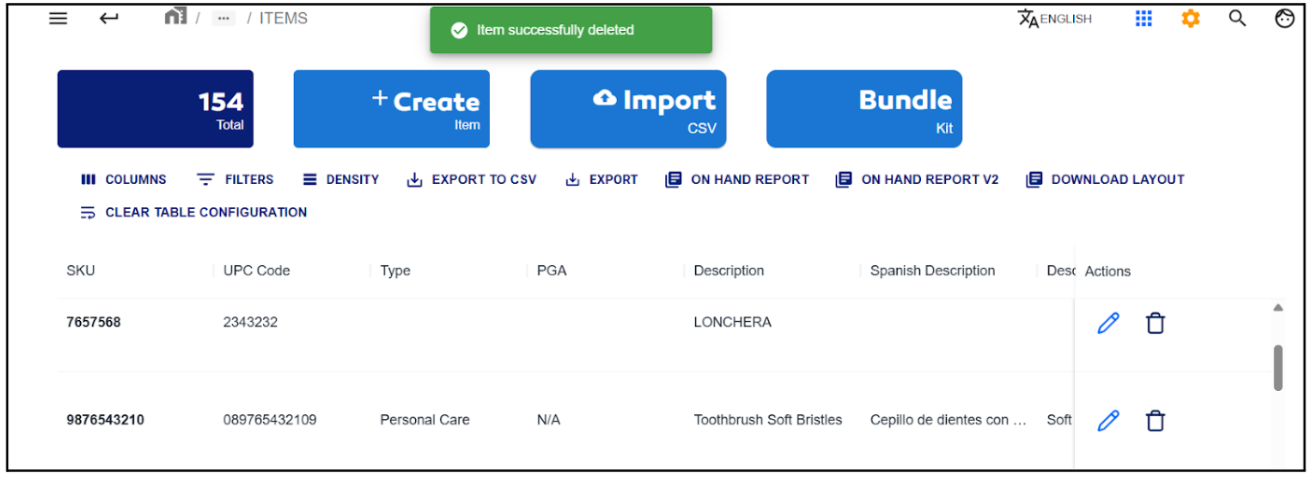
- The table will update automatically, deleting the item and displaying a green message indicating that the operation was successful, as shown in the following image: