Replenishment Module
The replenishment module is used to restock locations with items that are needed. This module creates a replenishment order, which can later be processed in the replenishment module itself, where data such as the container where the items are located, the items, and the location where the replenishment will be done must be entered. In this module, you can also delete and process open replenishment orders.
General Overview of the Module
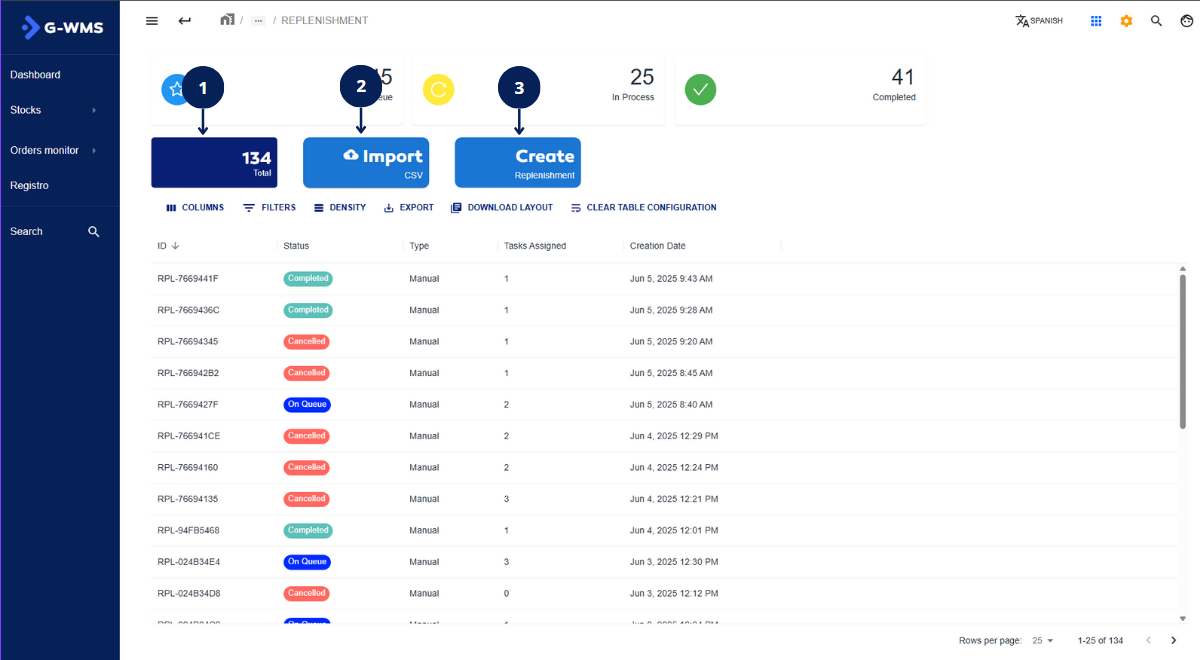
| No | Name | Description |
|---|---|---|
| 1 | Total replenishment orders box | This box shows the total number of replenishment orders |
| 2 | Import CSV button | This button is used to import replenishment as CSV |
| 3 | Create replenishment button | This button is used to start the process of creating a new replenishment |
Module Details
Replenishment orders have several statuses that reflect the current progress of that order. These statuses are listed below:
- (On Queue) - This status means the order is in queue.
- (In Progress) - This status means the order is in progress.
- (Completed) - This status means the order has been completed.
- (Cancelled) - This status means the order has been cancelled.
Context |
|---|
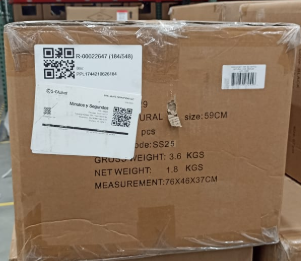
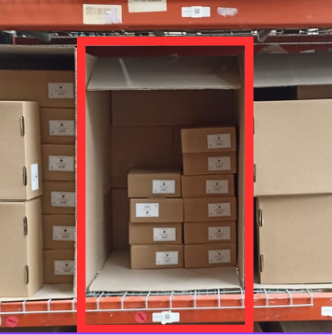
The first thing added when using replenishment is the container, which is the box where one or several items are stored. A container typically looks like this:
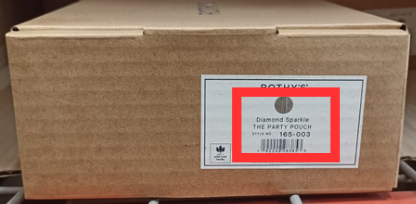
Items usually come in different presentations, but one of the most common is smaller boxes.
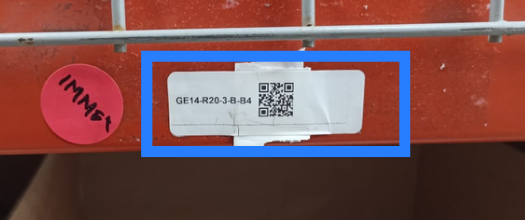
The location is where items can be stored for use in the process. This location is a space on a warehouse rack and is represented by a label with a QR code, which is placed on that rack.
|
Create Replenishment
| Steps |
|---|
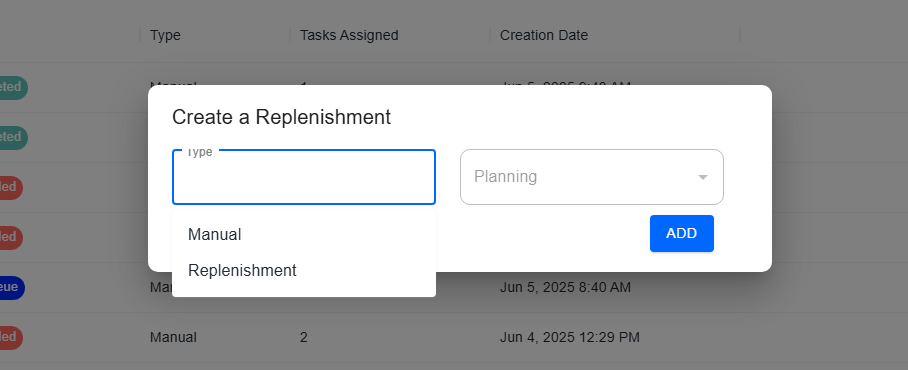
Select 3 from the main interface to start the process of creating a new replenishment. An interface will appear where the order will be created.
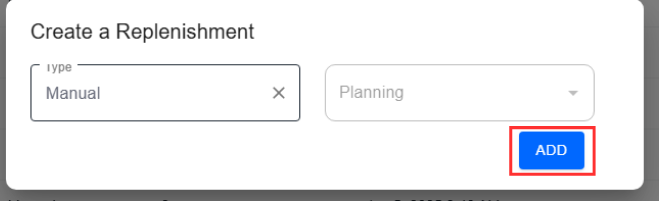
In this interface, there are two ways to create a Replenishment when selecting the type field. As the most common option, we will select Manual, so planning remains empty by default.
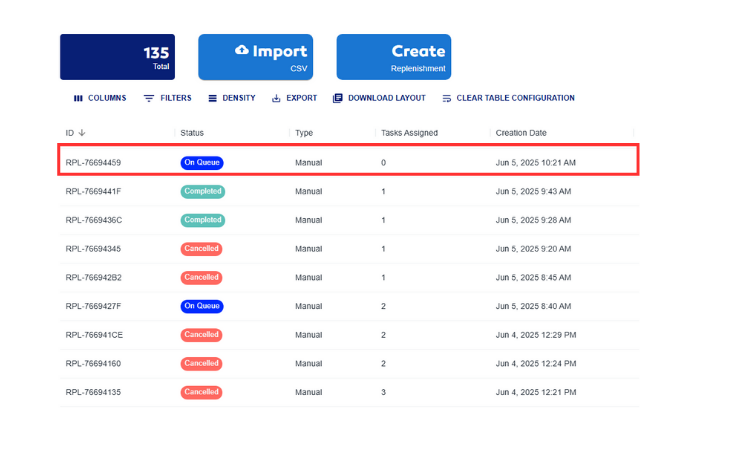
Then click ADD, and the replenishment order will be created. This will be represented as follows:
Here you can see how the order was created and listed. Once created, the order is ready to be processed. |
Process Replenishment Order
Recently, COO configuration was added. If you're looking for a configuration with COO, go to Customer Settings.
If you're looking for replenishment with COO, go to Replenishment with COO
| Steps |
|---|
The first step is to double-click a newly created replenishment order with a status of OnQueue.
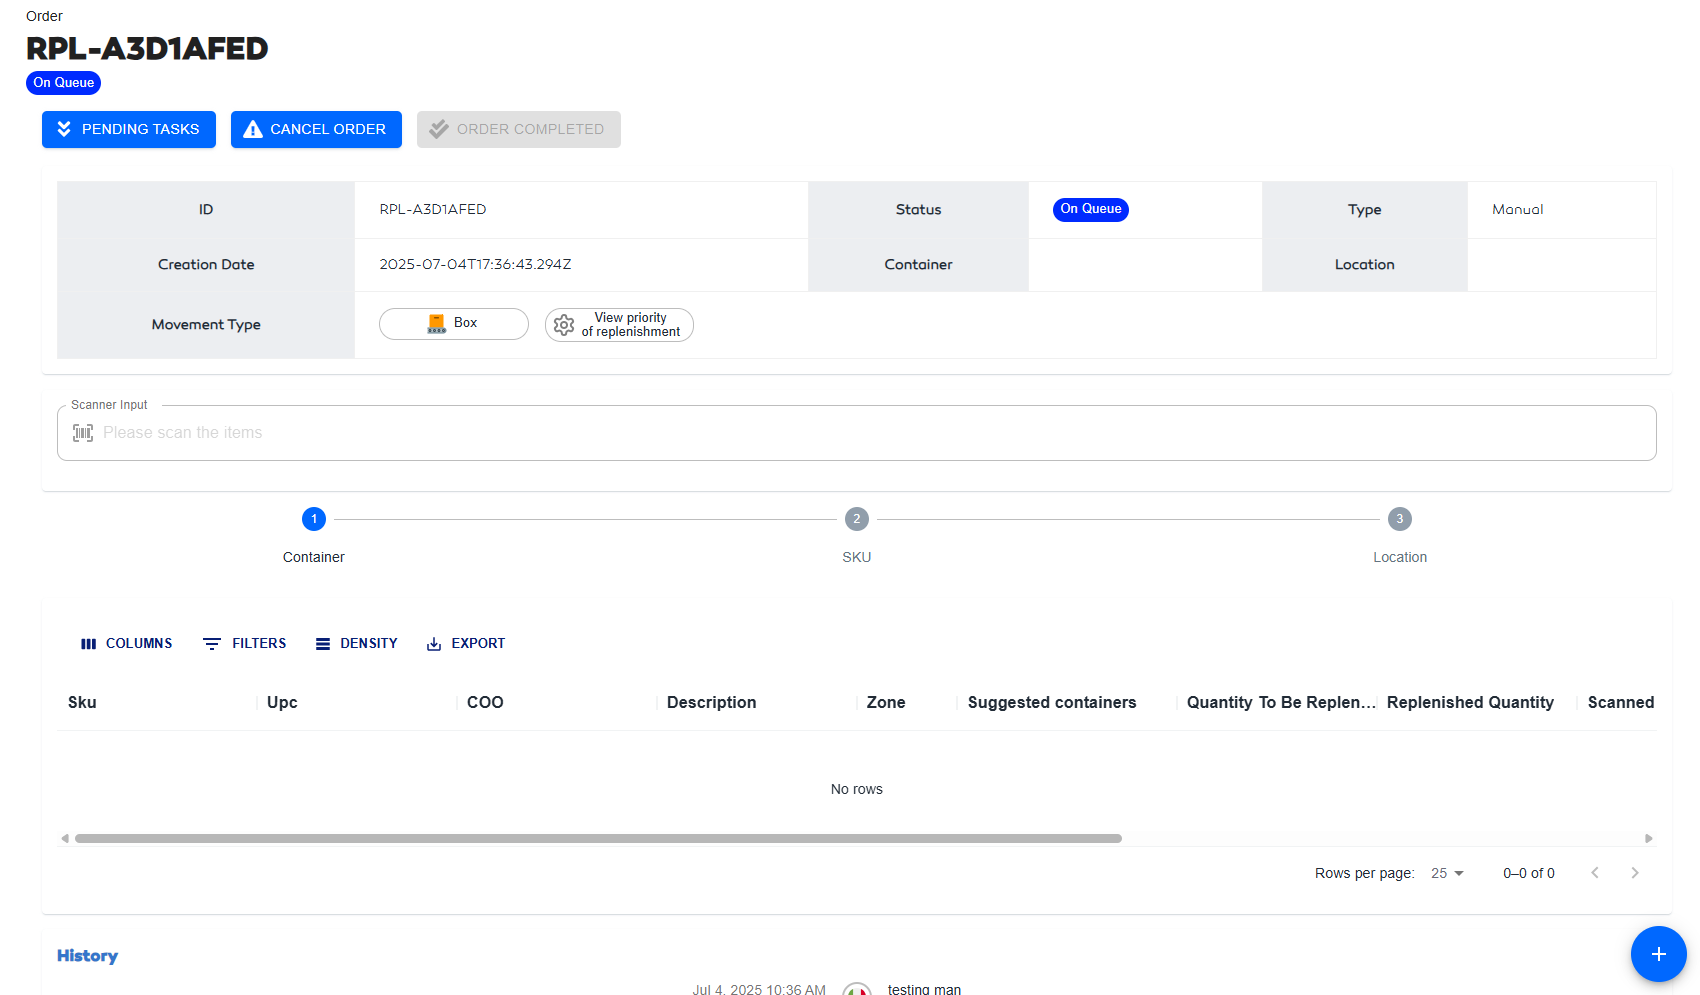
Then the order processing page will open.
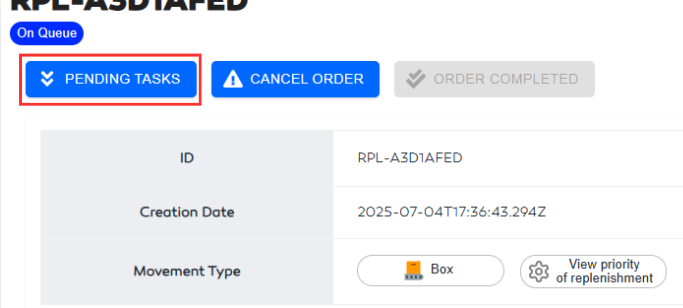
First, you need to create a pending task to indicate the item to be moved. Click on Pending tasks, located in the top-left corner as the first button.
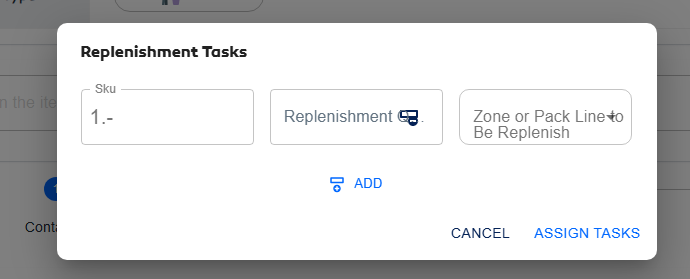
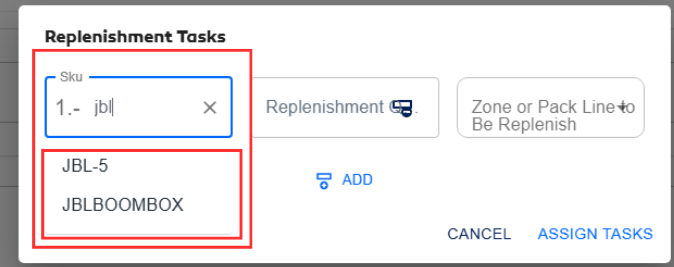
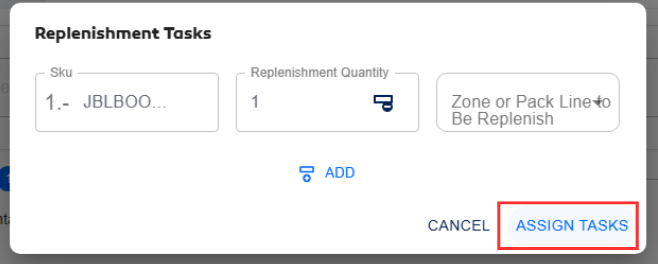
Upon clicking, a form will appear where you will specify the item to move, the quantity, and the zone. The zone where the item is located should only be entered if explicitly requested; otherwise, it can be left blank.
When entering the SKU of the item, make sure to select the SKU from the results list; otherwise, the operation cannot be performed.
Once the task is completed, click assign tasks.
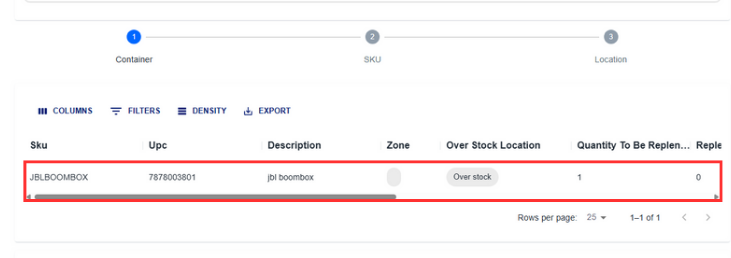
This task will be reflected in the table at the bottom.
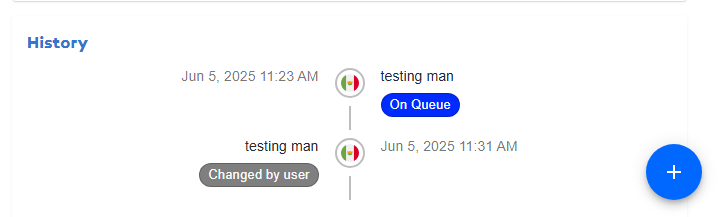
Every time you create or assign a task, this type of movement is reflected in the replenishment order history, which is located at the bottom of the order processing interface.
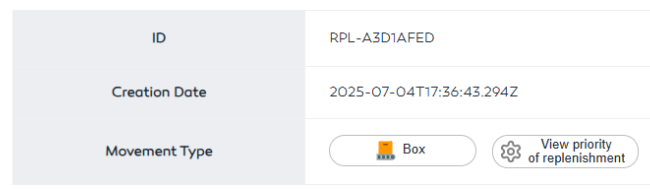
Once this is done, select the movement type, either SKU to register items or Box to move a container. This is done by clicking the button in the Movement Type cell in the table above.
In this case, let's select SKU. If you selected Box, you can skip the step of scanning replenishment items by SKU. The first step is to scan the PPL or Container where the items needed for replenishment are located. Upon doing this, it will be reflected in the progress bar with a filled circle and a checkmark.
A success message will also appear at the top of the screen.
Next, scan the QR codes of the items that will be moved from the location. If you have 4 items to move, you must scan all 4 items. Once scanned, the progress will be noted when the table record turns green. Ensure that the same number of items to be moved as described in the order have been scanned. This can be checked in the Quantity to be replenished and Scanned Quantity columns.
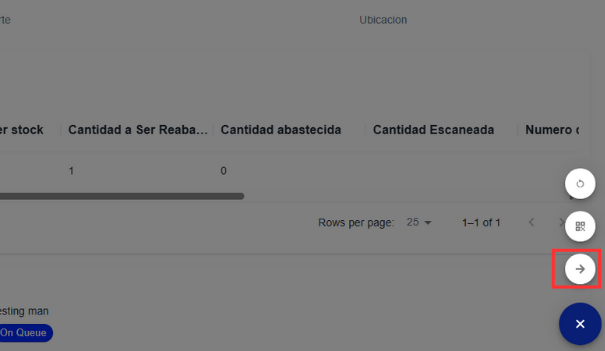
Once all items have been scanned, click the menu in the bottom-right corner of the screen, which is a blue circle. This blue circle has 3 options, the last of which is an arrow labeled Next—click this to proceed to the next step.
Once this is done, the progress will be reflected in the progress bar, indicating that the items have been scanned and proceeding to the next step of item location.
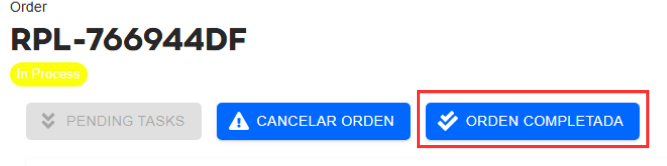
Now scan the location of the items to complete this step. A successful order notification will appear at the top of the screen. To complete a replenishment order, click the order completed button.
Upon doing this, the order status changes to Completed, making the order unmodifiable.
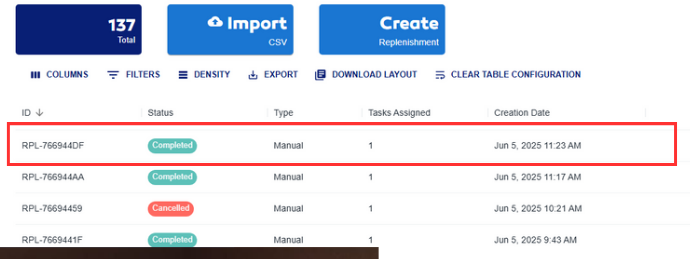
This status is also reflected in the replenishment orders table.
|





Process Replenishment Order with COO
COO configuration was recently added. If you're looking for a configuration with COO, go to Customer Settings.
To use replenishment with COO, you need to understand how COO impacts replenishment.
COO in replenishment adds the following:
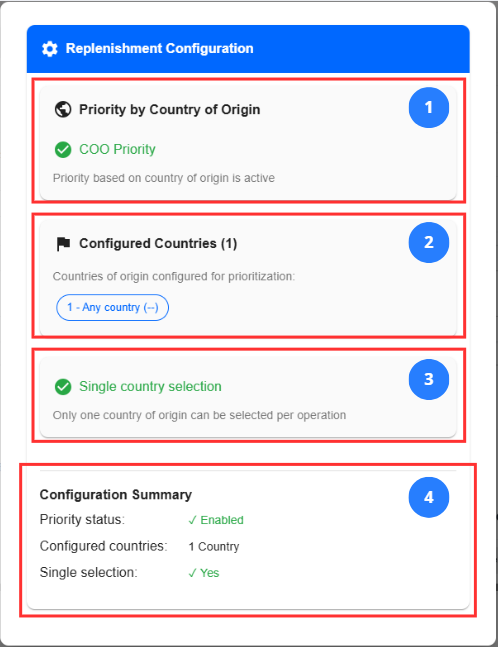
| No | Name | Description |
|---|---|---|
| 1 | Origin priority by country | This box indicates whether COO priority is enabled for the company and therefore affects all replenishment and other dependent processes. |
| 2 | Configured countries | If COO is enabled, there is a list of countries in order of priority, numbered from 1 to n, with 1 being the highest priority. This means items with COO in position 1 will be used first. |
| 3 | Single country per operation | If this configuration is enabled, it means only one COO will be handled per replenishment order, meaning only one COO will be present in pick locations at a time. |
| 4 | Configuration summary | This shows a simplified view of all the configurations mentioned above. |
Example
Eg. Rumble Inc. requires prioritizing CN - China: The replenishment process must prioritize restocking tasks by country of origin, and this functionality must be configured.
Restocking will only apply if materials from China are depleted; then, picking locations can be restocked with materials from Thailand.
To add items of a different COO to a picking location, you must follow the COO Change rules. The most common one is: the location must be completely empty to make the change.
For more information about these rules, Link pending.
When scanning items for replenishment, the new COO rules must be considered.
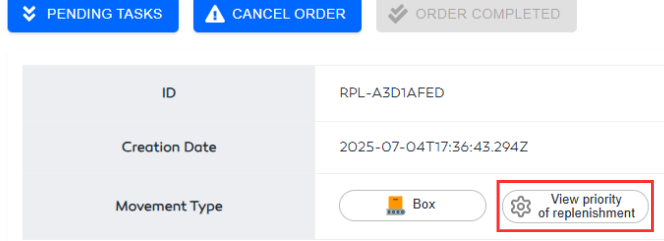
These configurations can be viewed when performing replenishment by clicking the following button.
| Steps |
|---|
The first step is to double-click a newly created replenishment order with a status of OnQueue.
Then the order processing page will open.
First, create a pending task to indicate the item to be moved. Click on Pending tasks, located in the top-left corner as the first button.
Upon clicking, a form will appear where you will specify the item to move, the quantity, and the zone. The zone should only be entered if explicitly requested.
When entering the SKU, ensure you select it from the results list; otherwise, the operation cannot be performed.
Once the task is completed, click assign tasks.
This task will be reflected in the table at the bottom.
Each task creation or assignment is reflected in the order history at the bottom of the interface.
Next, select the movement type (SKU for items or Box for containers) by clicking the button in the Movement Type cell.
Let's select SKU (if you select Box, skip the item scanning step). First, scan the PPL or Container holding the items. This will be reflected in the progress bar.
A success message will appear.
Then, scan the QR codes of the items to be moved. Ensure the Scanned Quantity matches the Quantity to be replenished.
Click the blue circle menu in the bottom-right corner and select Next.
The progress bar will update, showing the next step: location scanning.
Scan the location to complete this step. A success message will appear. Finally, click order completed to finish.
The status will change to Completed, making the order unmodifiable.
This status is also reflected in the orders table.
|
Cancel Replenishment
| Steps |
|---|
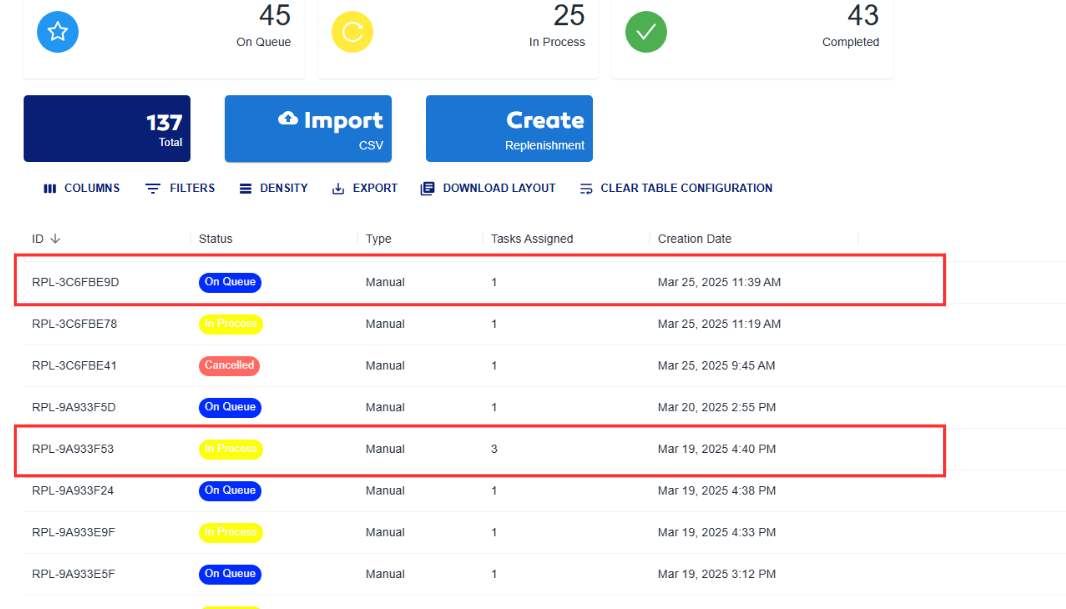
First, select a replenishment order whose status is neither Cancelled nor Completed (i.e., orders with OnQueue or InProgress status). Enter the order processing section by double-clicking.
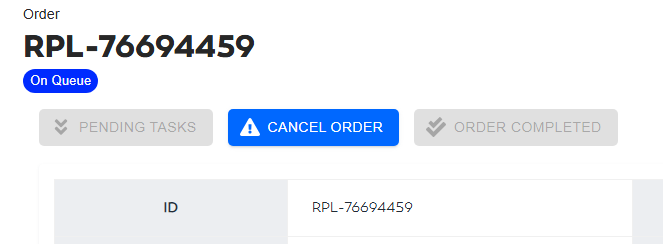
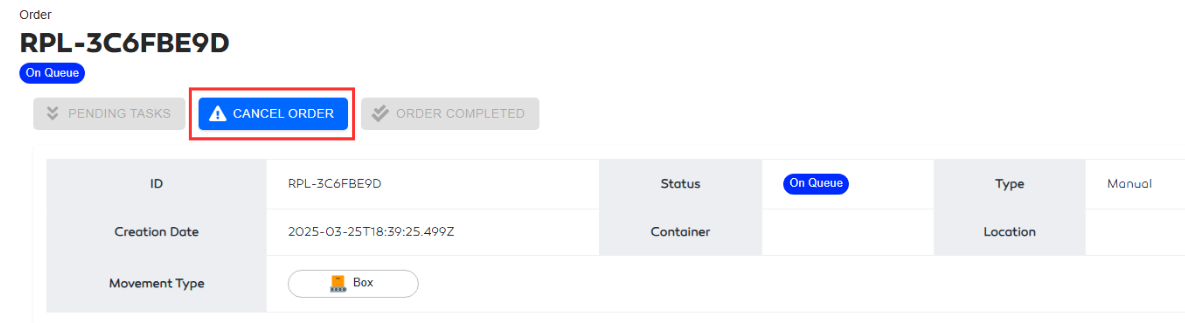
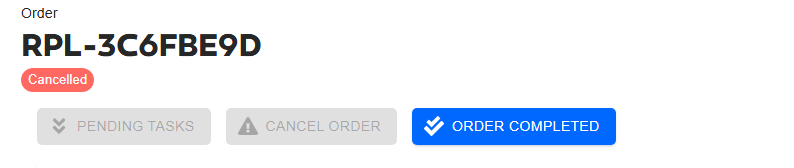
Inside this section, you will see the Cancel order button in the top-left corner. Click this button if you are sure you want to cancel the order, as it will be cancelled immediately.
The order status will immediately change to Cancelled.
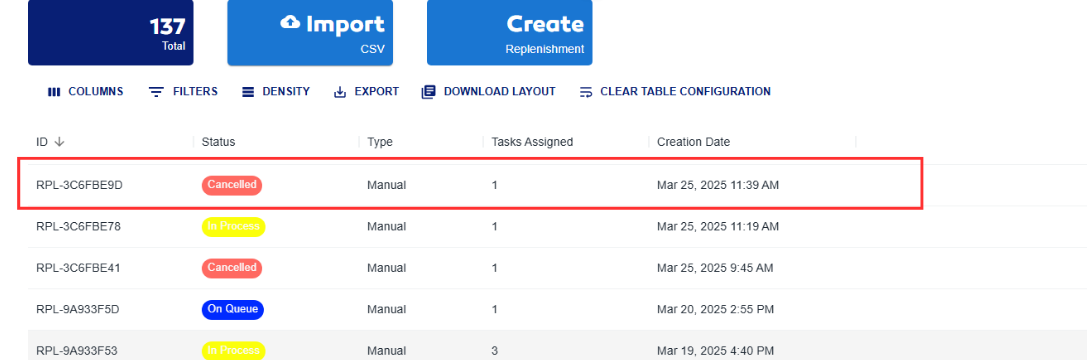
This will also be reflected in the replenishment orders table.
|
Tips and Tricks for This Module
If this happens, try reloading the page by pressing F5 or the reload button in your browser.
If the problem persists, reload using the key combination CTRL + R. This will reset the site's cache. Warning: if you have unsent form data, it may be lost.
Frequent Issues
Items to Move Are Not Detected
When this happens, it is usually because the module flow was not followed: Assign the replenishment type (SKU or BOX) via the button in the Movement Type cell in the order processing table. To switch between SKU and Box, simply click the button.
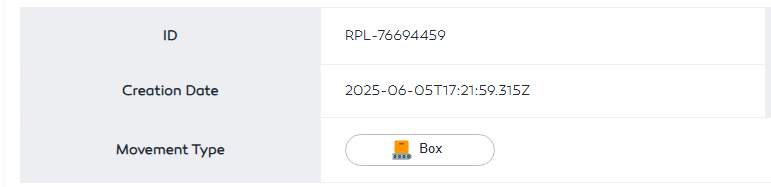
Box is used if you want to move containers to that location.
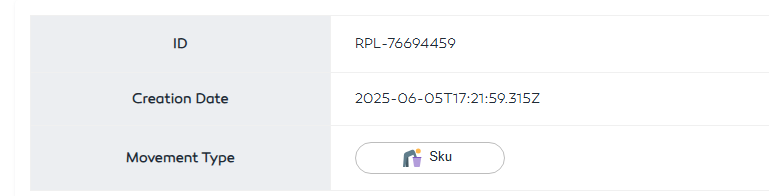
SKU is used if you want to move items directly to the location.
An Item Is Not Detected When Scanned
This may happen for the following reasons:
- You have not scanned the source container as the first step.
- You are entering an incorrect SKU or item code. Please verify the number is correct.
- The item you are entering already has full stock or no longer exists.
Frequently Asked Questions
Can I Delete Replenishment Orders from the Orders Table?
No, orders cannot be deleted, but they can be cancelled. To cancel an order, enter the order and click the Cancel order button in the top-left corner.
How Can I Cancel a Replenishment Order?
To cancel an order, enter the order and click the Cancel order button in the top-left corner.